I have always enjoyed using Microsoft Outlook for the desktop but every now and then I will jump to the online version just to check out the new features released.
In this blog, I’m going to show you how to quickly react to emails, use prediction text, and pin important emails.
Reactions
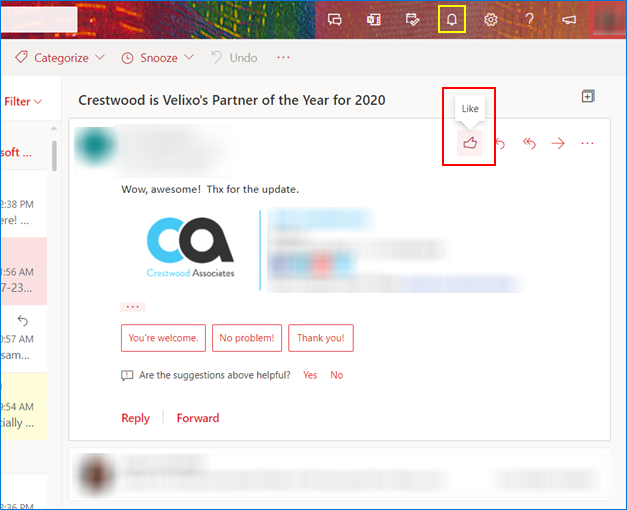
Currently, Microsoft Outlook online has given us the “Like” button but rolling out in March, users will be able to react to email messages with love, laughter, celebration, surprise, and sadness. When you apply a reaction to an email message, the reaction will be visible on the existing bell icon in the reading pane for users within the same tenant on supported Outlook apps.

Apply reactions in Outlook on the web.

Email message detailing which sent messages received a reaction.

Remember, this only works from within your tenant and system requirements may vary.
Text Predictions
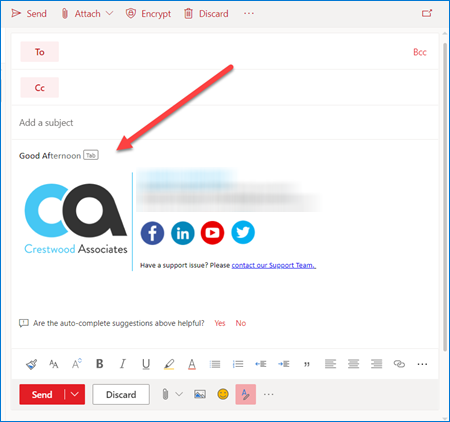
The next cool feature I found in Outlook is Text Predictions. Text predictions can help users write more efficiently by predicting text quickly and accurately. The feature reduces spelling and grammar errors and learns over time to give the best recommendations based on your writing style.
How to get started? Simply open a new email message and start typing, predictions will then start to appear. You can simply click on the TAB key accept the prediction or the ESC key to reject it. It is that simple.

Note: Text predictions are turned on by default; users can disable them in the Mail options for Outlook. Eventually, Microsoft text predictions will support additional languages, which will not require an update to the application or settings.

Pin Important Emails
Another cool feature I wish the desktop version had is the Pin feature. As with any push pin, the digital push pin does the same thing: it places your important messages to the top of your list for easier and faster access. It is a feature Microsoft said users like you and I have been longing for (yes, I have) and they finally granted our wish.
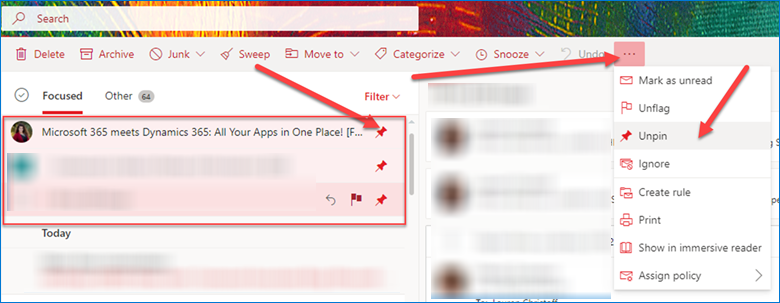
In your Outlook for Web inbox, select the email you would like pinned to the top, click on the Push Pin icon and you are done. Click it a second time to remove the pin.
Click on the ellipsis (3 dots) to bring up the Pin/Unpin options in the menu tab.

I hope you find these new features and quick tips helpful, for more tips and tricks for Microsoft office visit and subscribe to our blog.
