Have you ever found yourself scrolling through hundreds of pages searching for specific information? Keyword searches are time consuming and do not necessarily locate what you need. So, how do you manage to find that info? The answer, you build a Table of Contents (TOC).
In my previous blog, I talked about adding Styles to headings to bring a little pizazz to your documents. In this blog, I will show you how by using Styles, to quickly insert of TOC in your documents. Additionally, you can easily update your TOC when you modify your document.
What is a Table of Contents?
A Table of Contents serves two purposes: It gives the reader an overview of the document’s contents and it allows the reader to go directly to a specific section of an online document.
What do you need to build a Table of Contents?
When building a TOC it is important to have your document formatted to include these two components:
- Headers and Footers (see: Make or Break Your Headers & Footers in Microsoft Word)
- Styles (see: Give Your Documents a Little Pizazz with Styles in Microsoft Word)
Note: Headers/footers and styles need to be formatted consistently throughout your document for a TOC to function.
To get started:
Your document is already formatted with headers and footers in place along with page numbers. You also have your sections formatted with Styles, what do you do next?
First, place your cursor where you want your TOC to be displayed. Then on your Menu Ribbon click the References tab and then go to the TOC option. A drop-down menu will appear with some built-in options. Click the option you would like to use for your document.
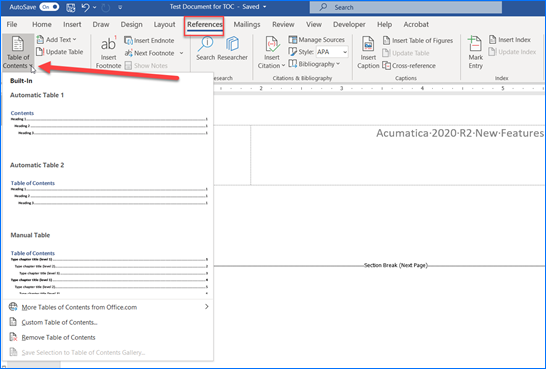
In the sample below, I selected Automatic Table 1.
Once you select the format of your TOC, a small menu bar will appear above the table with 3 tools:
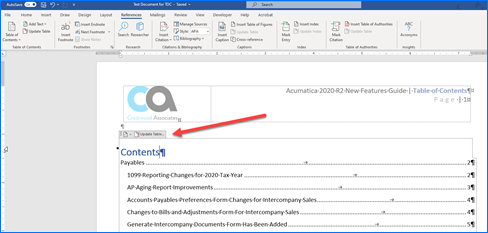
- The ellipsis (…): When clicked, this tool selects the entire contents of the table.
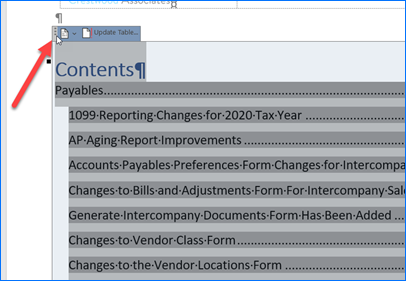
- Page Icon with wording: When clicked, allows you to change or remove current TOC.
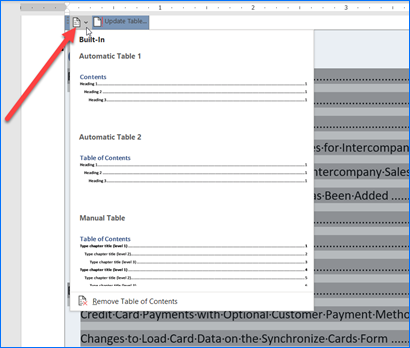
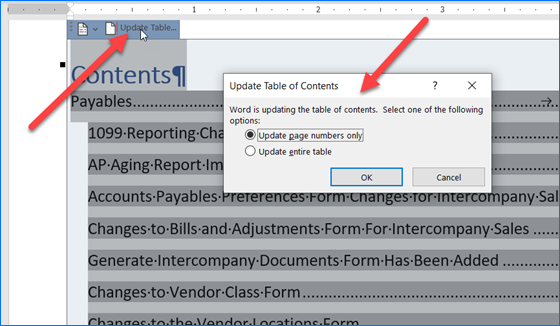
- Update Table: If you make any changes to your document, such as removing a page, or relocating a section. You MUST CLICK Update Table every time otherwise your Table of Contents will be inaccurately displayed. Simply click Update page numbers only or Update Entire Table. I personally prefer to Update the entire table each time so that there are no mistakes.
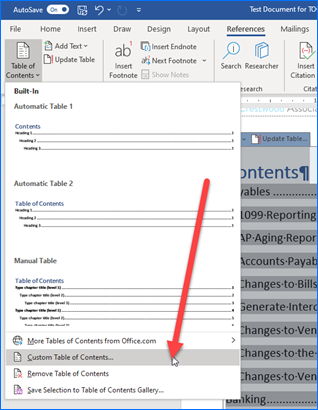
Lastly, if you do not like the way your TOC is displayed you can customize it to your preferences by clicking on the Table of Contents Menu from the ribbon and select Custom Table of Contents. I usually only like two levels in my TOC, not three, so I modify the TOC to remove it.
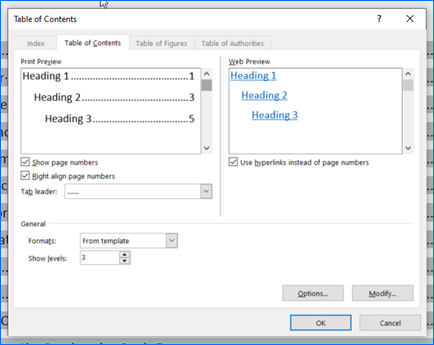
Here you can do several things:
- Select or Deselect to Show Page Numbers on your TOC.
- Right Align page numbers.
- Select a previously designed template.
- Change the number of levels shown.
- Select to use hyperlinks instead of page numbers.
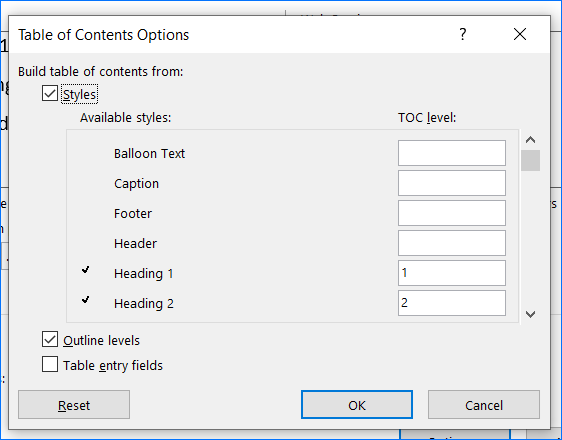
- Click Options… to change how your TOC reads your document to create the TOC. Can be completed by Selecting Styles, Outline Levels or Table Entry Fields.
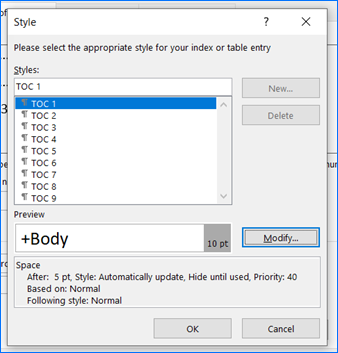
- Click Modify… to change style type or add a new style or delete an old one.
Once you have made your custom changes, press OK. You are then good to go. Remember, any changes you make to the content of your document, you must go back to the Update Table toolbar and update entire table or page numbers.
I hope this tip helps you in making your documents easier for the reader to find things. For more tips and tricks visit and subscribe to our blog.
