
In Microsoft Dynamics 365 Business Central, you can use filters in just about every window to create an ad hoc report that can then be shared amongst roles.
For example, let’s say you want to create a filter to show any customer with a currently due balance that start with the letter A.
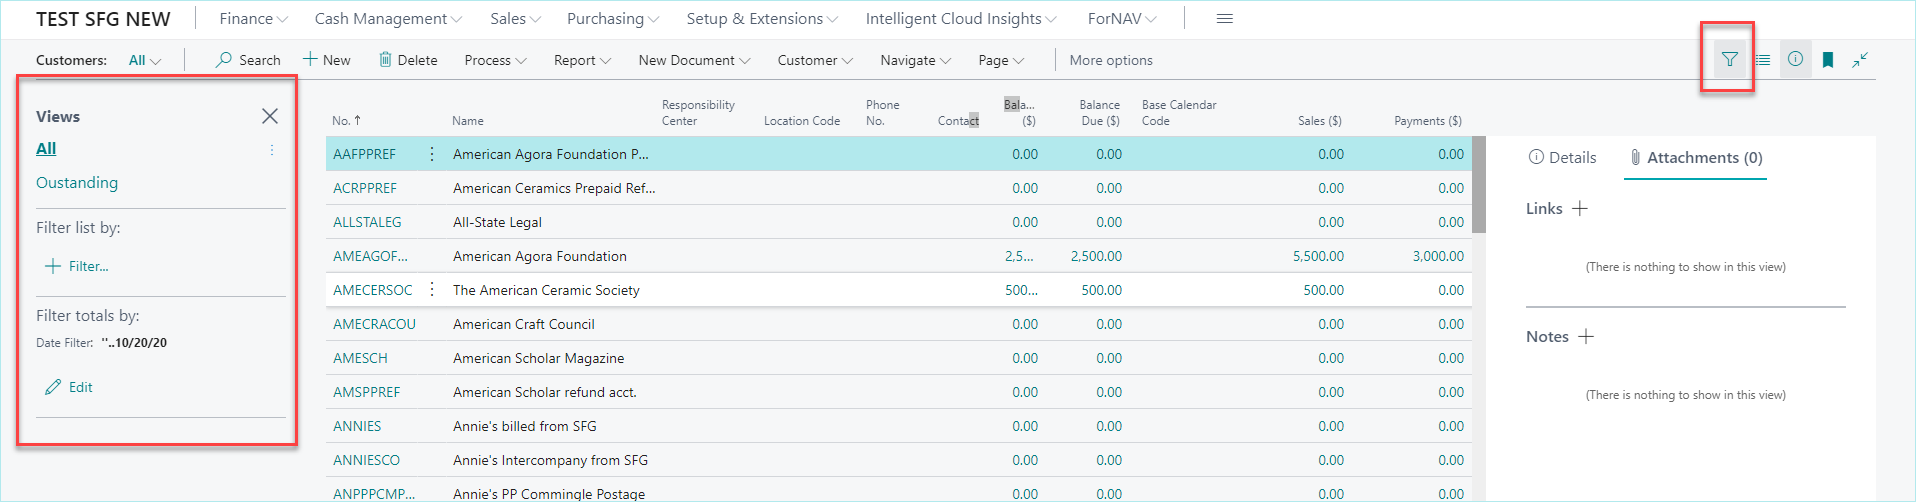
First, navigate to your Customer List. Once there, be sure the filter icon is selected in the top right so that the filter pane is showing on the left. This is also where all of your saved “Filters” or reports will be saved and viewable. Below, I have already created a filter for outstanding invoices, which shows any balance greater than zero for a specific time period.
 Select the Plus Filter button to add, and select from the dropdown which filter you would like to use. You can repeat this step to add as many filters as you would like in a single view.
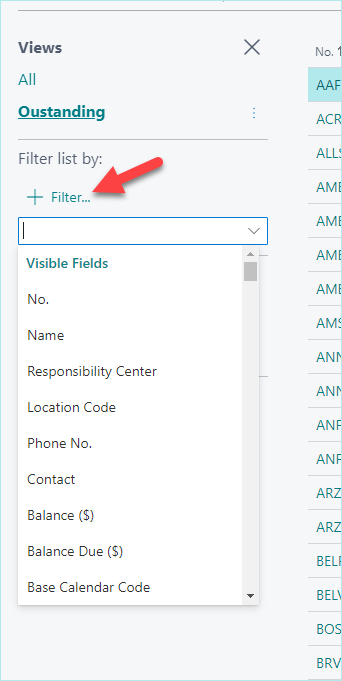
Tip: use an asterisk as a wildcard. In this case, A*, since I want to view every customer that starts with A.
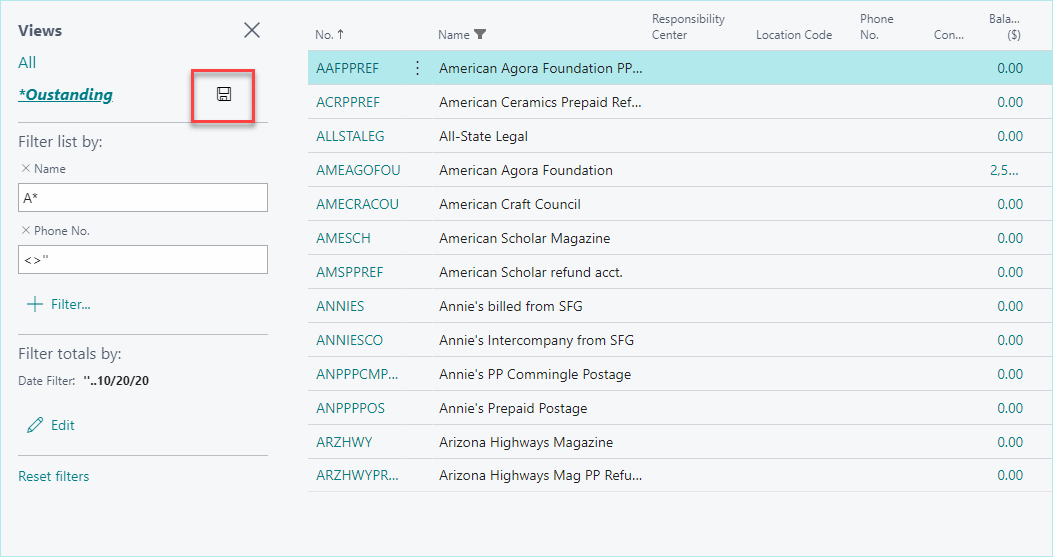
Once you are done adding filters, use the Save icon to save this list as a favorite. Give it a name.
Once saved, this view will be available for future use. You can also customize what columns are visible, which allows additional flexibility for your view, as well as a cleaner presentation (not having to look at the columns you don’t need). To adjust your column selection, navigate to:
Settings cog (top right) à Personalize à Add Field and the options will show up on the right:
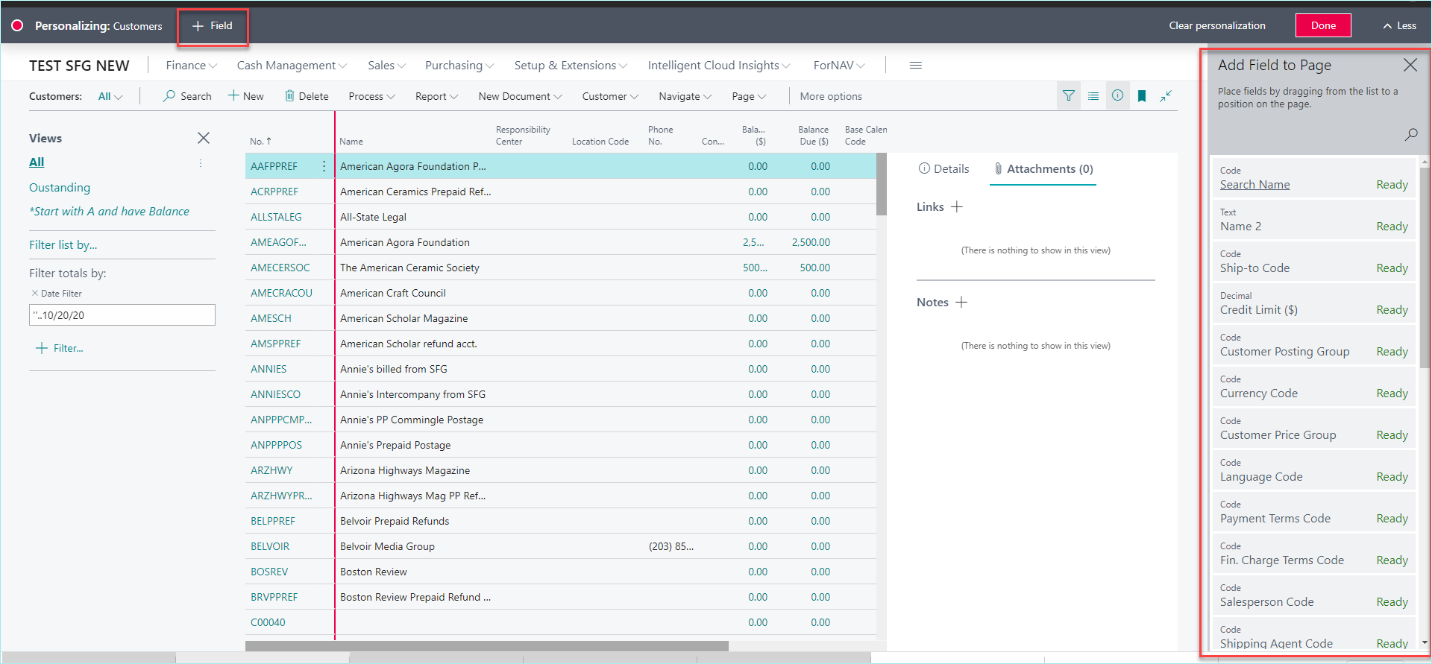
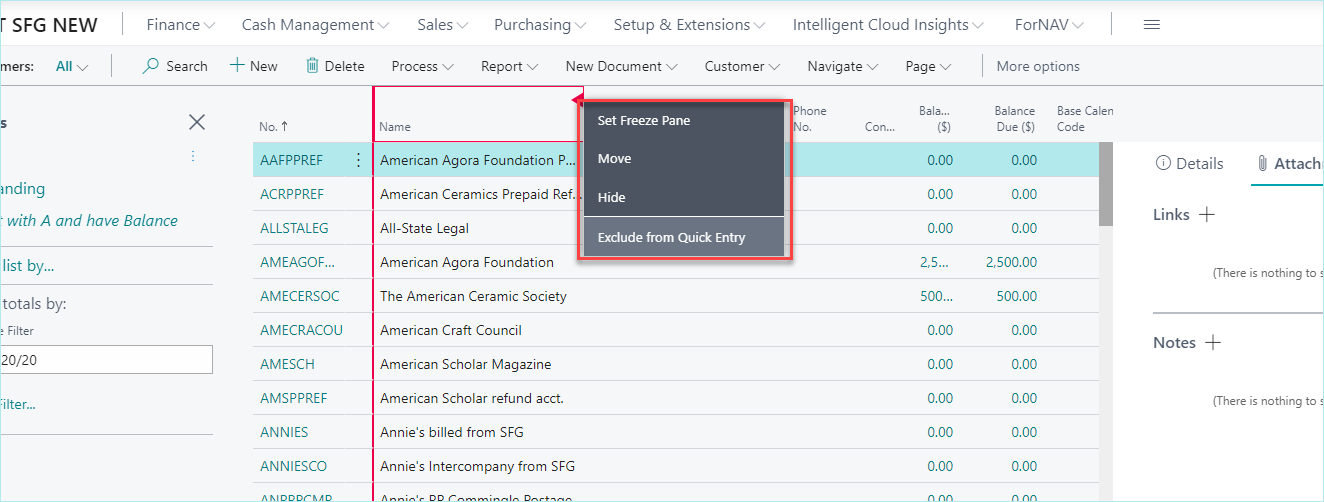
Select the field you would like to add, then drag and drop it into the screen. If you would like to then remove the columns you do not need to see, rearrange the order of the columns, or set one of the columns to freeze so that you always see it when scrolling, click on the red arrow that appears when you hover over the column you want to change and make your selection.
When complete just hit “Done” to close the Personalize function and your view is officially saved! You can always continue to tweak this to make it just right for your daily duties. As always, reach out to us with any questions. For more tips, subscribe to our blog.