Staring at PowerPoint slides during your company meeting whether working remote or at the office can be a bit, here it is I’m going to say it… BOOORRRRRIIINNNING!
Let’s be honest, company meetings with zero interaction with team members is no fun. After the first 15 minutes of just listening to the presenter, interest is lost. What can we do to turn boring meetings into lively sessions where everyone can join in and interact on the call?
Browsing around Microsoft’s website, I found a tool called Whiteboard, and what I found out, is simply amazing. Just like what you would see in the front of a conference room, this Whiteboard is a virtual canvas that allows you to add text, graphics, and so much more. It’s been around for a while, but recently they took it a step further and integrated it with Teams, do you know what that means? Yes, I found the answer of livening up your Teams meetings.
Getting Started
In order for us to get started in learning how Whiteboard works with Teams, we need to get you set up. This is where it gets tricky.
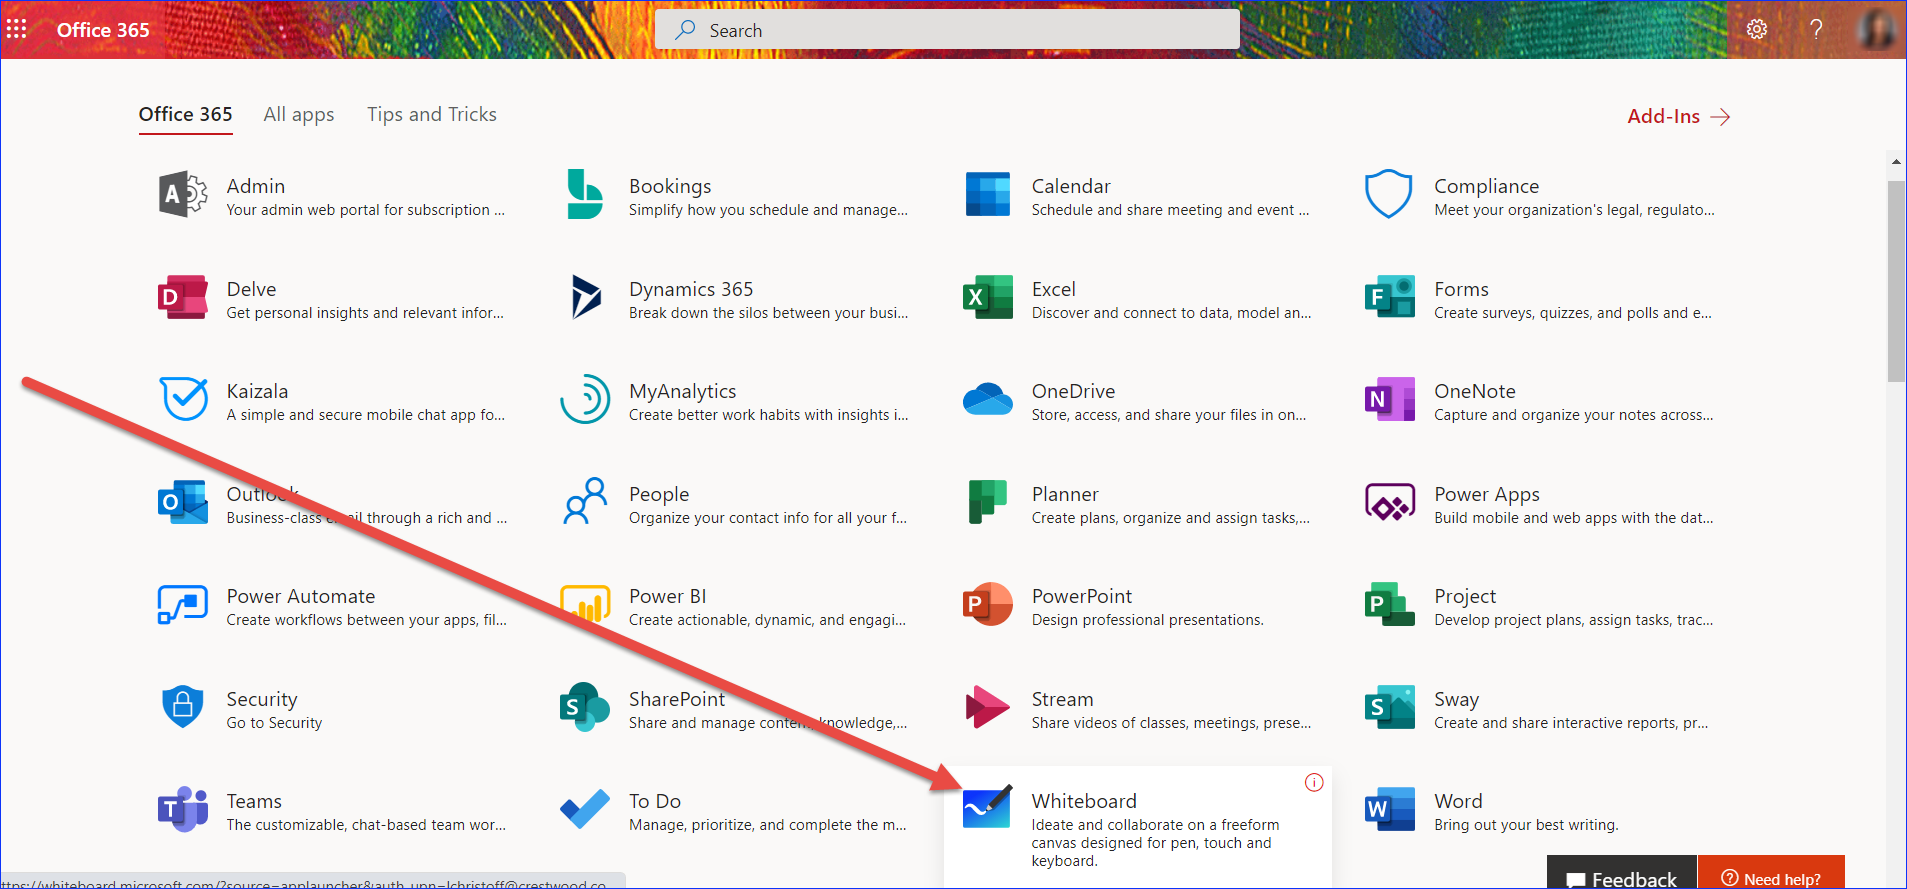
If you want to simply play around with Whiteboard and use it for your own use, you can do so by going to your online office account and select Whiteboard from the apps listing.
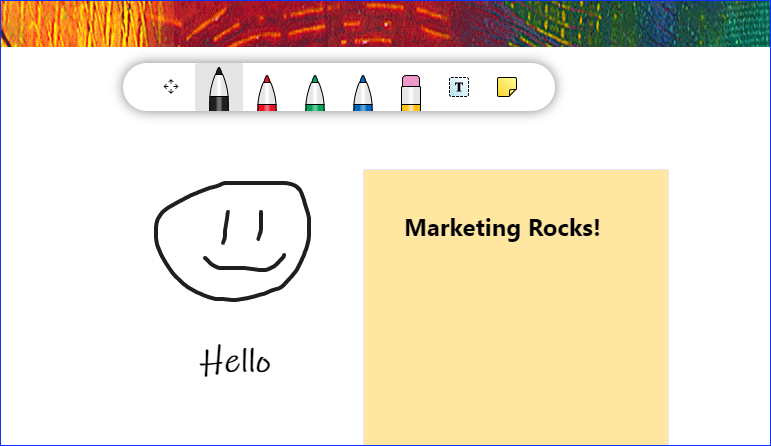
Here you can draw images, add text, add a sticky note or erase. The browser version gives you basic tools. But, if you download the App to your desktop, you’ll see a broader set of tools. We’ll get to that later.
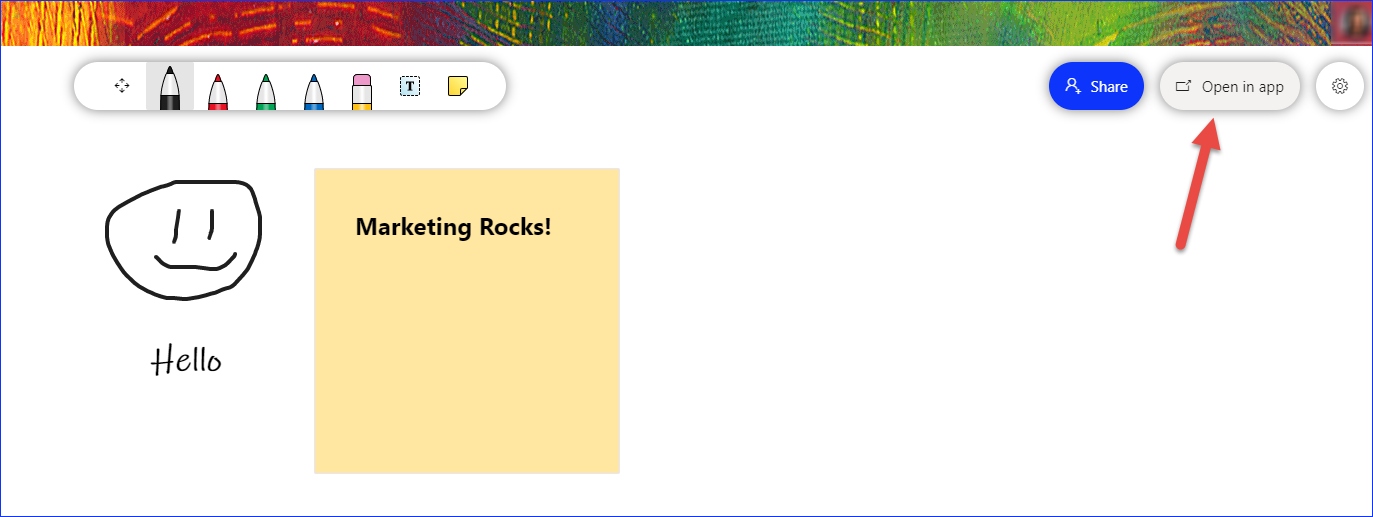
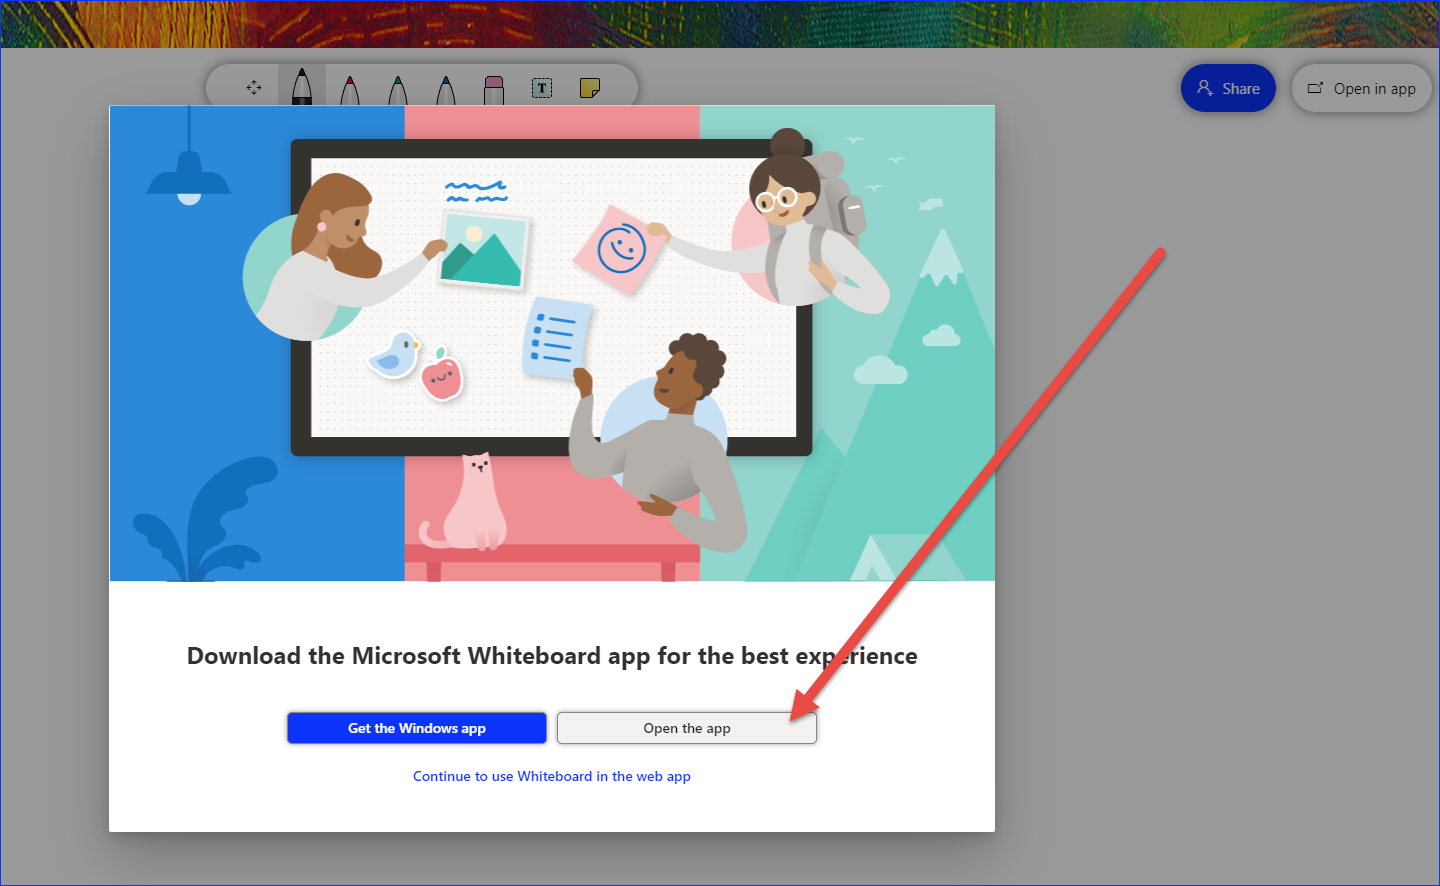
To get started with Whiteboard in Teams, everyone on your team or who will be on the call will need to download the Whiteboard App to their computer. To do that, click on the Open in app button at the top right-hand corner of your Whiteboard screen.
Note: You may want to send an email out to your team prior to the meeting with instructions on how to download the Whiteboard app, that way there is no delay in the meeting with setup issues.
An image will pop up on the screen, click Open the app. Next you will be sent to the Microsoft Store where you will need to enter your credentials to proceed to download and install. After installation, you’re ready to go.
Note: Whiteboard may not be enabled in your package, so you may need your account administrator to enable whiteboard for all within your organization.
Once download and installation is complete, you may proceed to open the Whiteboard app on your computer. It is pretty similar to the browser version but has a unique set of tools which sets it apart from the online version.
Before we proceed to a Teams meeting there are a few stipulations utilizing the whiteboard within a meeting.
- You must have three or more people on the call to access Whiteboard during your meeting. Using whiteboard during one-on-one calls is not available, but Microsoft is working on this feature.
- If you record your Teams meeting the Whiteboard will NOT be included in the recording. There are ways however to save your Whiteboard and share it with the group later.
- Attendees within the same Microsoft 365 tenant can collaborate on a whiteboard. External users are not yet supported.
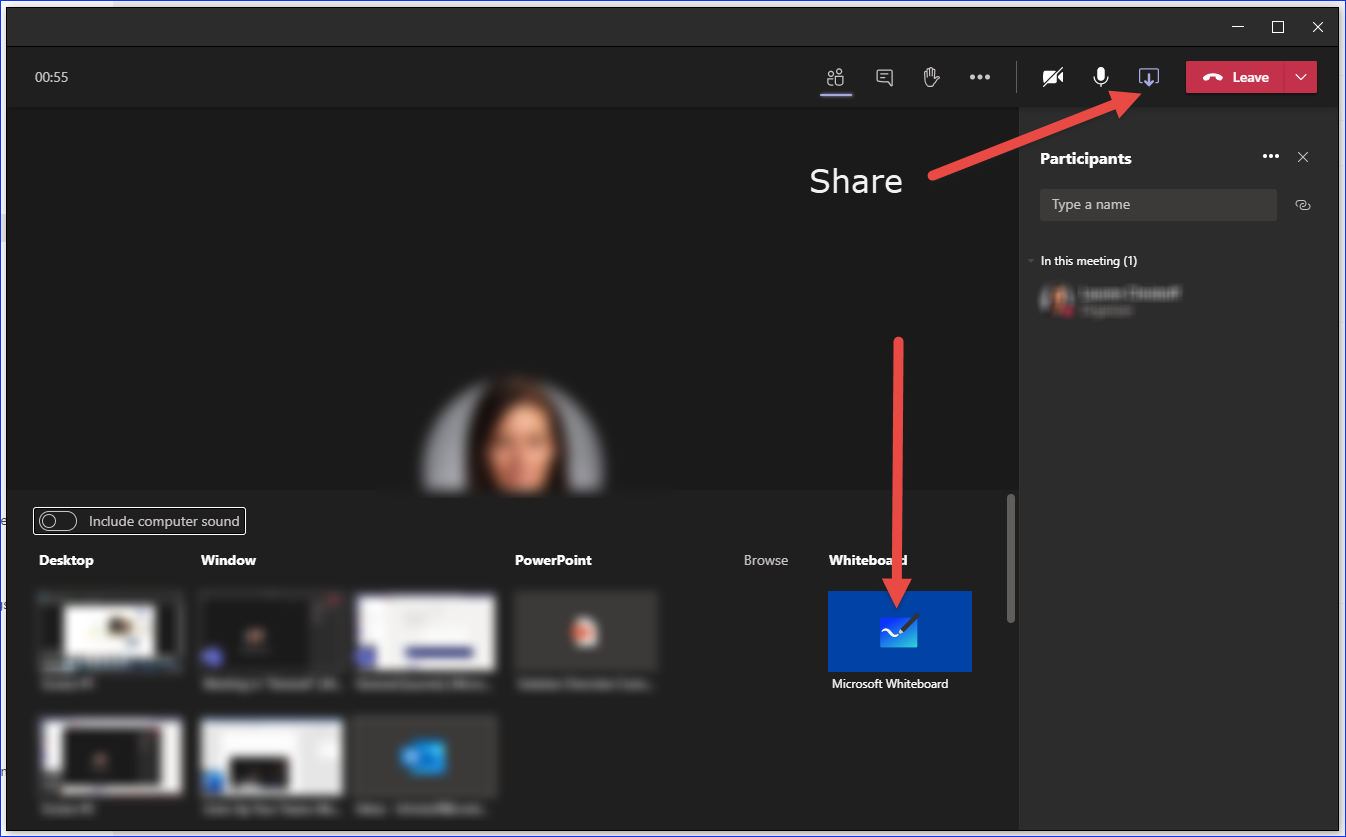
Once you have joined your meeting the next step will be to Share your screen. A share tray will appear at the bottom of the screen, click on Microsoft Whiteboard. From there you will need to follow the steps above to open the Whiteboard App.
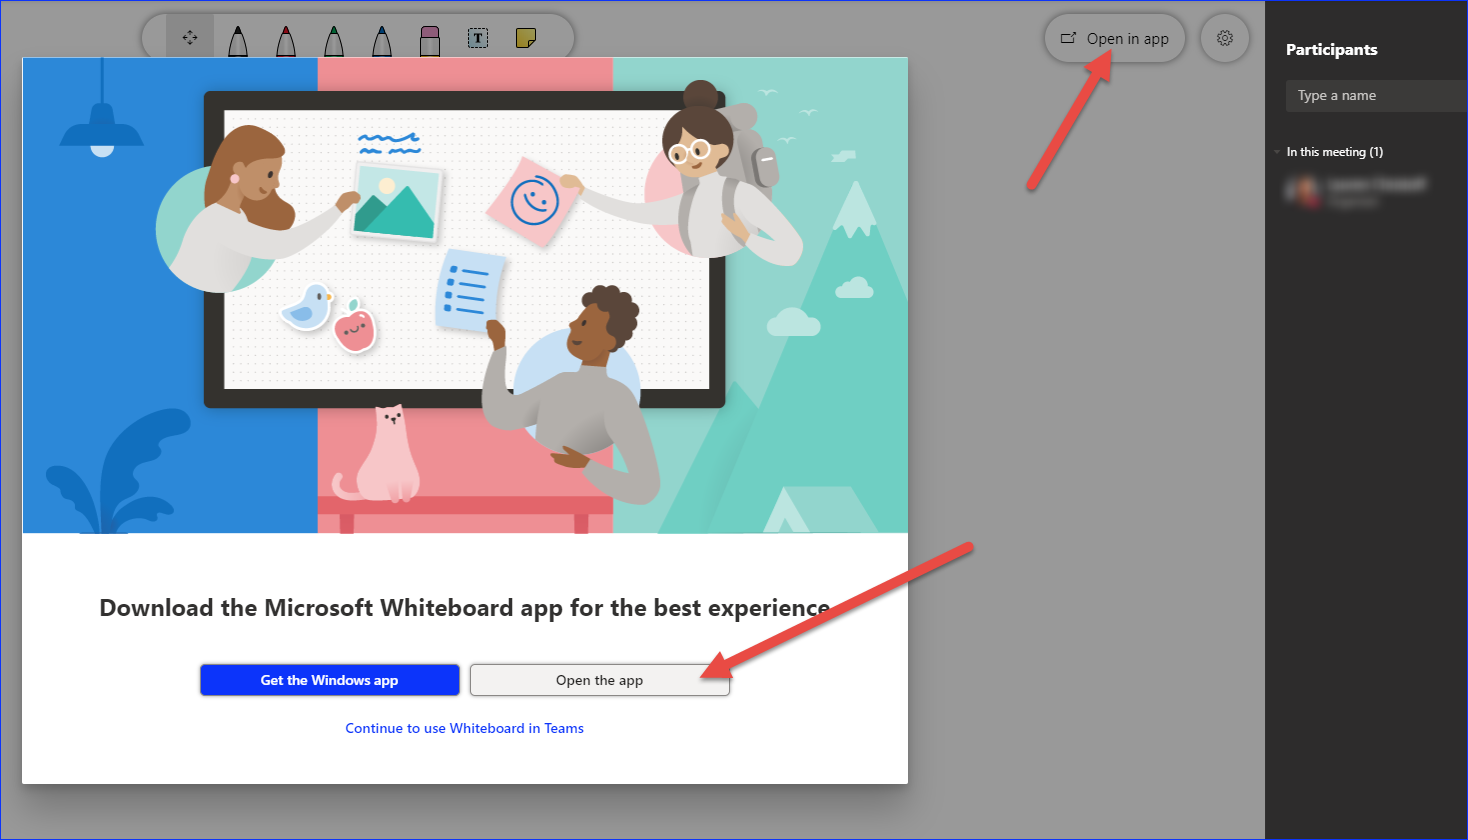
Whiteboard will appear in a new window.
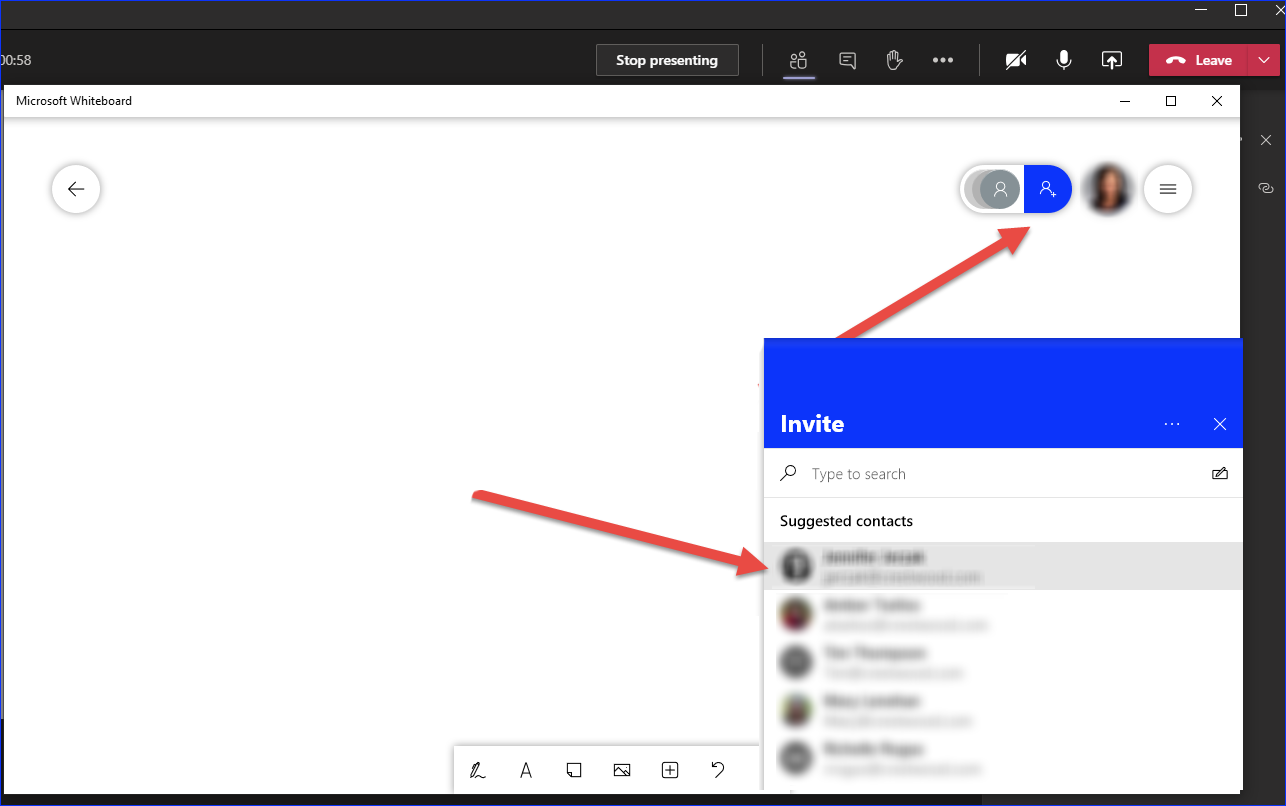
To invite your team to interact with the whiteboard, select the person icon on the top right-hand side of screen, then either type in a name or select members from the list provided.
I tested this out with my team and they absolutely loved it.
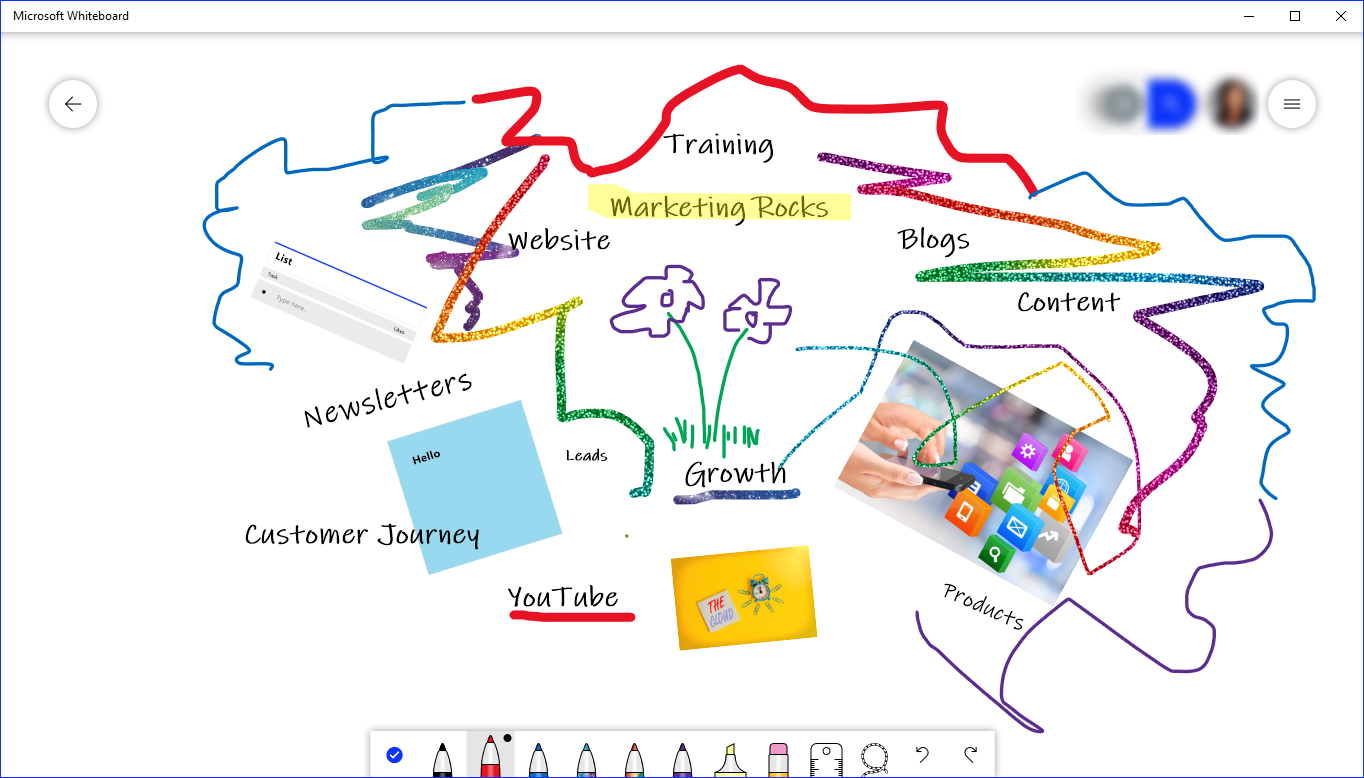
Now that we’ve covered how to set up Microsoft Whiteboard during your Teams meetings, I will walk you through some of the tools to get you started.
Tools for the Whiteboard App
The Whiteboard app is a lot more advanced than the browser version. We’ll start with the Settings menu at the top right-hand side of screen, next to your photo, a dialog box will appear to the right with a variety of settings. You can reposition your tool bar, clear the canvas, export to an image, post to teams and much more.
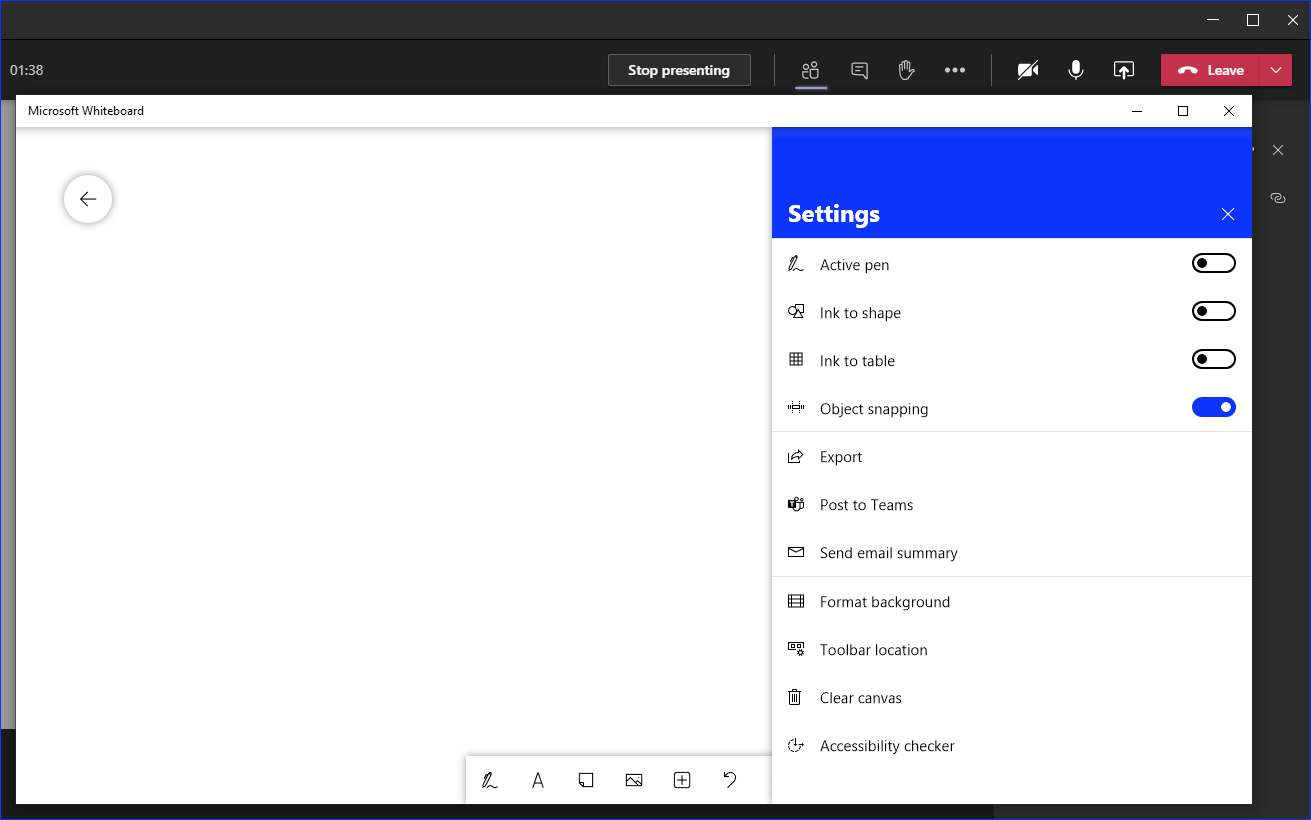
Main Tool bar:
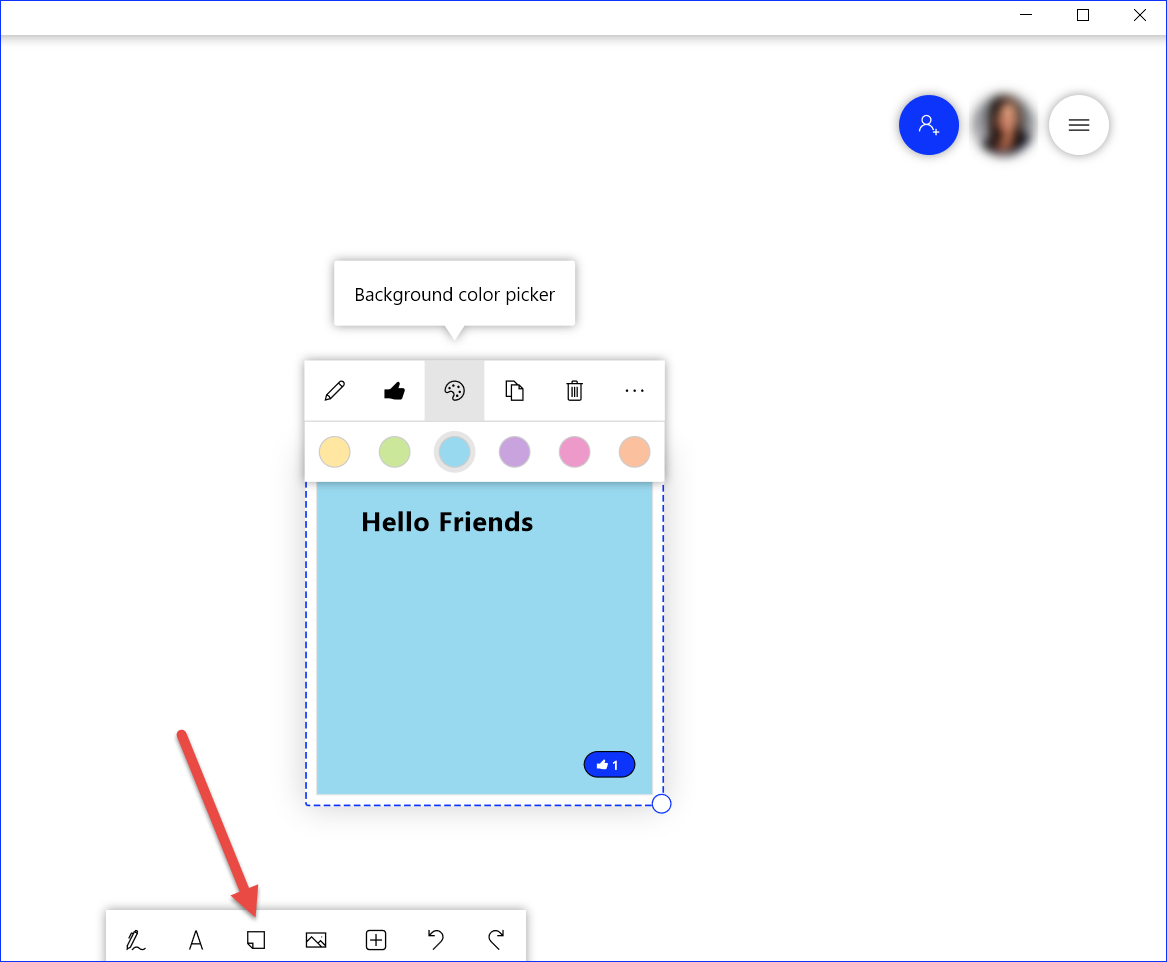
This is your main tool bar. It houses a pen, text tool, sticky note, image, more options, undo and redo.

The Pen Tool:
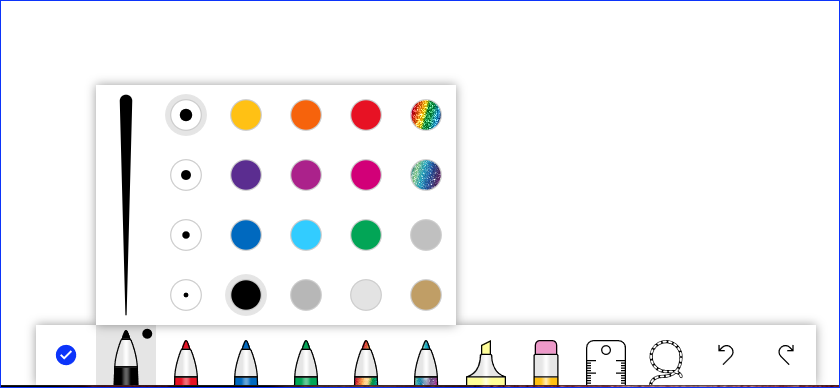
Select the pen or highlighter tool to change the color and size. Use the pencil eraser to remove objects, the ruler to of course measure and the lasso to select images.
Note: After you are done utilizing the pen tool, you will need to click on the blue checkmark on the toolbar to toggel to another tool on the main toolbar to exit the pen options.
The Text Tool:
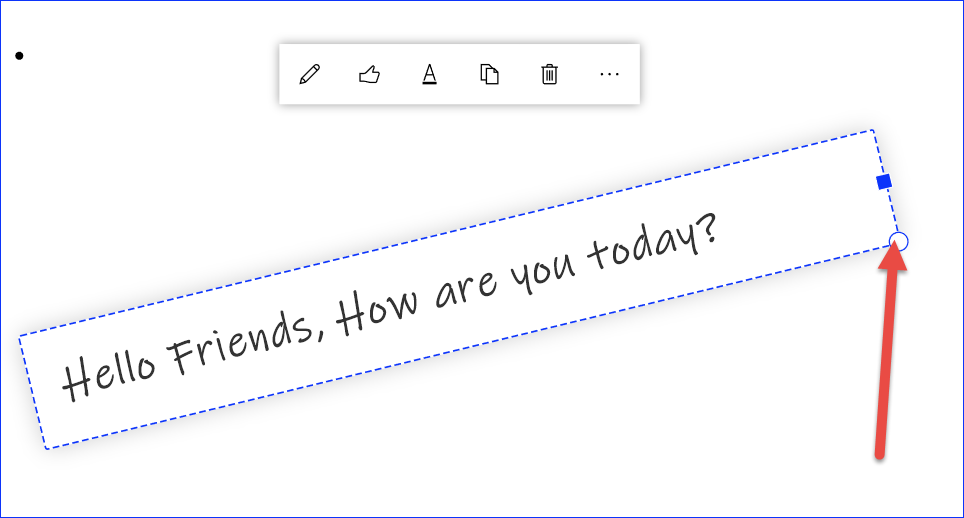
Click on the “A” to add text to your canvas. To edit text, double click on the text object, select text, copy, cut, or paste text, or disregard it all with a click on the garbage can.
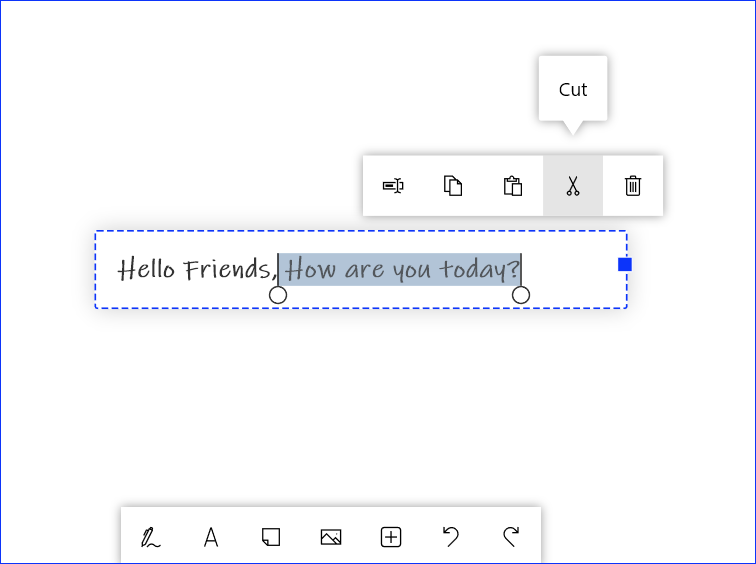
Click and drag the corner of the text object to resize or manuver how ever you want text to be displayed on the board. Select the elipsis to add alt text to your image.
The Sticky Note Tool:
Select the Sticky Note icon to add a note to your canvas. Click anywhere on the note to bring up more menu options such as change the background color.
The Image Tool:
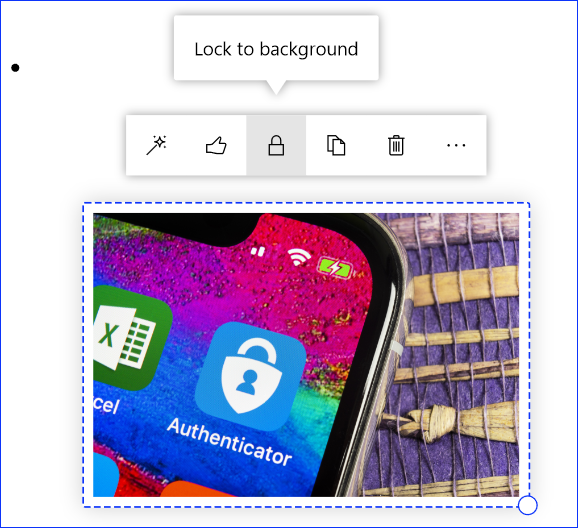
Click on the Image icon in the tool bar to add an image to your canvas.

Lock your image to the background so it doesn’t move when moving other objects.
More Options Tool:
The More Options tool allows you to add note grids, lists, and follow-up lists. You can also add PDF’s, Word, and PowerPoint documents. However, when adding a Word or PowerPoint file, you need to obtain special permission to do so.
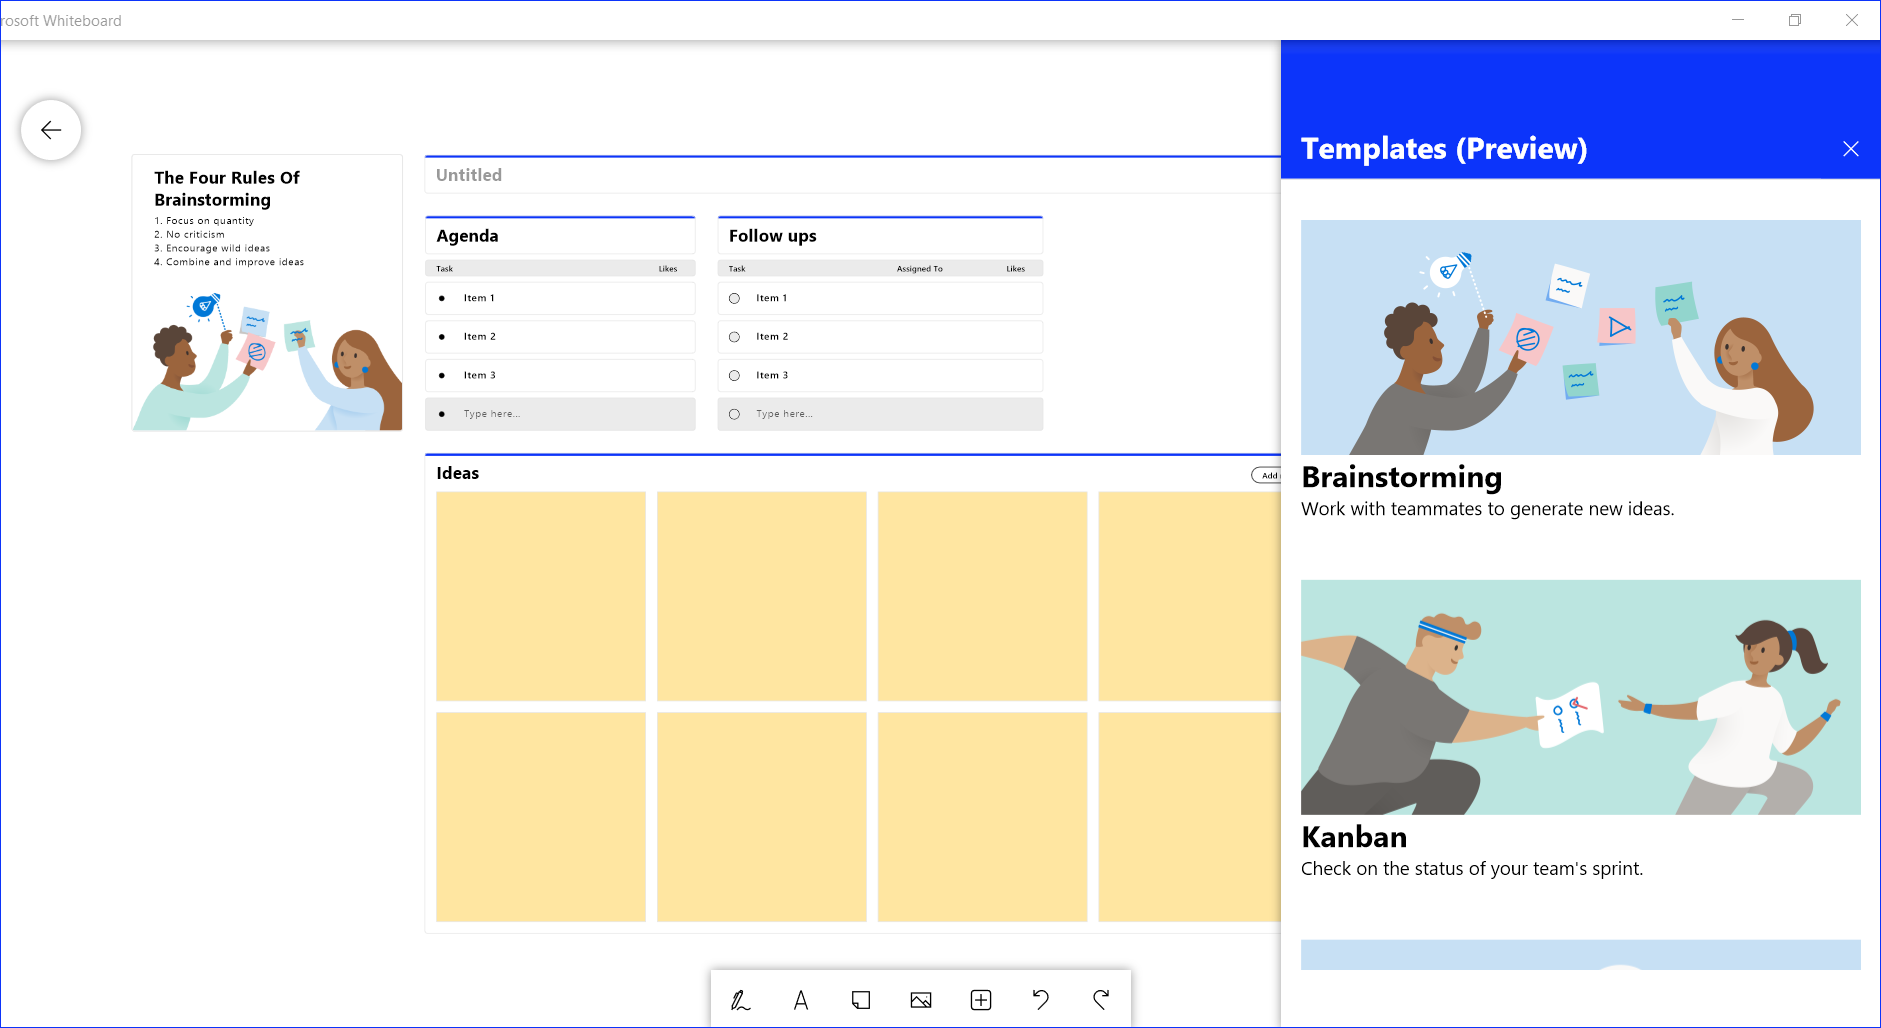
You can also add templates to your canvas to help in brainstorming inititatives.

That concludes how to setup and utilize Whitboards during your Teams meetings. Be sure to play around with the tools and features to get yourself familiariezed prior your meeting. I hope you and your team can use whiteboard to run effective fun meetings where everyone together can brainstorm and think creatively. For more Microsoft Office 365 tips & tricks, be sure to visit our blog and subscribe.
