Business Events are a great way to send notifications to users in Acumatica, when data changes, or events occur. You can now also attach a report to the email notification. The example below is to notify the purchasing manager when a PO is received. It sends an email to this user, and it also attaches a copy of the PO Receipt form for that receipt.
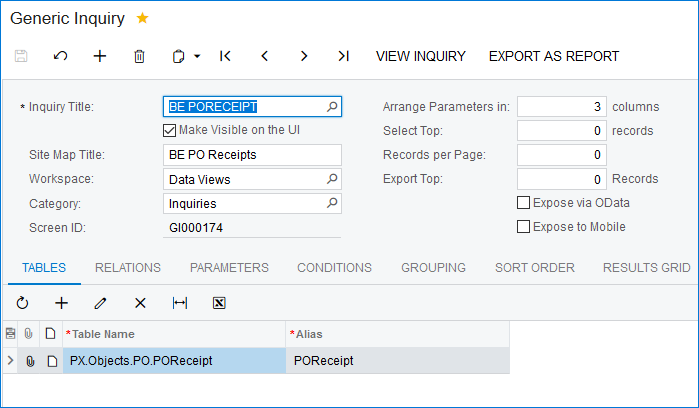
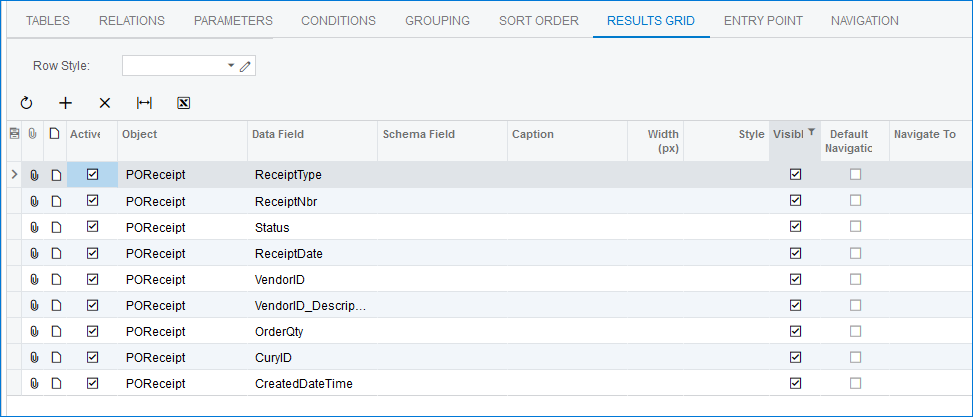
- The first step is to create a Generic Inquiry for this Business Event. It must contain the data for which you are tracking the change. (Acumatica does not recommend using the out of the box GIs for Business Events, but to instead create a new GI specific for this notification). For this example, we will create a Generic Inquiry named BE PO RECEIPT. It will contain all the fields we need for the notification, as well as those important to track the change.


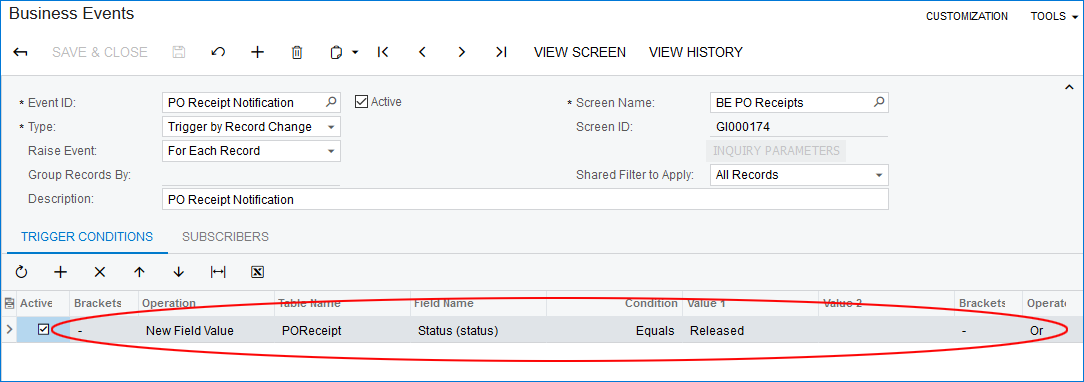
- Next, create the Business Event that will notify the owner of the Purchase Order:

-
- The Type is “Trigger by Recode Change.”
- The Raise Event is “For Each Record.”
- The Screen Name is the GI created in step 1, “BE PO RECEIPTS.”
- The Screen ID is the GI screen ID (will default automatically).
- The Trigger Conditions are defined so if a New Field Value in the Status field of the POReceipt tables changes to “Released.”
- Next click on the Subscribers tab:

-
- The Type is “Email Notification.”
- Then click “CREATE SUBSCRIBER” to create a new Subscriber ID. Here, we named it “PO Receipt Created.”
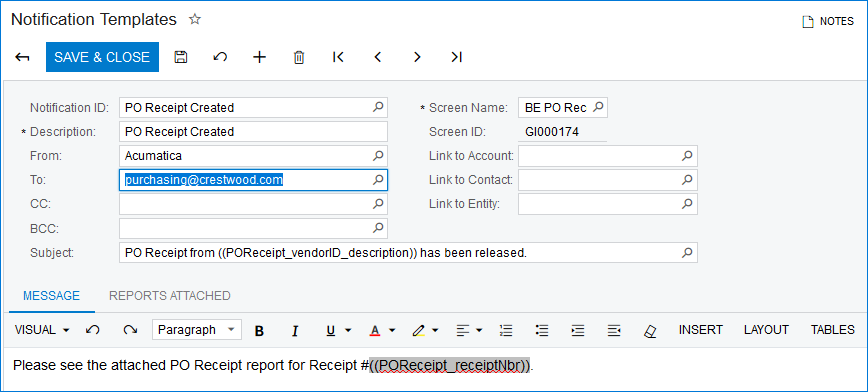
- In the Notification Template window, enter the fields below:

-
- Enter a Notification ID and Description that describe the notification.
- Select an email account for the From field.
- Select the recipients of the notification in the To field. (These can be dynamic, DataFields from the GI table, or a specific email address, as shown above).
- The Screen Name is the GI we created in Step 1, and the Screen ID defaults from it.
- The Subject is the subject of the email. (Add Datafields to make the subject dynamic).
- Enter a message (body of the email).
- Finally, click on the Reports Attached tab:

-
- Select the appropriate Report ID for the report you wish to attach to the email.
- Select the Report Format you wish to send – PDF, Excel or HTML.
- Be sure to click to “Use Event as Data Source.”
- Select the Source Table from your GI, then fill in the Parameters, to write those values from the GI into your report parameters. This will pull the report for those values only.
- Save and Close your Email Notification, then Save and Close your Business Event.
The Purchasing Manager will now be notified via email when a purchase order is received. The PO Receipt form will be attached for that specific receipt.
If you have questions or need some assistance, visit our support page for more help.
