Crestwood Associates has been using Microsoft Teams for a while now, but I still get calls and questions every day about where something is located. Teams is great for collaborating, meetings, etc., but even I forget where something is at times. This article is going to show you tips and tricks for searching in Teams. So, whether you’re an old pro with Teams or a newbie, you need to read this.
Additionally, if you’re new to Microsoft Teams, you might want to first take a glance at our blog: “Our First Trial of the New Microsoft Teams,” for a quick overview.
Note: All files must be saved to the cloud in order for any of these searches to work. If you save to the local C: drive or desktop, your files will not appear in any of these searches.
How to Search for Things in Teams
Basic Search Menu Bar

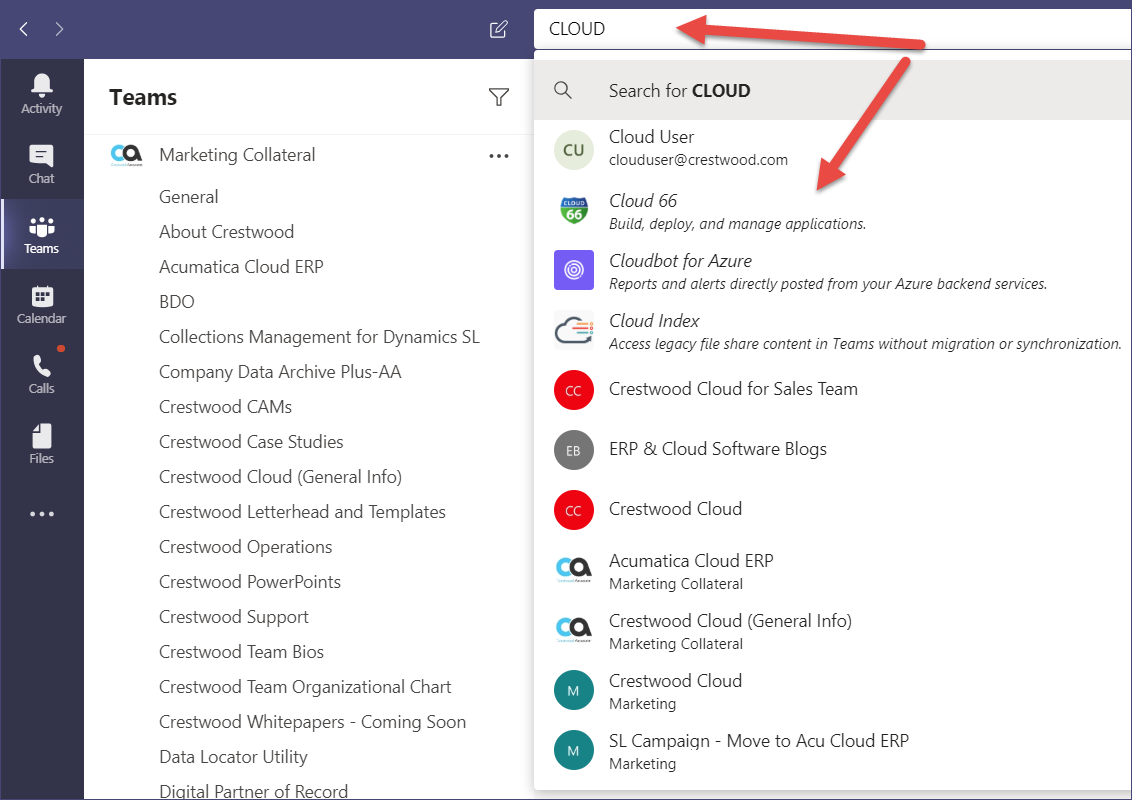
With the basic menu bar search tool at the top, typing in a keyword will automatically display Teams and Channels that contain documents or conversations with the Keyword. Below, I have typed in the keyword CLOUD. Once you type in your keyword you can select a location in the drop-down list. Clicking on a Team or Channel in the drop-down menu will take you to that specific area and display all conversations or files related to your Keyword (if any). Or simply click Enter to do a search for all.
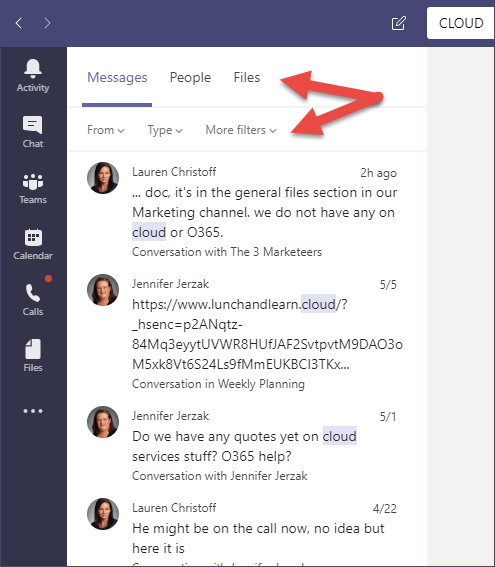
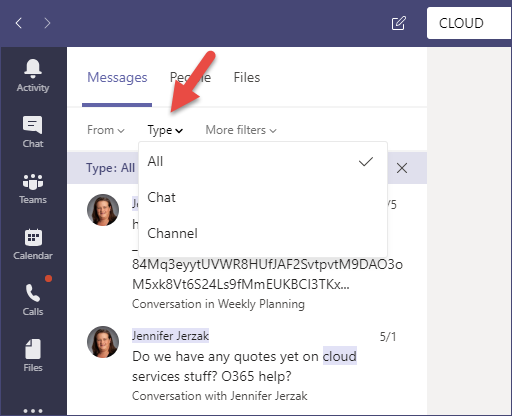
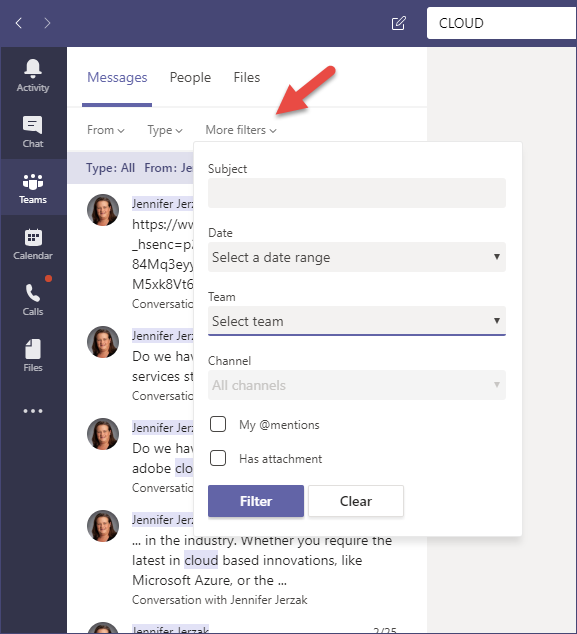
If you can’t find what you are looking for in the drop-down menu, clicking Enter after your keyword has been typed will display all documents and conversations in relation to that keyword on the left. Here you will have the option to dig deeper in your search using filters: Messages, People, and Files; then by who it’s from; then the file type, whether a document (DOCX, PDF, XLSX) or chat. With the More Filters feature you can specify dates, Team, Channel, mentions, and more.
Search by Files Tab
Another way to search for files is by clicking on the Files icon on your left menu ribbon. When you click on the Files icon, the left-hand column will now display: Recent, Microsoft Teams, Downloads, and Cloud Storage (your OneDrive).
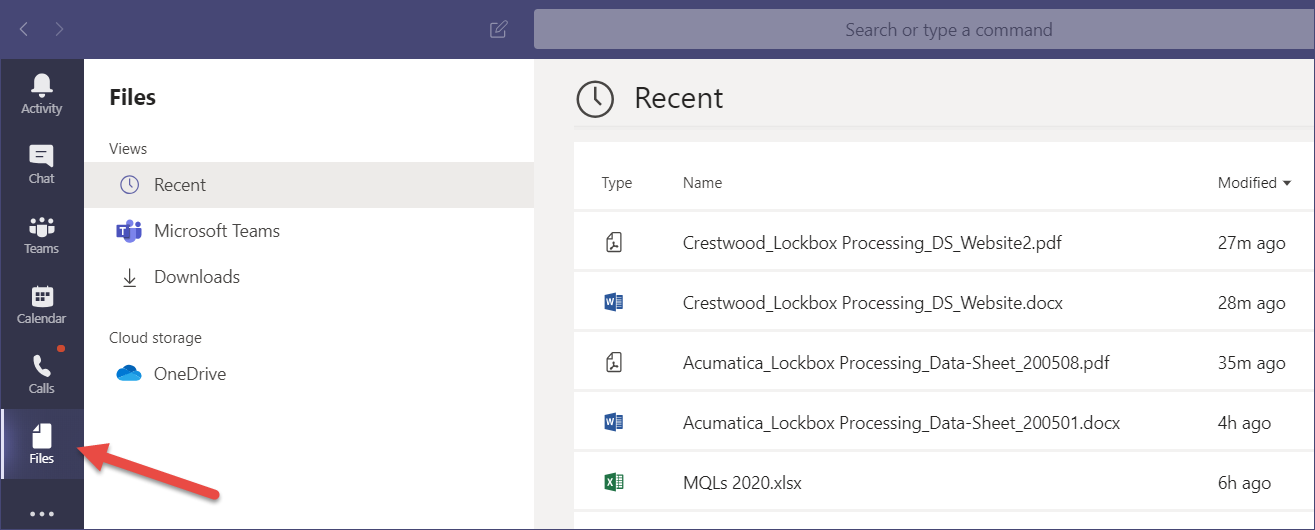
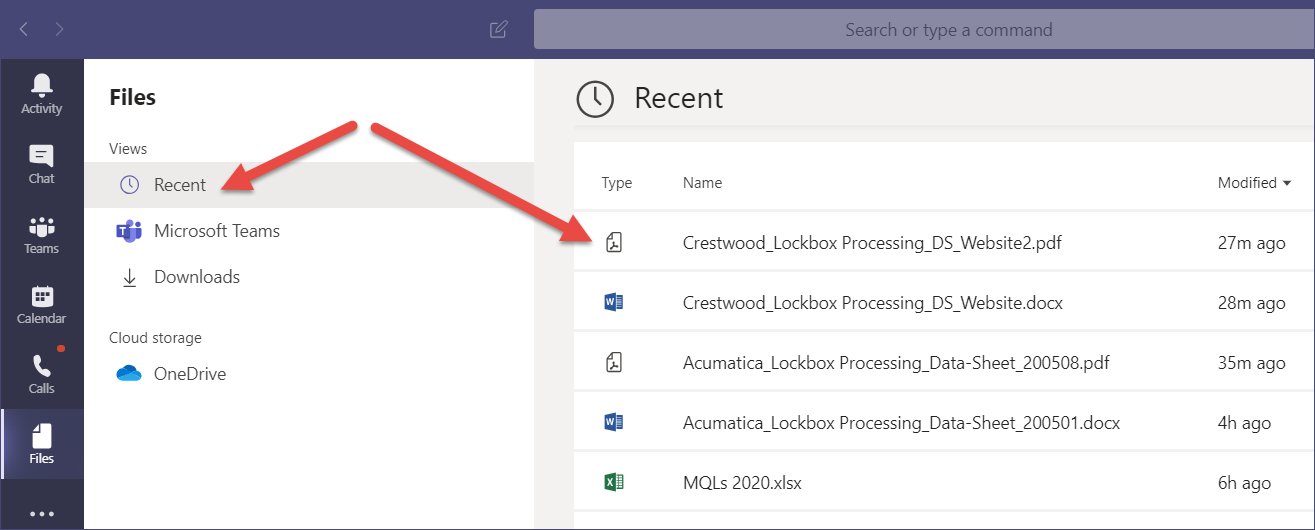
Clicking on Recent will bring up all of your recently edited files.
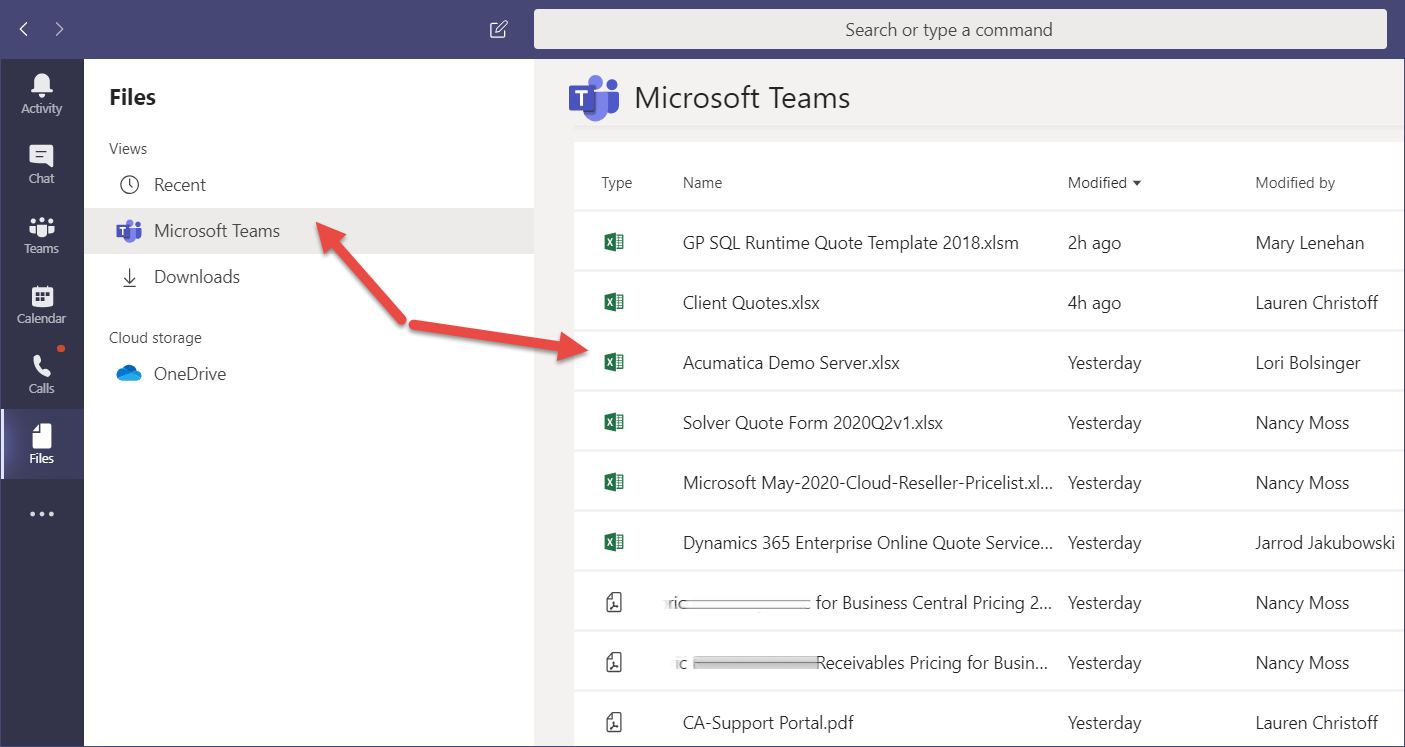
Clicking on Microsoft Teams will bring up every recently produced or modified document created by any member of your team.
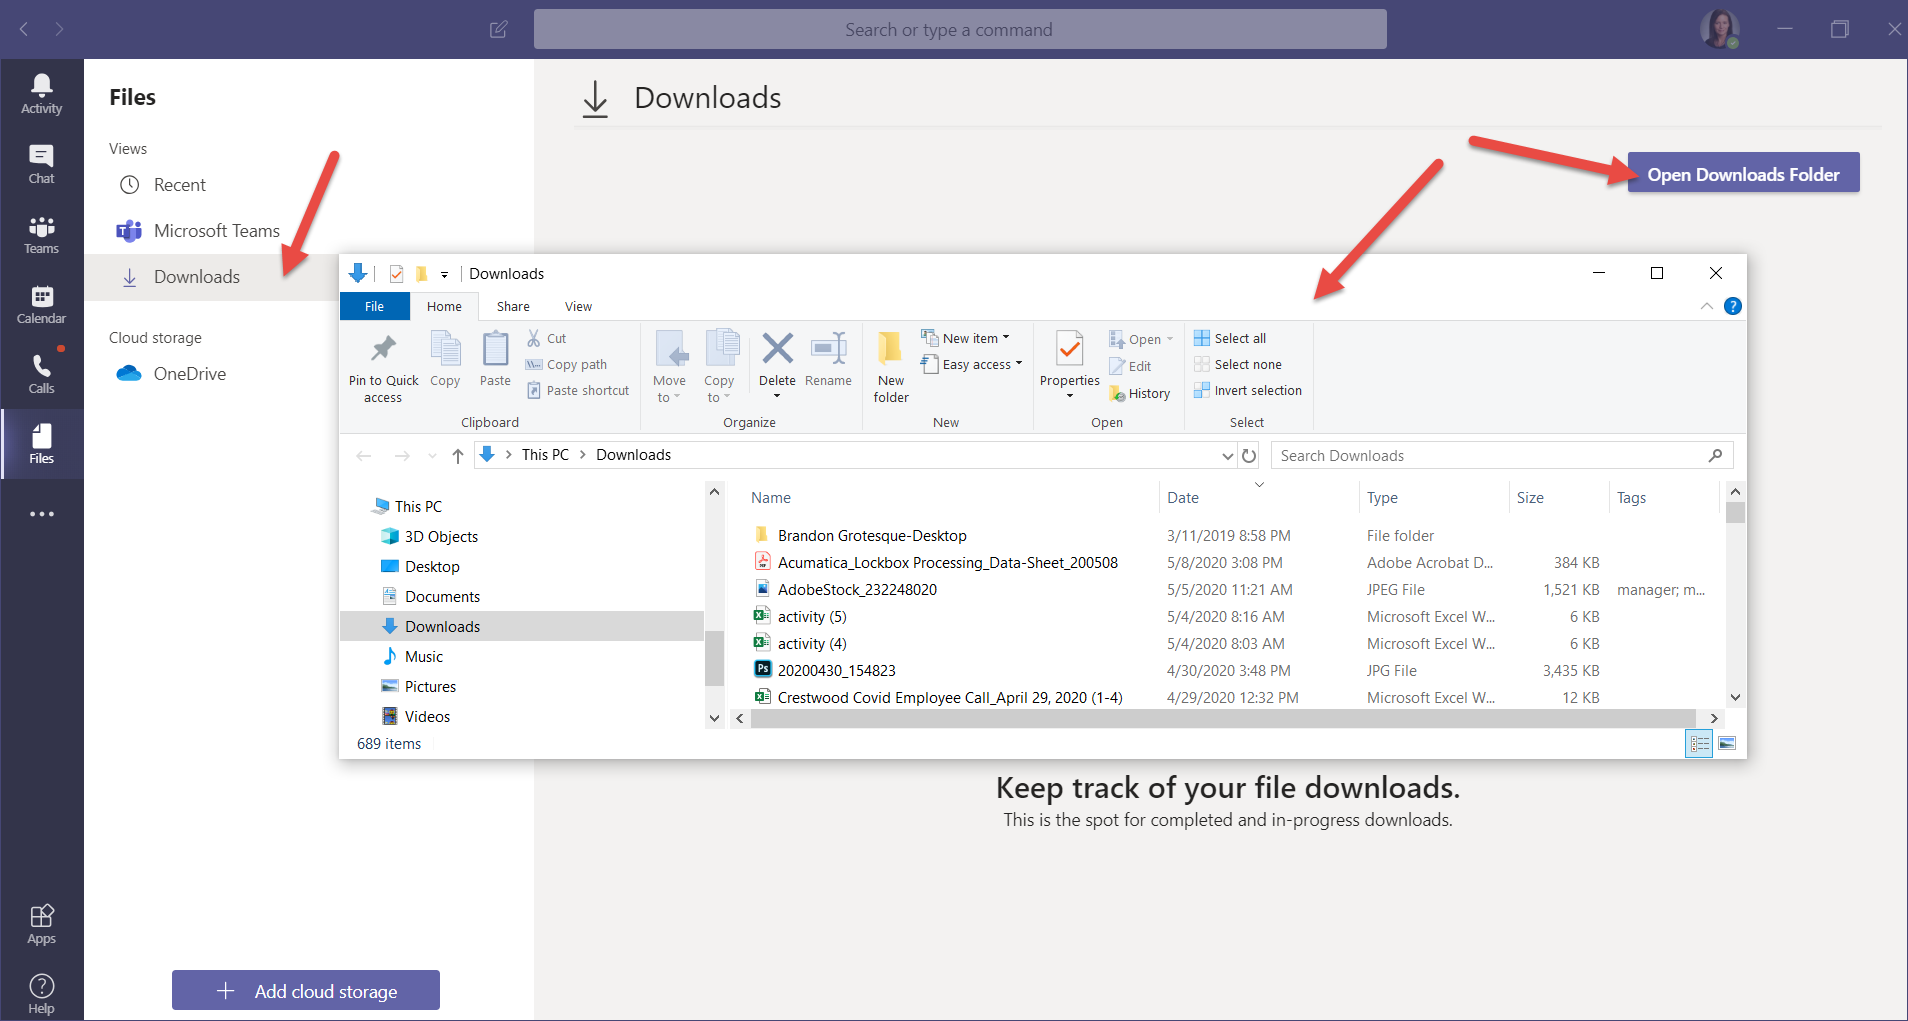
Clicking on the Downloads tab will pull up all recent files you have downloaded from Teams to your PC and store in your downloads folder.

You can also open your Downloads Folder through Teams to view files that have been recently downloaded to your PC.
Lastly, you can search for files on your OneDrive through Teams.

Refining search results with search operators
Sometimes the basic searches bring up too many options. If you need to narrow the results of your search, Microsoft Teams allows you to search by operators. Below are some examples.
Please note that search operators do not work searching for people. Some of the operators below work with messages but not all. Also, if a document/file contains the keyword those files will appear in the display.
- Search by “ “ to obtain an exact result.

- Search by using OR – X OR Y, search for more than one word if you aren’t certain what you are looking for.

- Search by using AND – X AND Y, narrows your search if you know what you are looking for.

- Search with a dash symbol (–) – This will exclude a term or word

- Search by file type docx, xlsx, PDF, etc. to obtain results that contain a certain file type.


- Add * – a wildcard will search for a word that contains what you’ve searched for, e.g. train* gives training as a result as well.

We hope this helps you when you’re crunched for time and you need to locate files. Don’t forget to subscribe to our blog for more Office 365 tips and tricks.
