Microsoft Dynamics 365 Business Central allows users to add a field to any document called “Item Extended Text.” Item Extended Text is a great way to display any additional information about an item on various document forms. The user can choose which documents to display the additional text on along with a date range if it is promotional information.
How to Add Item Extended Text
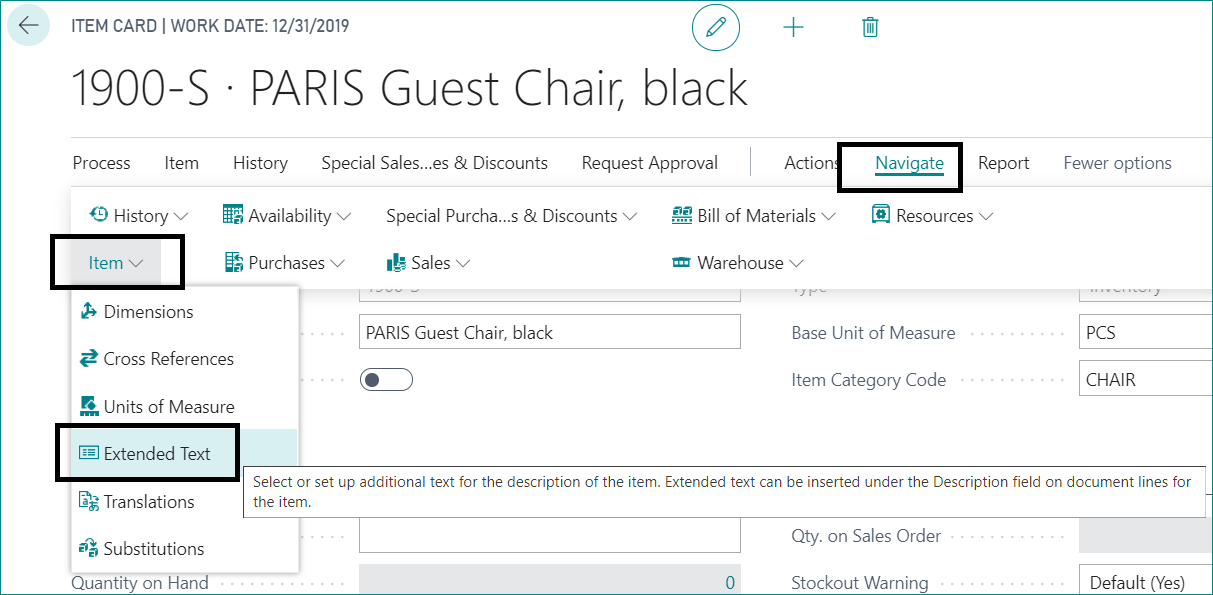
To use this feature, open up an Item and go to Navigate > Item > Extended Text:
Create new Extended Text. Provide a description for the type of text, and (if applicable) also define a starting and ending date to use the text
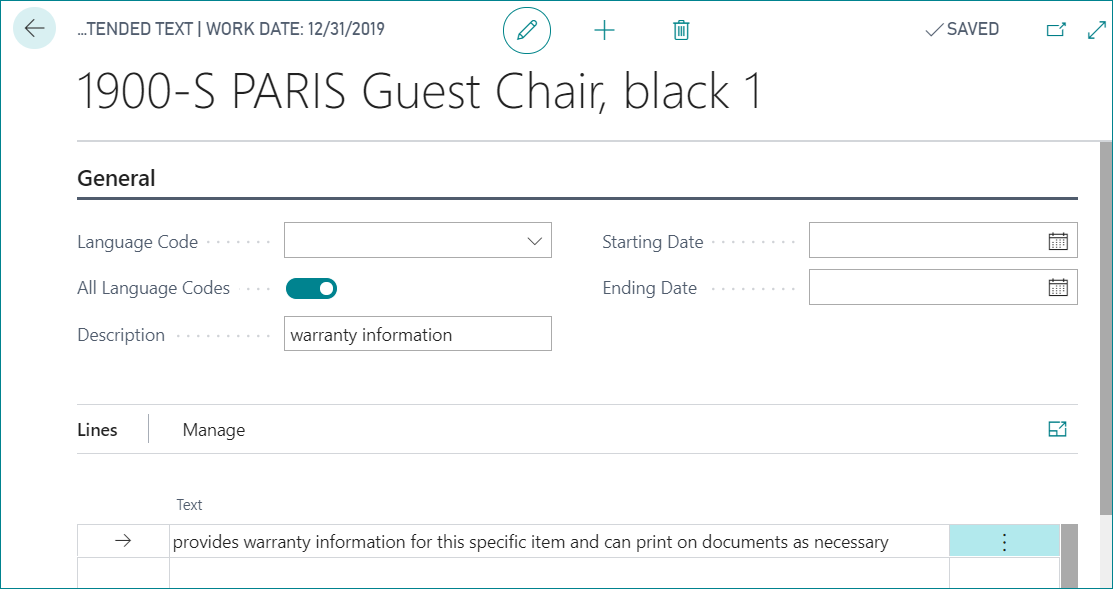
Select the document types on which you would like the extended text to display.

Back on the item card, expand the Item Fast Page and turn on the option to automatically display the extended text on the document types specified.
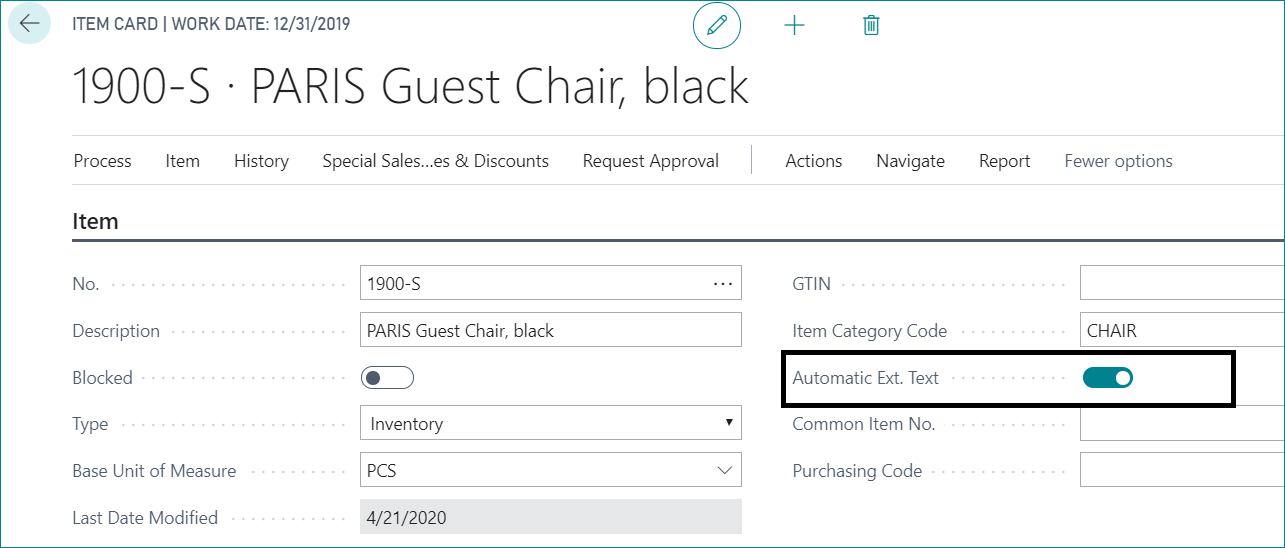
Now, when you enter a new document, the text will automatically appear.
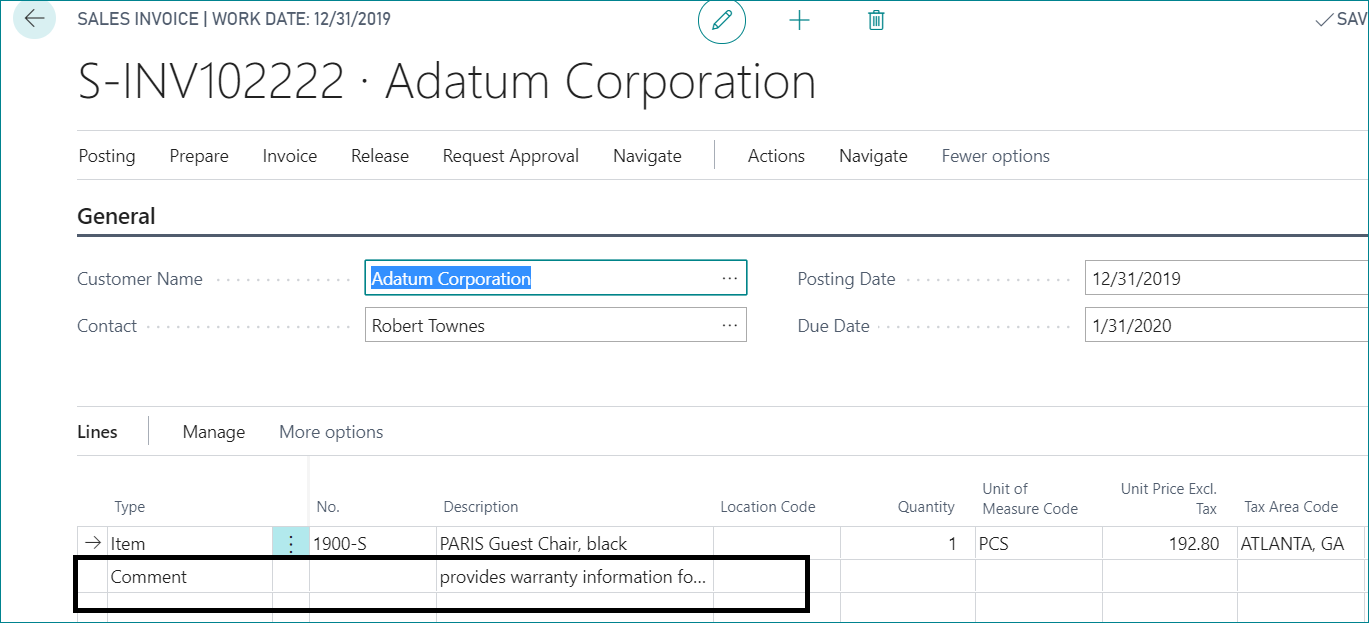
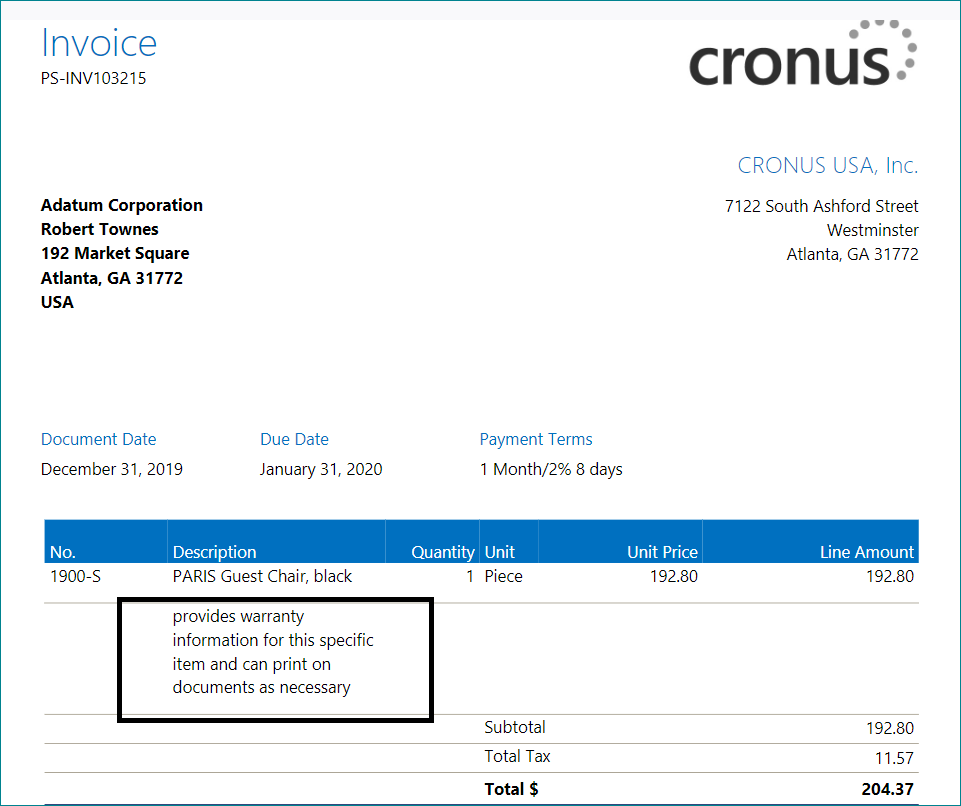
It will also appear on the form (in this case, the sales invoice):
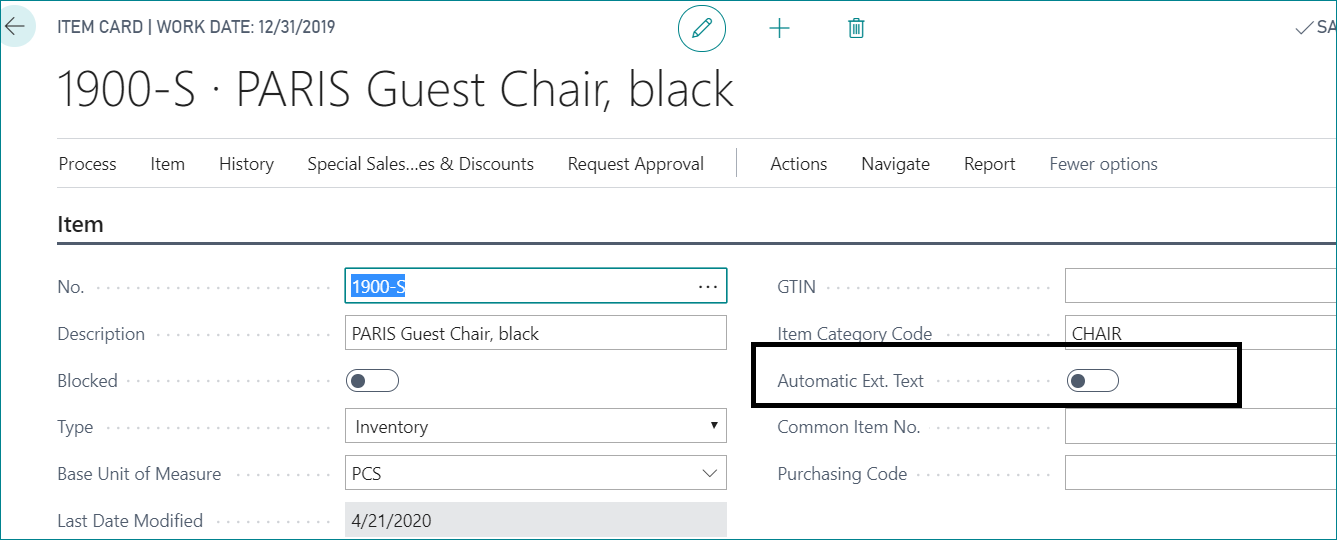
This feature can also be used manually by turning off the Automatic Ext. Text option in the item card:
On the document (in this case a Sales Invoice) highlight the item and go to Line > Functions > Insert Ext. Text:

The text will then display for that item instead of automatically appearing:

This technique can save a lot of time and manual entry, if the text is something that a user needs to repeatedly enter.
For more Dynamics 365 tips, be sure to subscribe to our blog!
