We get a lot of questions in support about how to process prepayments in accounts payable in Acumatica. Prepayments are used when you need to create an advance payment or a down payment to a vendor. There are two ways to create a prepayment.
- Standard way: enter the prepayment in the Bills and Adjustments screen. This creates a non-financial document. It doesn’t affect the vendor’s balance or update the general ledger. It is an internal document that is used to create a payment. After you release the prepayment, it can be applied to vendor bill.
- Simplified way: create the prepayment in the Checks and Payment screen. There some restrictions to this method. You can’t use an approval process and you can’t use a payment method that requires the printing of checks.
Here’s how to do both.
[For more on payables, be sure to subscribe to our blog. And content like this is generated from folks like you contacting our support team and asking questions. So be sure to reach out to us if you have problems that require solutions!]
Standard Way of Entering Prepayments
On the Bills and Adjustments screen, select Prepayment as the type and complete the transaction. In the Document Details tab, the inventory ID, unit cost, and quantities are specified for information purposes only.
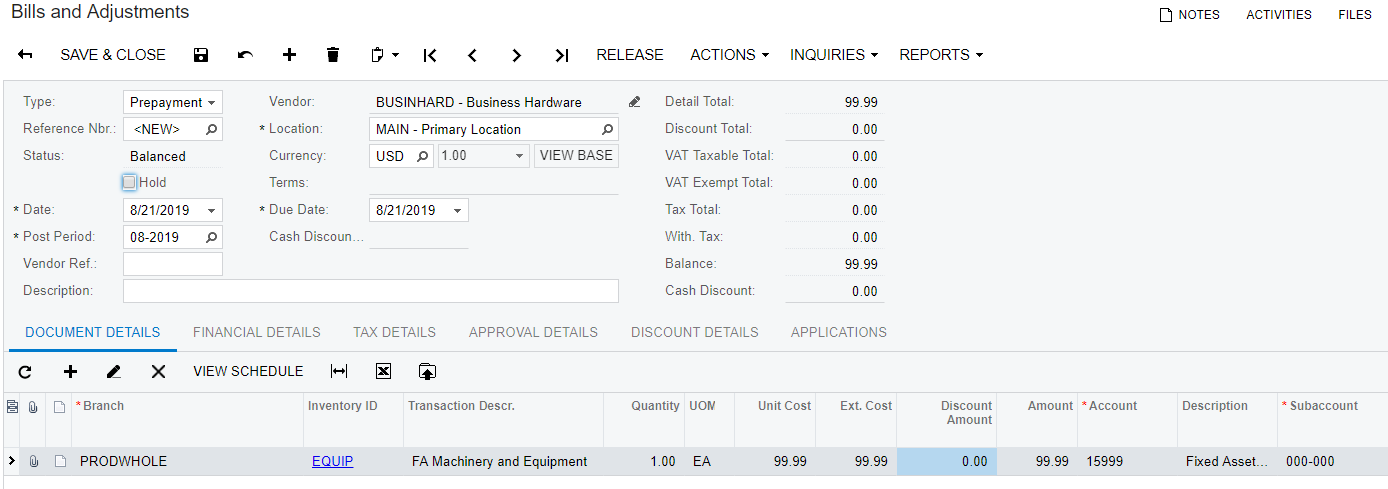
The account that is inserted to this document after it is released is specified in the Vendor screen > GL Accounts tab > Prepayment Account. In this case, “13200 Deposit to Vendor.” If no prepayment account is specified for the vendor, the vendor’s AP account is used.

When the prepayment is released, the system doesn’t generate any transactions or update the vendor balance. The prepayment status changes to Open so the actual prepayment can be made. Open prepayments can be voided in the Bill and Adjustments screen. Navigate to Actions > Void Prepayment.
To make the payment based on the prepayment request, you would open the prepayment in the Bills and Adjustments screen. Click on Actions > Pay Bill/Apply adjustment. The checks and payment form will open so you can make the payment. The information is automatically transferred from the prepayment. The prepayment request is added to the Documents to Apply tab. Choose the application date and release the payment.
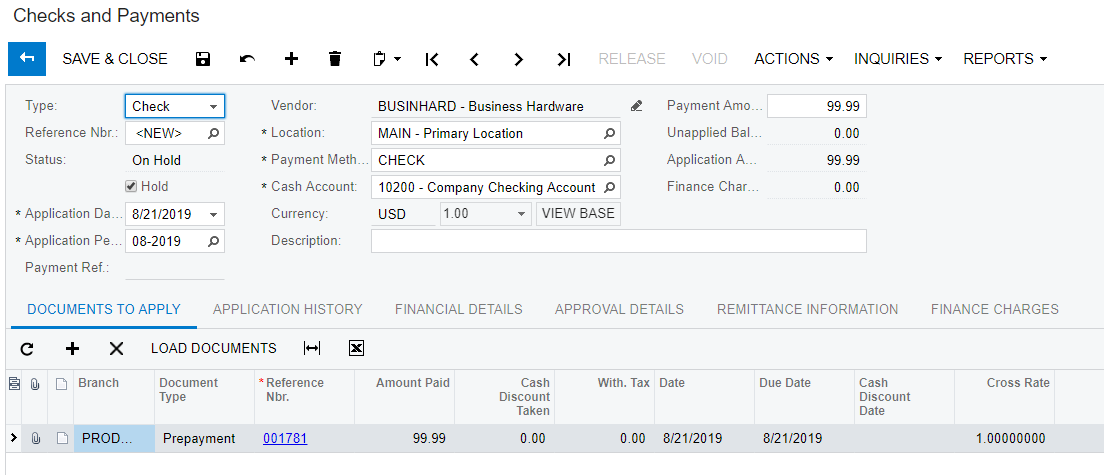
Upon the release of the payment, the system updates the prepayment balance of the vendor and generates a document of the prepayment type. The balance of the vendor does not change. A batch is created which credits cash and debits the prepayment account. The payment is closed after you release and the prepayment remains open. It can now be applied to bills or credit adjustments.
If you release an incorrect payment, you can void the payment using the Checks and Payments screen. Once the payment is voided, the prepayment request gets the voided status.
Now, apply the Prepayment to Bills. In the Checks and Payments screen, select your prepayment. Choose your application date. On the documents to apply tab, add a new row. Look up the reference number of the bill.
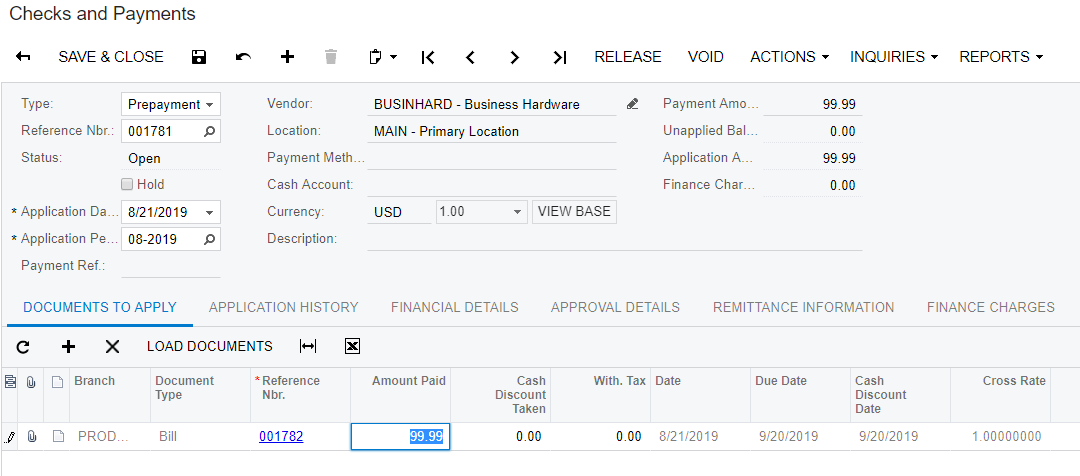
After you release the Prepayment, the system updates the vendor balance and generates a batch that debits AP and credits the prepayment account. Also, you can reverse incorrect applications by selecting the bill in application history and choosing Reverse Application.
The Simplified Way
In the simplified method, you create the prepayment directly in the Checks and Payments screen. As mentioned previously, you can’t use a payment method that requires printing a check.
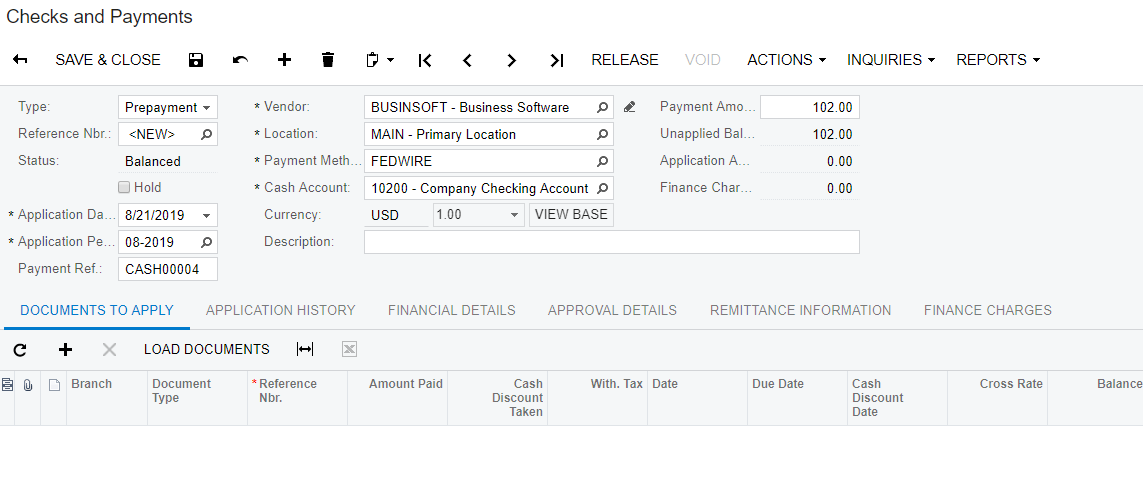
Upon release, a batch is created which debits the account specified in the vendor account in the prepayment account field. Cash is credited.
To apply the prepayment, open the prepayment in the Checks and Payments screen. Look up the Reference Number of the bill in the Reference Number column.
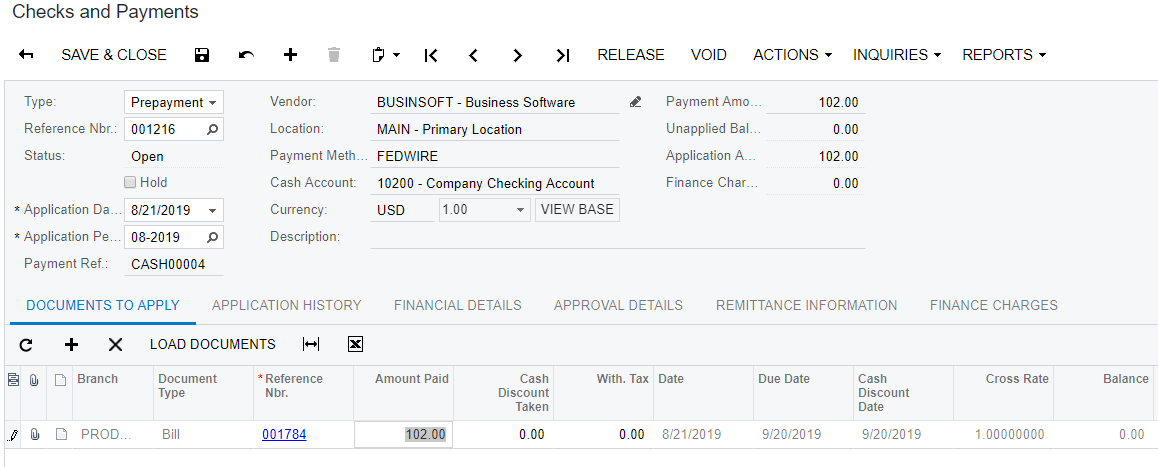
Upon release of the prepayment, the prepayment is closed. The document in the Documents To Apply tab is moved to the Application History tab. No financial batch is created.
Another potential issue with this method is the accounting. When you create a bill, it credits accounts payable. If you use a deposit account for the prepayment account in the vendor, this payable won’t be offset. You would need to book a journal entry to debit payables and credit the deposit account. The other option is use the payable account for your prepayment account in the vendor setup. However, this isn’t proper accounting as prepayments to vendor should be classified as deposits.
