SmartList Designer Tips
Next in our series of SmartList Designer blogs, we’ll look at a common request for viewing vendor details within SmartList: displaying the 1099 detail information for a given period. (If you need a refresher on SmartList Designer, or missed the first blog, you can find it here.)
This will show you how to create a brand new SmartList from an existing Dynamics GP table, with just a single table. This process can be repeated with any table.
Here’s How:
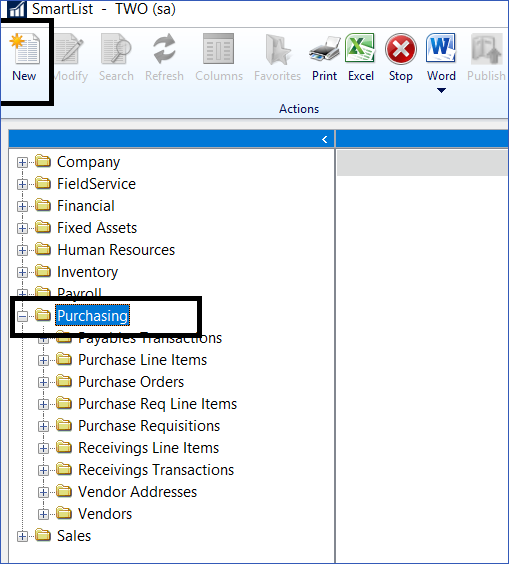
Highlight the Purchasing folder in SmartList and click New.
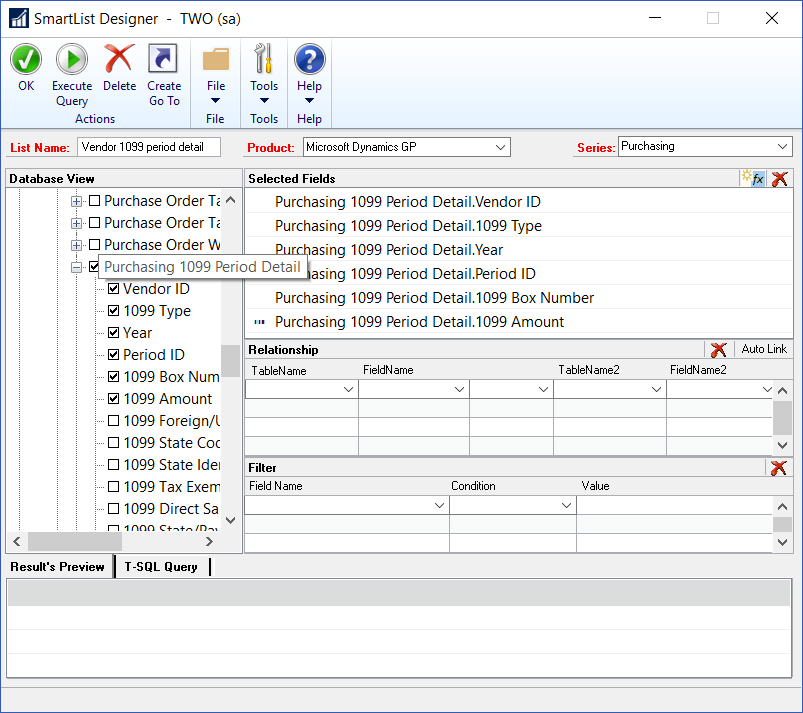
Next, give the new list a name (e.g. “Vendor 1099 period detail”). Expand the folders MS Dynamics GP > Tables > Purchasing > Purchasing 1099 Period Detail.
Add checkmarks to select the following fields from the table:
Click OK and you will see this new list as a new folder under Purchasing. You can also create additional favorites with restrictions for the year, period, etc. within this folder.
To see the rest of the SmartList Designer webinar (or for more tips like this), click here. And be sure to subscribe to our blog for more Dynamics GP tips and news.


