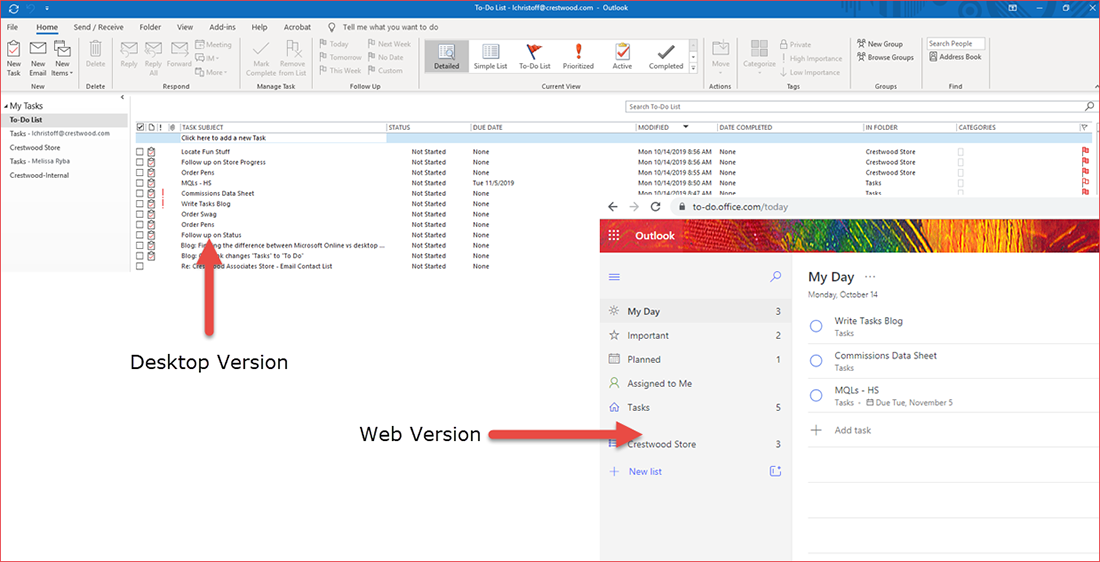
Microsoft is set to update Tasks in Outlook on the web at the end of October, with the full rollout be completed by December 2019.
What does this mean to you? Nothing really, just a new name, from “Tasks” to “To Do.”
Personally, I’ve never used the Tasks feature to its fullest potential. I’ve added Tasks here and there on my desktop version of Outlook but that was the extent of it.
I decided to take a look at To Do and see if I could use it in my daily work life, and taking a quick glance, I found it to be user-friendly and very easy on the eyes than the old Lists in Outlook.
Since all your tasks are stored on Exchange Online servers, you can view them on any platform. So, whether you’re online, using the desktop version, or on your mobile device, you can view your tasks anywhere at any time. Pretty cool!
Let’s take a quick walk through To Do
If you haven’t already figured it out, Microsoft To Do is a user-friendly simple way to create To Do lists that help you manage all your tasks in one place. You can work through your tasks for the day in My Day and create any number of additional lists to organize your work, travel, shopping – you name it!
To Get Started
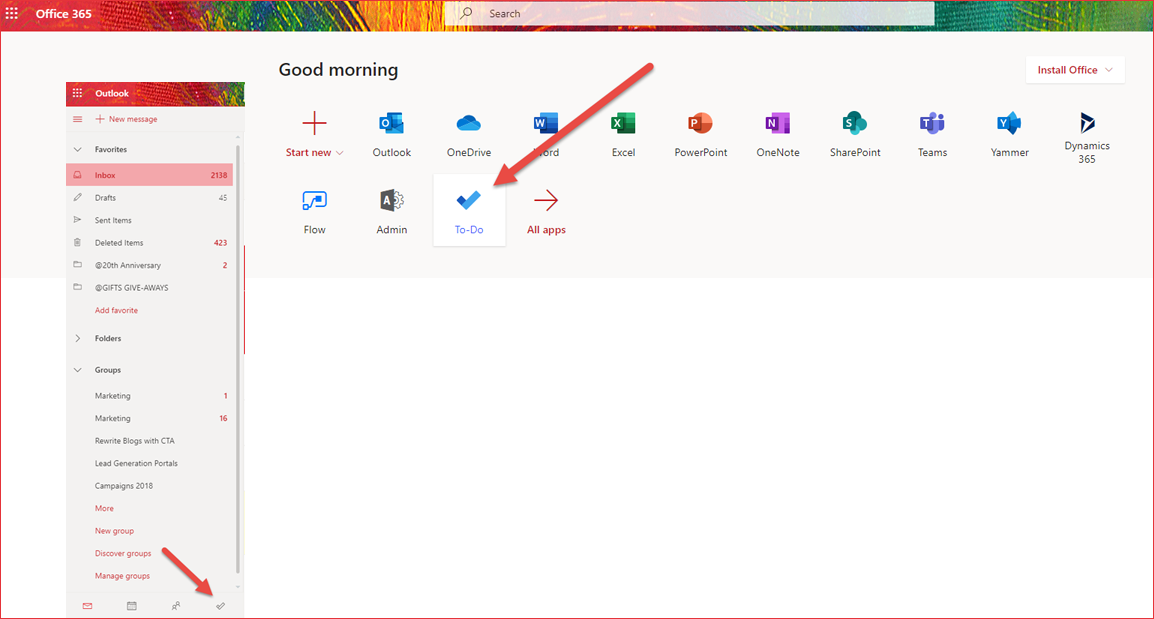
To access To Do, simply go either to your online home screen and select To Do, or in Outlook scroll all the way to the bottom of the left-hand column and click the check mark.
Basic Tools
Let’s go over the menu items in the left column first.
My Day: gives you clean slate each day. You can add additional tasks or select from suggestions on the right side of your screen.
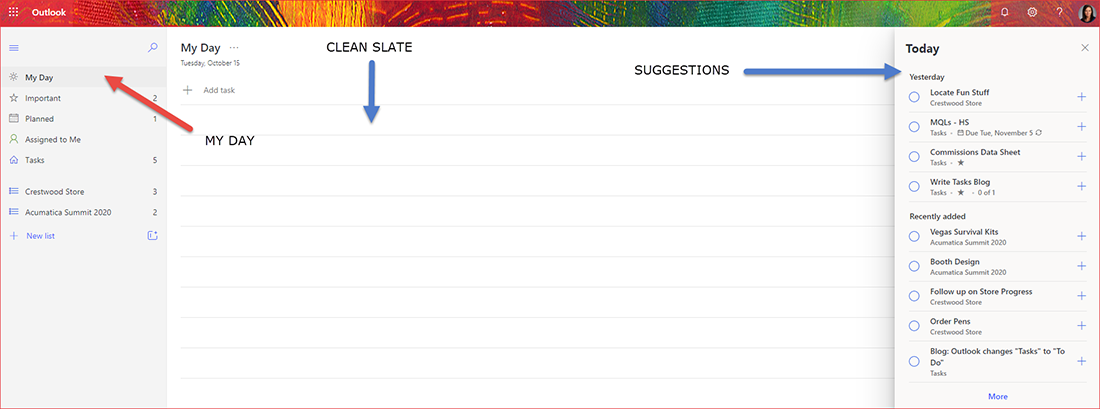
Any tasks in My Day that aren’t completed before the list resets will be saved to your Tasks list and included in suggestions the following day. Click on the lightbulb icon at the top right-hand side of screen to add additional tasks.

Note: On Android devices, the lightbulb is at the bottom of My Day. Tap it to open suggestions and drag up to access the full list.
Anything you are not able to complete today will be saved and suggested to you tomorrow.
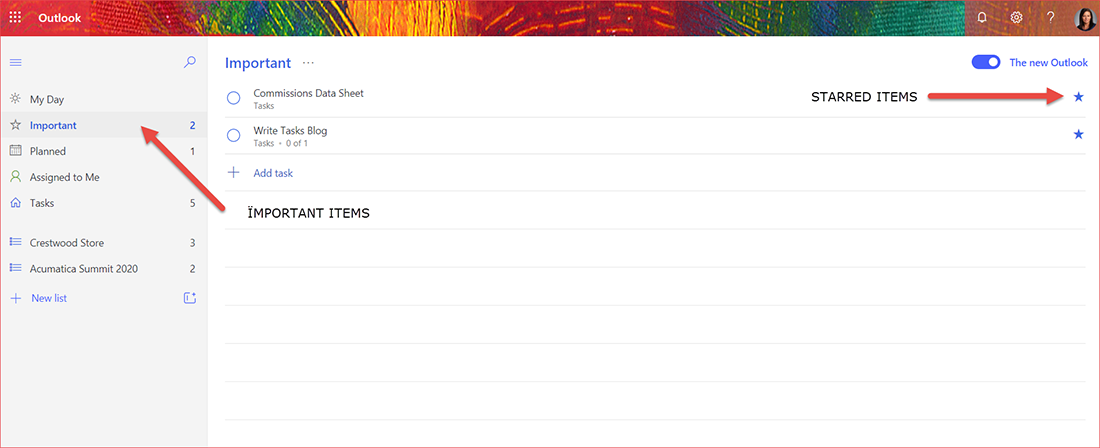
Important: Any task that you mark with a star gets placed in the Important menu list.
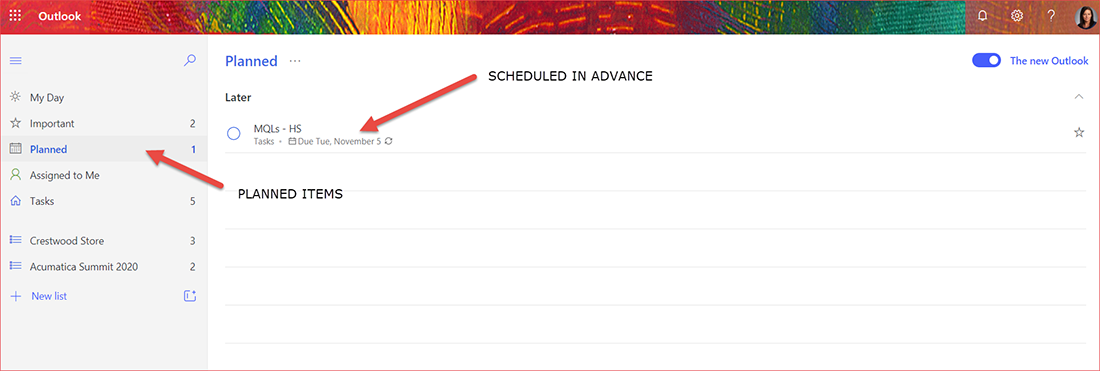
Planned: Tasks that you schedule reminders for are displayed in the Planned section. I’ll show you how to schedule reminders later.
Assigned to Me: Any member of your team who utilizes the To Do feature in Microsoft Online can assign tasks. In my case, because I don’t use To Do, tasks assigned is empty.

Tasks: When you add tasks to My Day, all tasks even from days before will be listed here.

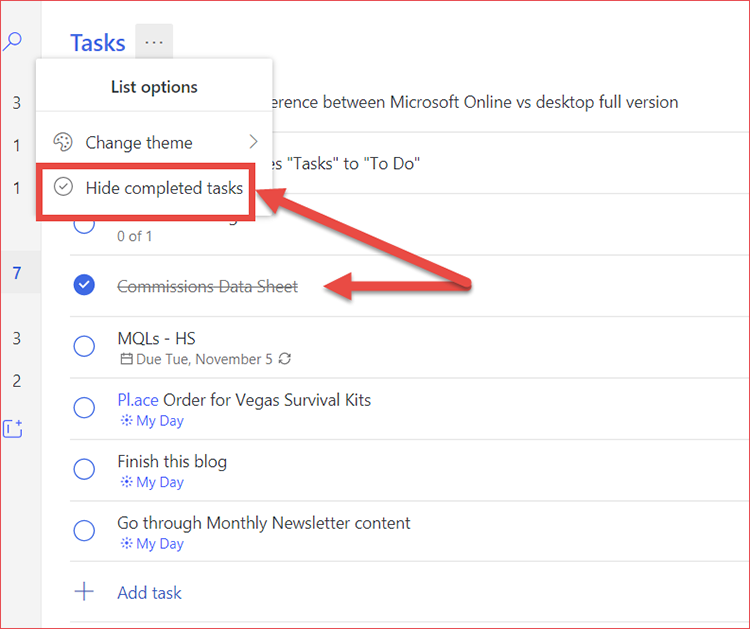
Click the circle bullet next to a task to mark it complete, it will then be crossed off. Click on the ellipsis next to Tasks menu at the top and click Hide Completed tasks to remove them from the lists.
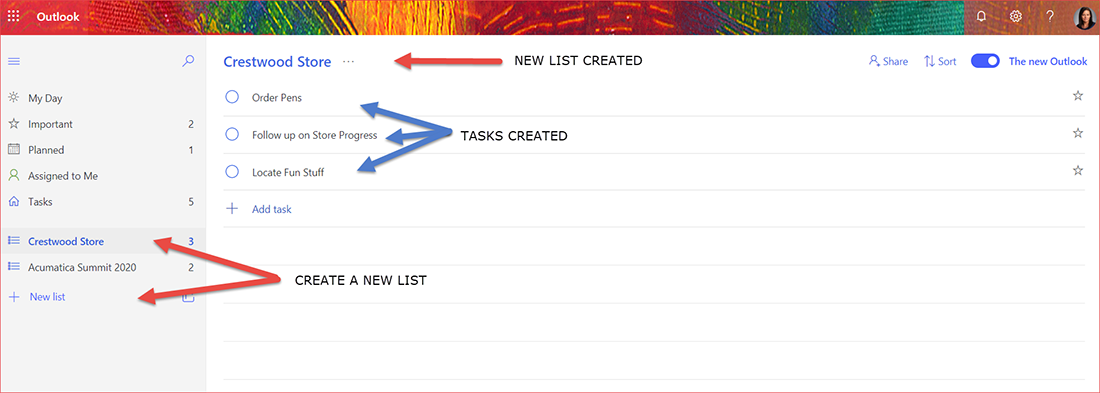
Creating New Lists: When you want to keep track of larger tasks that have more complex steps to complete, you can create a New List. New Lists will be added in separate tabs that will allow you to view only those specific tasks under that list.
Setting Up Reminders
Working with your clean slate in My Day, click on the lightbulb (top left-hand side). Here another dialog box will pop-up giving you a list of tasks from previous days. Add them to your My Day list by clicking on the Plus sign.
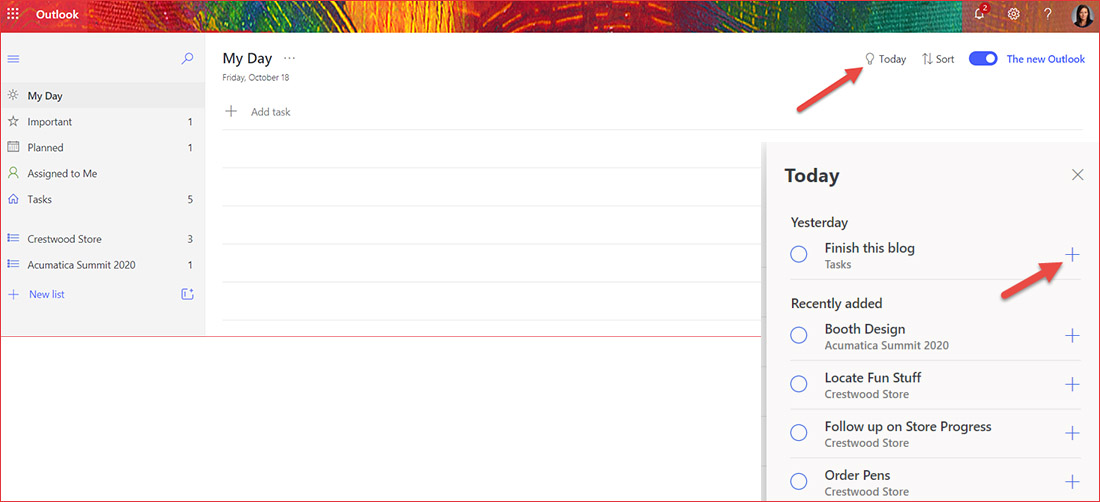
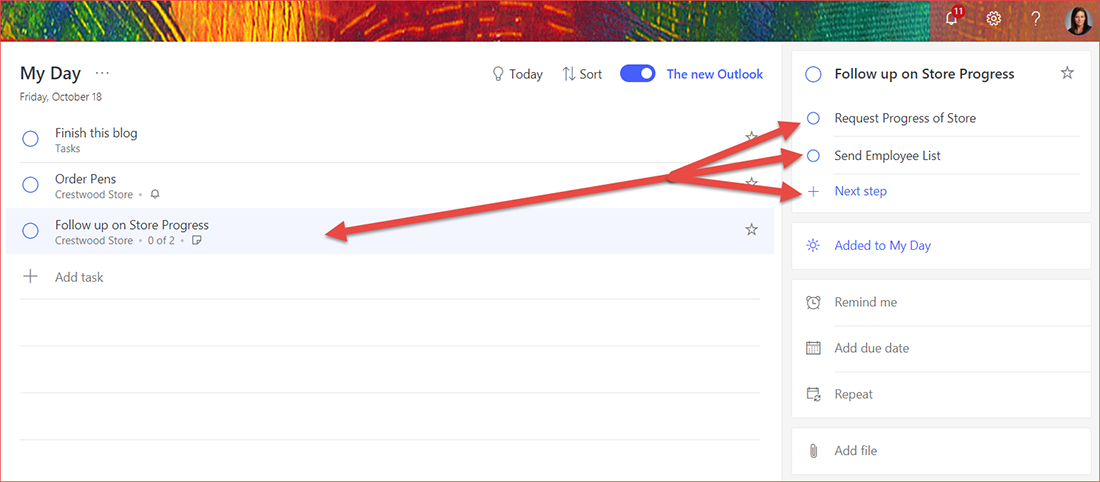
After you have added your tasks to the My Day list, click on individual tasks to do the following:
Add Step
Make tasks more manageable by breaking down tasks into simple steps.
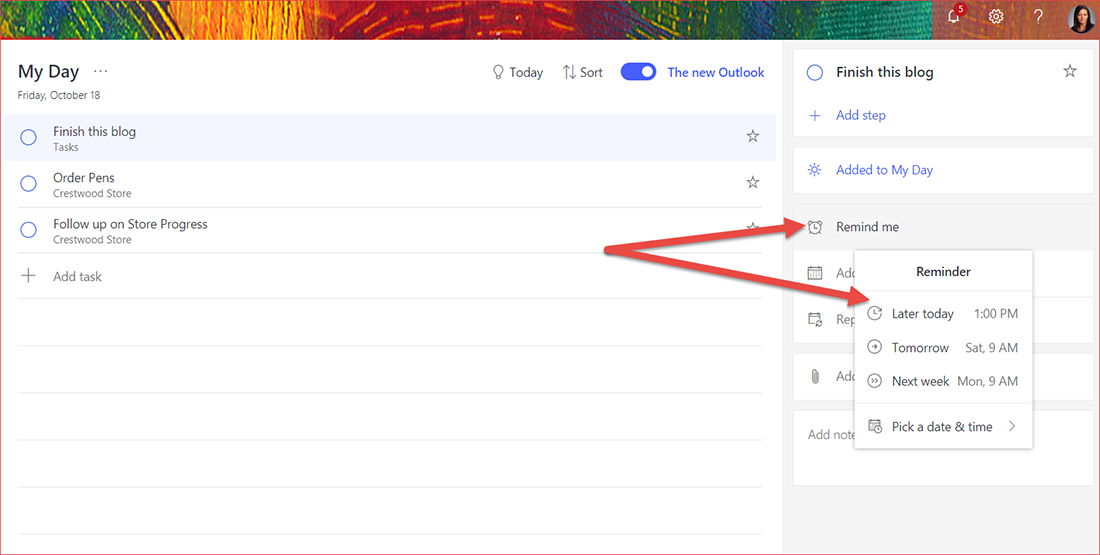
Remind Me
After you are done adding your tasks for the day, you can set up reminders to finish at a certain time. Click on Remind me to set up reminders throughout the day or select “Pick a date & time” to customize.
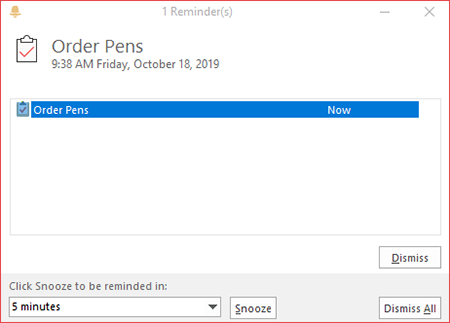
As with every appointment you schedule in Outlook’s calendar, a reminder will pop up to complete the task scheduled.
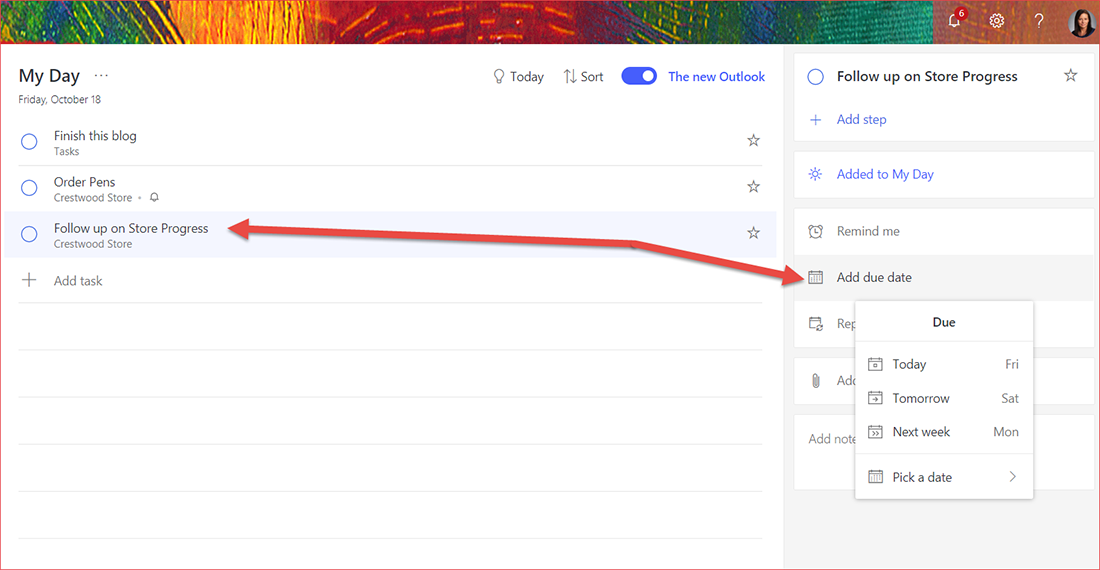
Add due date
You can add a due date to your task, click on the item and select from the list or customize to a specific date.
Repeat
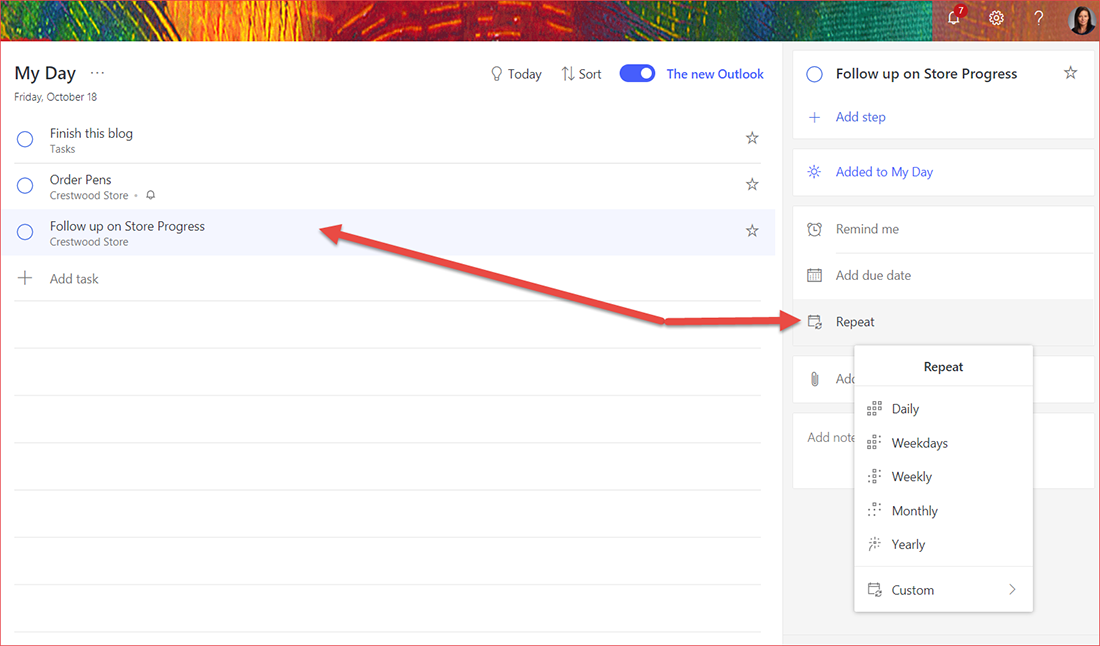
You can select the frequency of a reminder by selecting the task, then clicking on Repeat and clicking on one of the pre-listed items or customize to your preference.
And finally, you can add a file or a note to specific task.
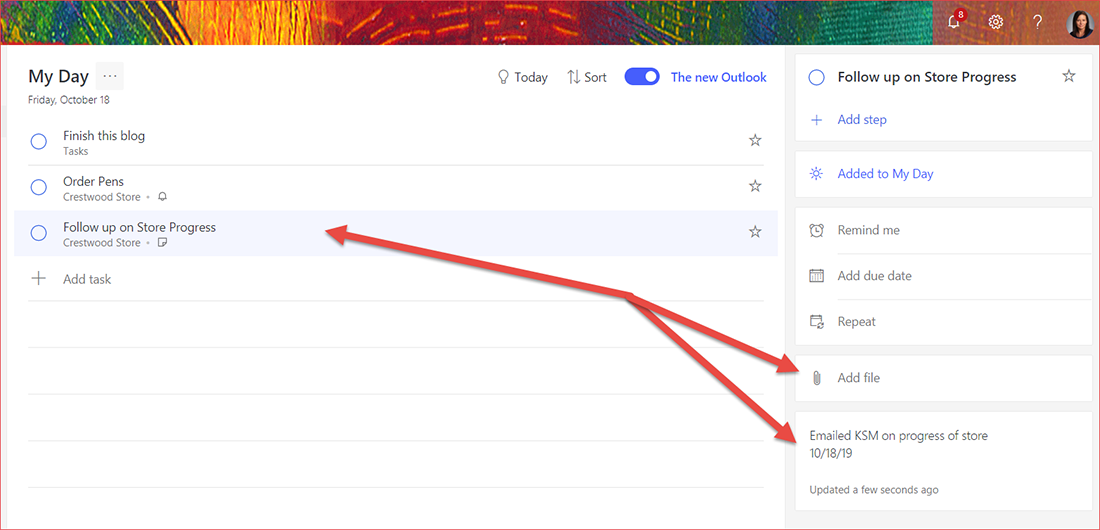
As a recap, you can add as many tasks as you like to each list; keep track of everything by setting due dates and reminders; star the most important To Dos; utilize steps to break down your larger tasks into more manageable pieces; and record notes for extra details.
I hope you find this tutorial helpful. For more Office Productivity Tips & Tricks, subscribe to the Crestwood Blog.
