It’s been a long time since I’ve found something this cool in Microsoft PowerPoint, so I had to share! Motion paths for animating objects in PowerPoint. Using power point animations to move objects is a great way to stand out in your presentations.
PowerPoint Motion Path :
My manager came to me one morning with this slide and said: “I need ‘Member 1’ to be grouped and animated with 4 random ‘Subs’ and placed at either Table 1, 2, 3, or 4. I also need that repeated with each ‘Member’ with one click.” What? Can that be done in PowerPoint? You bet, with motion paths.
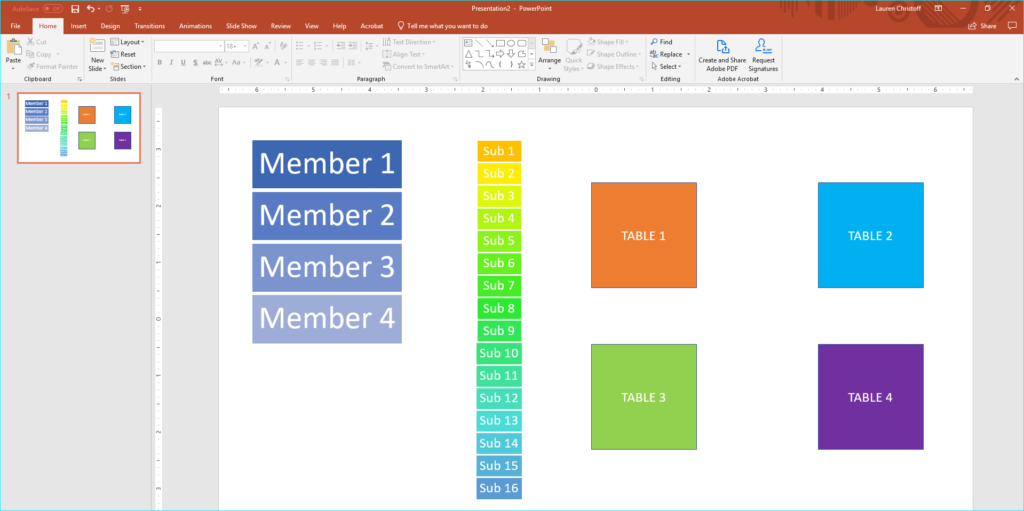
Here’s how:
- The first step is to make sure all your SmartArt or objects are ungrouped.
Note: if using SmartArt, you will have to click ungroup 2 times to allow for each object to move freely on the slide.
- Next, hold the SHIFT key and select Member 1, and 4 random sub boxes.
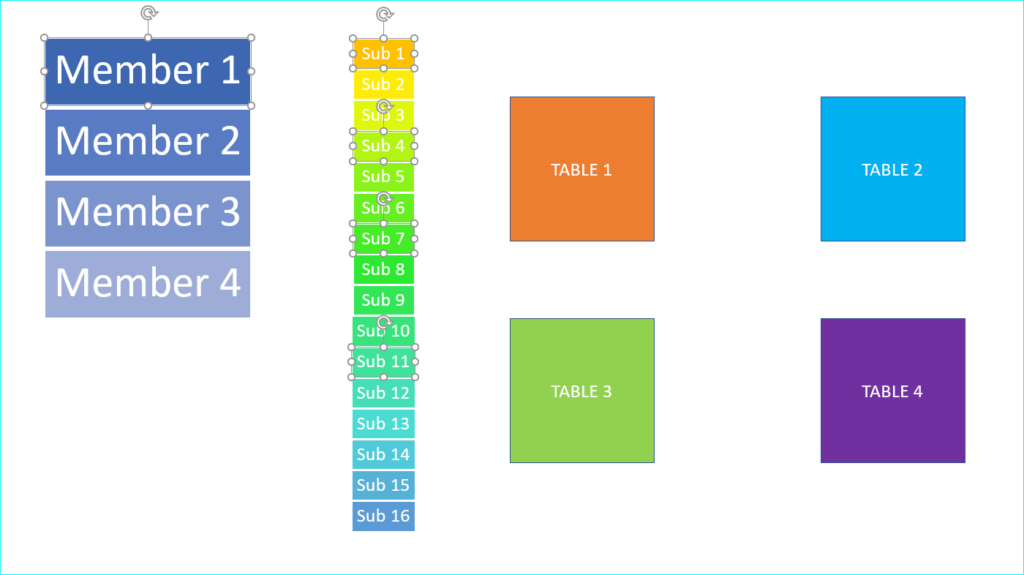
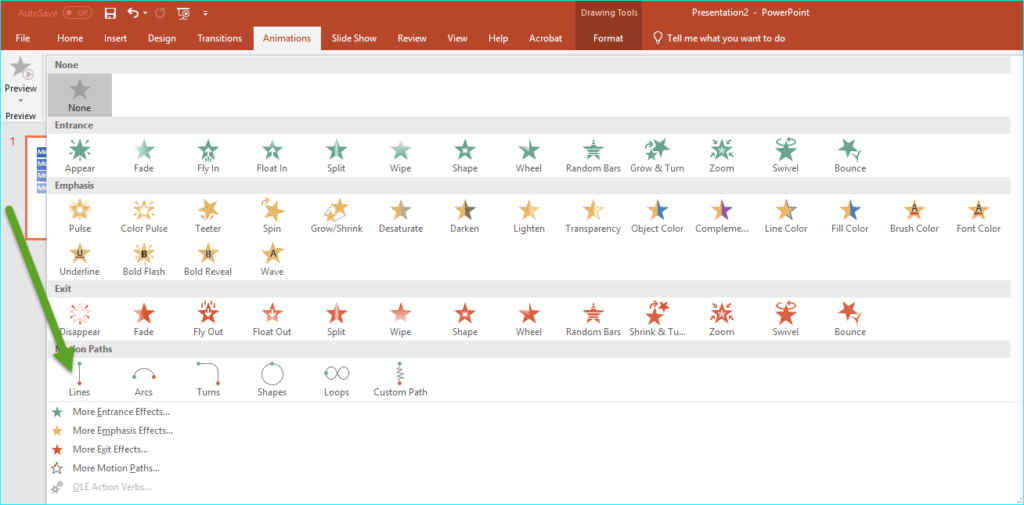
- Now, move to the ANIMATION tab (green arrow) on the ribbon menu, and click on the arrow button down (blue arrow) to expand the animation options.

- Once the animation menu is expanded, click on “LINES” under the motion paths section.
- Here’s the fun part. Once you click on the motion path LINES, (or any motion path you desire) each object you have previously selected will have a red anchor (see circle on each block with black arrow pointing to it). Those red anchors will now be individually clicked and dragged to wherever you want! In our case, to each table.
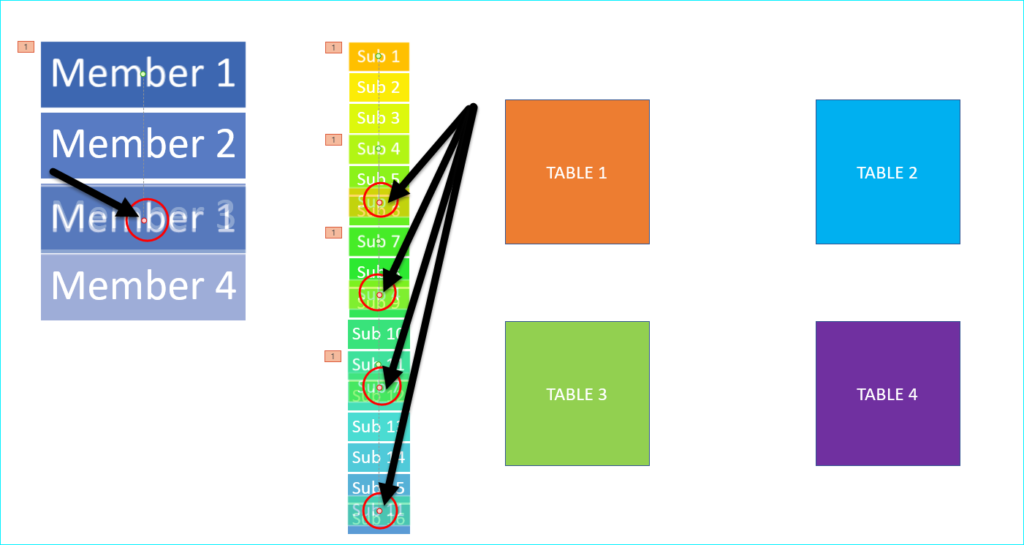
- All you do is click and drag each of those anchors to Table 1. Then repeat the steps above for each Member, Sub and Table.
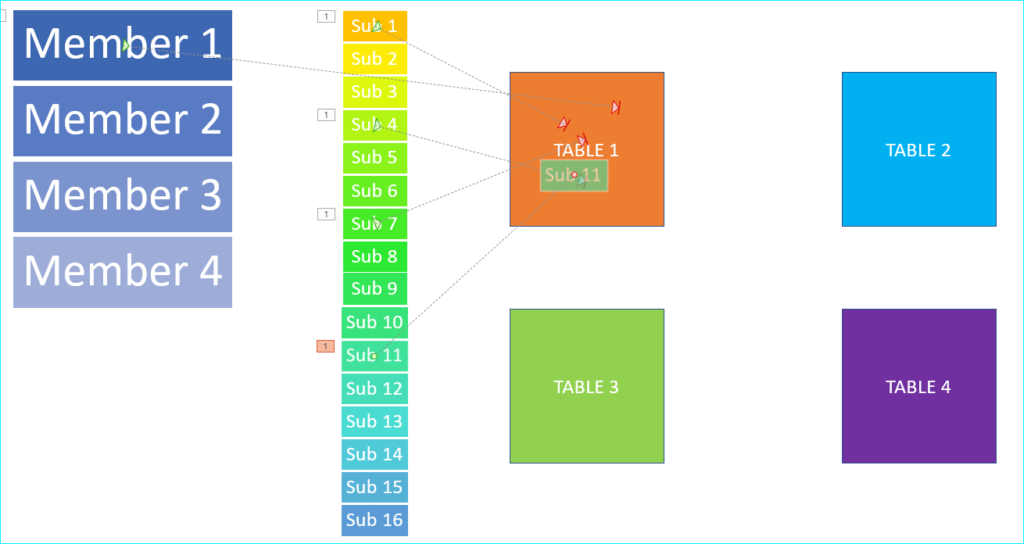
Here’s a better screen shot, so you can see how everything looks once you add motion paths to all the objects.
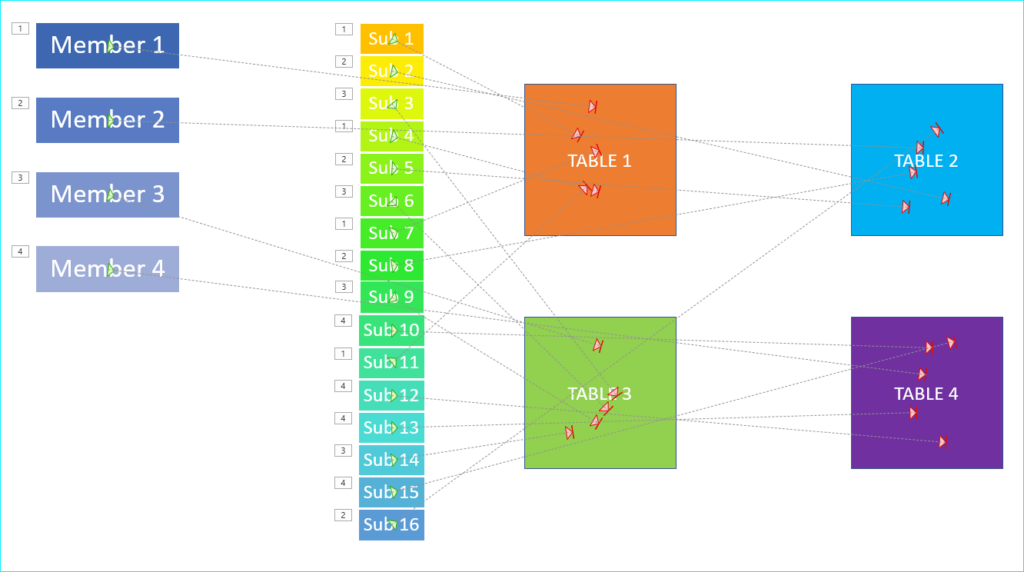
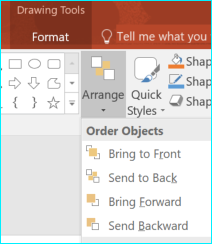
Note: I made the Member and Sub objects hide behind the table objects so the end result was only showing the 4 tables. To do this, I selected the objects I needed to hide and used the Send Backward option in the arrange menu.
- Next, while still under the Animations menu, click on Animation Pane, this is where we will work to have each sequence move right after the other on one click.

First, click on the downward arrow, then click Start on Click for the first box.
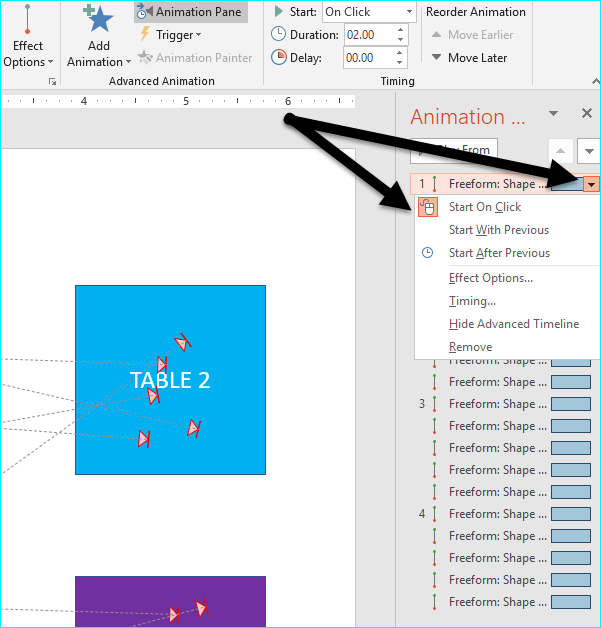
Next, click on the downward arrow for each Freeform Shape after that and select Start with Previous, until you get to the next group.
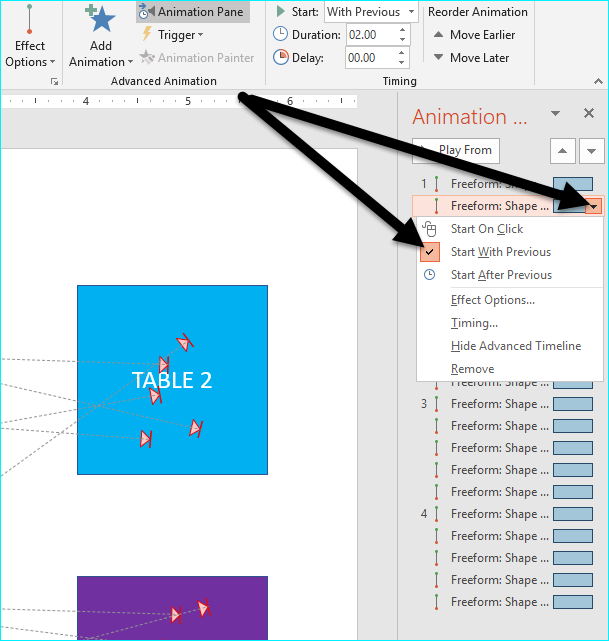
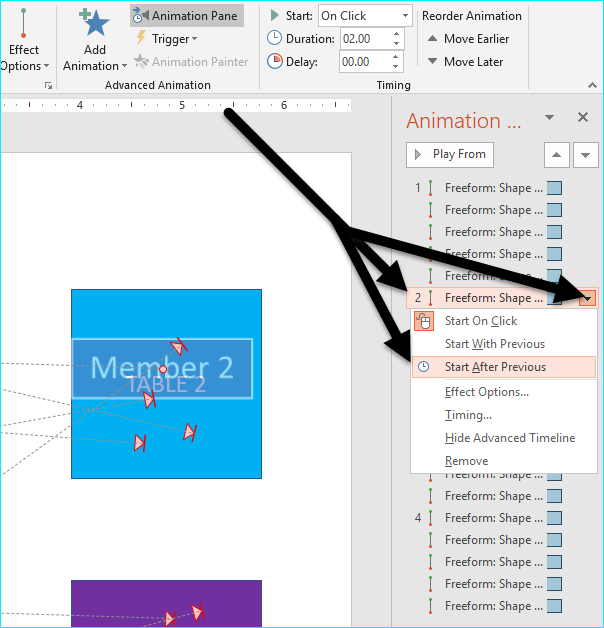
For each group, you will see a number. Click on the downward arrow, then click on Start After Previous. This will allow for the next group to start animating after the previous group. Repeat all steps above for each Freeform Shapes and groups until all are formatted.
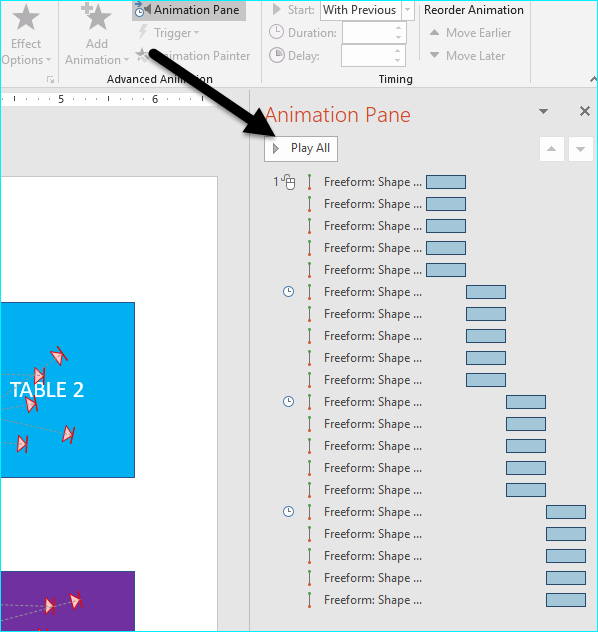
When completed your Animation Pane should look like the screen shot below. Next click on Play All to view your animation.
Watch this video to learn how to set up motion paths and see the animation in affect. I hope you find this tip helpful. For more Office Productivity Tips & Tricks, subscribe to the Crestwood Blog.
