Most businesses require some customization to their reports and documentation; such as invoices, sales orders, etc. With Microsoft Dynamics 365 Business Central, you don’t need a developer to help with this. You get the options and flexibility needed using the well known interface, Microsoft Word.
Modifying the Sales Invoice format:
In the following example, I will show you how to modify the Sales Invoice format to add a field ‘Shipment Date’ and view the modified invoice.
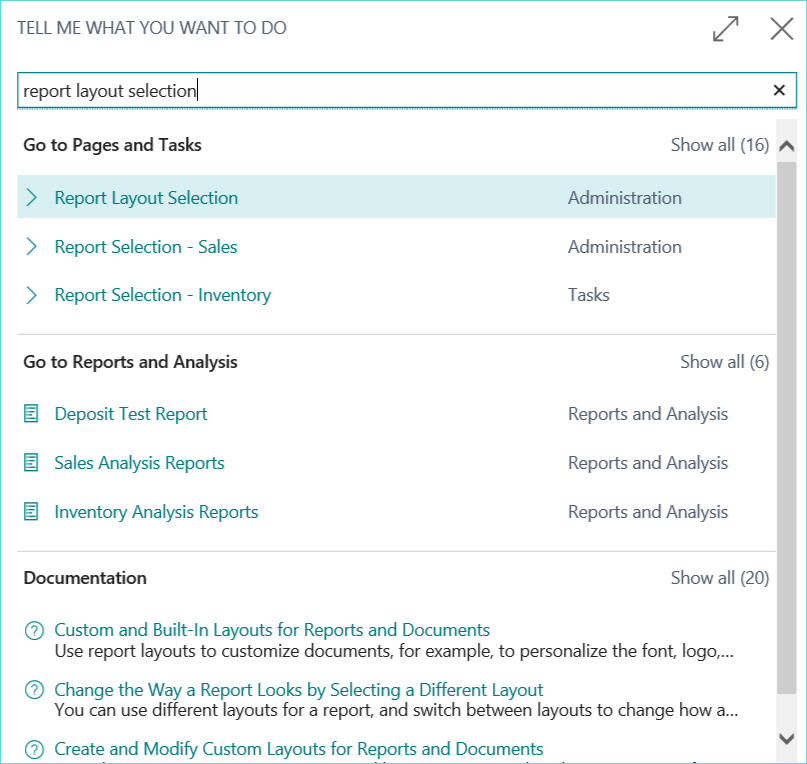
First, use the global search to search for “Report Layout Selection”
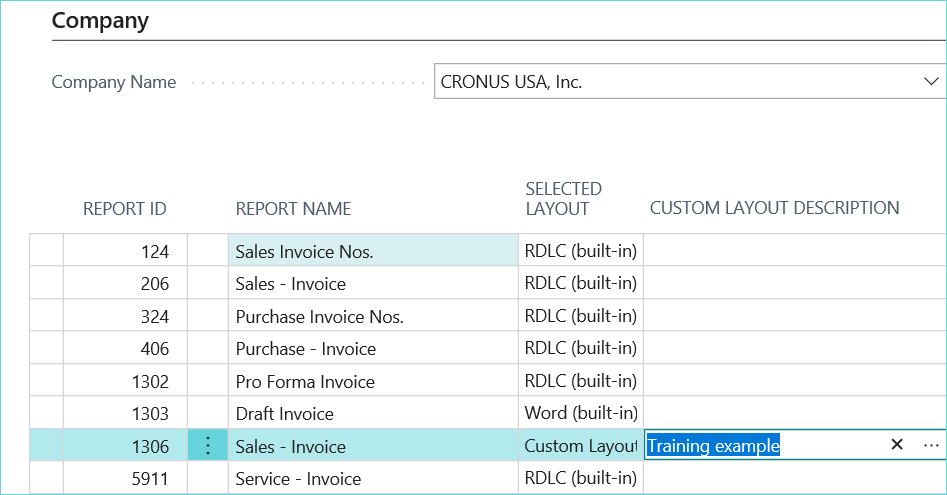
Highlight the report you would like to modify (in this example we will work with the Sales Invoice)
Select Process-custom layouts
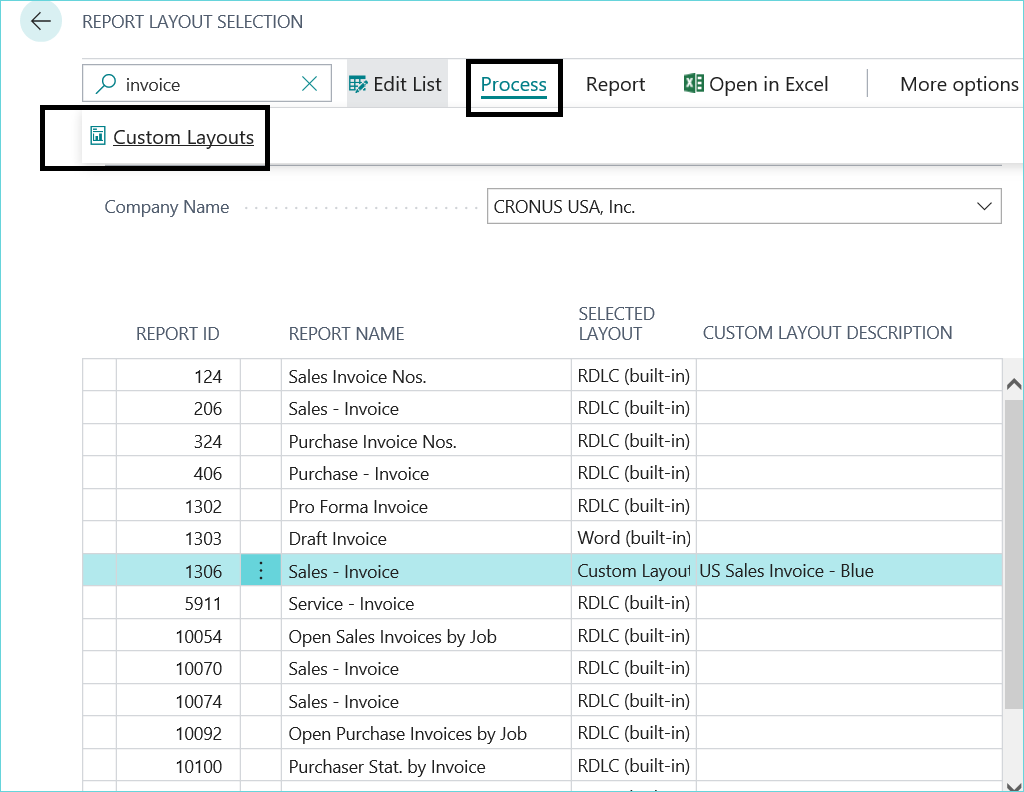
Click New and New again.
Be sure to turn on the option ‘insert word layout’ if you wish to modify in Microsoft Word.
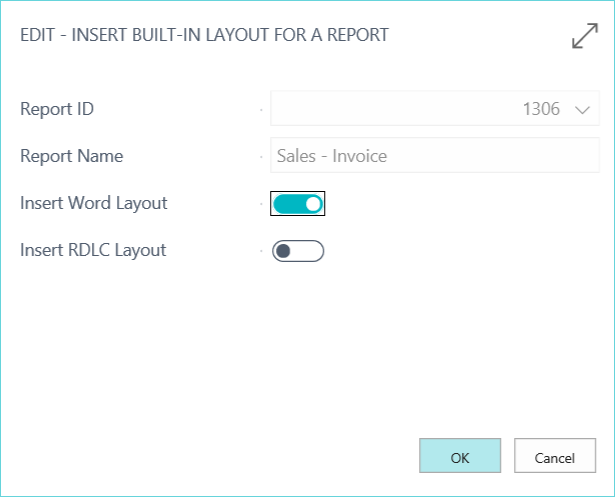
Next, click OK and then modify the description so you know which one you are working on.

Now go to Process, then Export Layout to save the layout as a Word file.

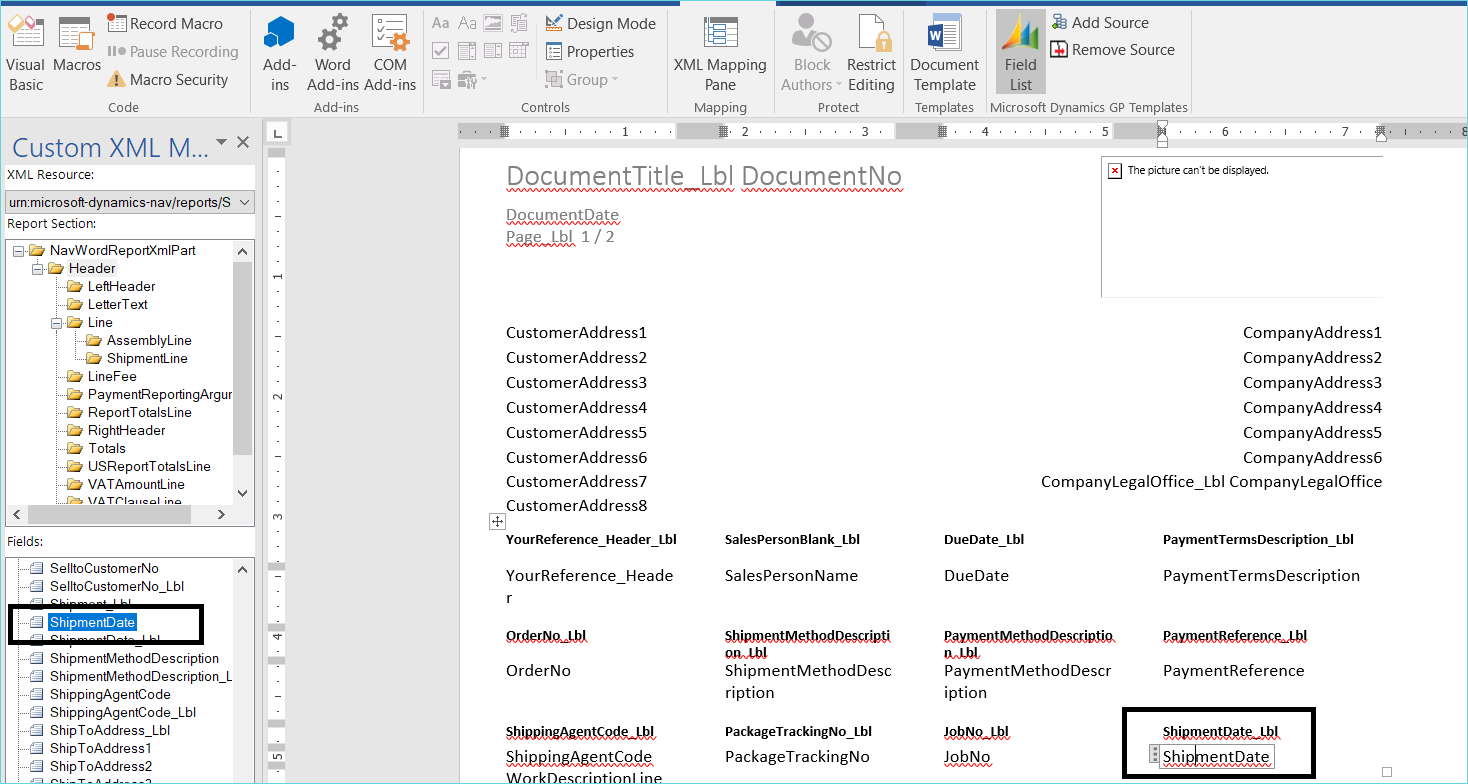
Open your Word file to modify the invoice. Be sure the Field List is enabled on the developer tab in your Word program. Next, select the source for the report (in this example, Standard_sales_invoice/1306).

Drag and drop the field you would like to add to the report. In my example, I’ve added the Shipment Date field to the invoice (drag and drop from the header field list on the left).
Save and close the Word file and then back in Dynamics 365 Business Central, select Process, Import Layout and browse to your Word file.

In the report layout selection window be sure to select the new layout as the selected layout if you would like it to print that one by default.
Here we can see the Shipment Date now appears on the modified invoice.

For more helpful tips and tricks using Microsoft Dynamics 365 Business Central, check out our great selection of blog posts.
