When you create a budget within Dynamics Nav 365 Business Central, you can export it to Excel and have full access to all the great spreadsheet editing capabilities. This will allow you to quickly fill out all line items in the budget, and then simply import the budget back into Dynamics 365 Business Central. Many times, we want to show the breakout between the different departments for that total budget amounts.
In this example, we will upload a departmental budget for the entire year. Here’s how.
To create a budget by dimensions go to Finance-G/L Budgets – New

Process-Edit Budget
The easiest way to upload dimension nav budget information is to upload the budget for a specific department.
I have chosen to have the G/L accounts as lines and periods as columns so I can work on the entire year budget at once for a specific department
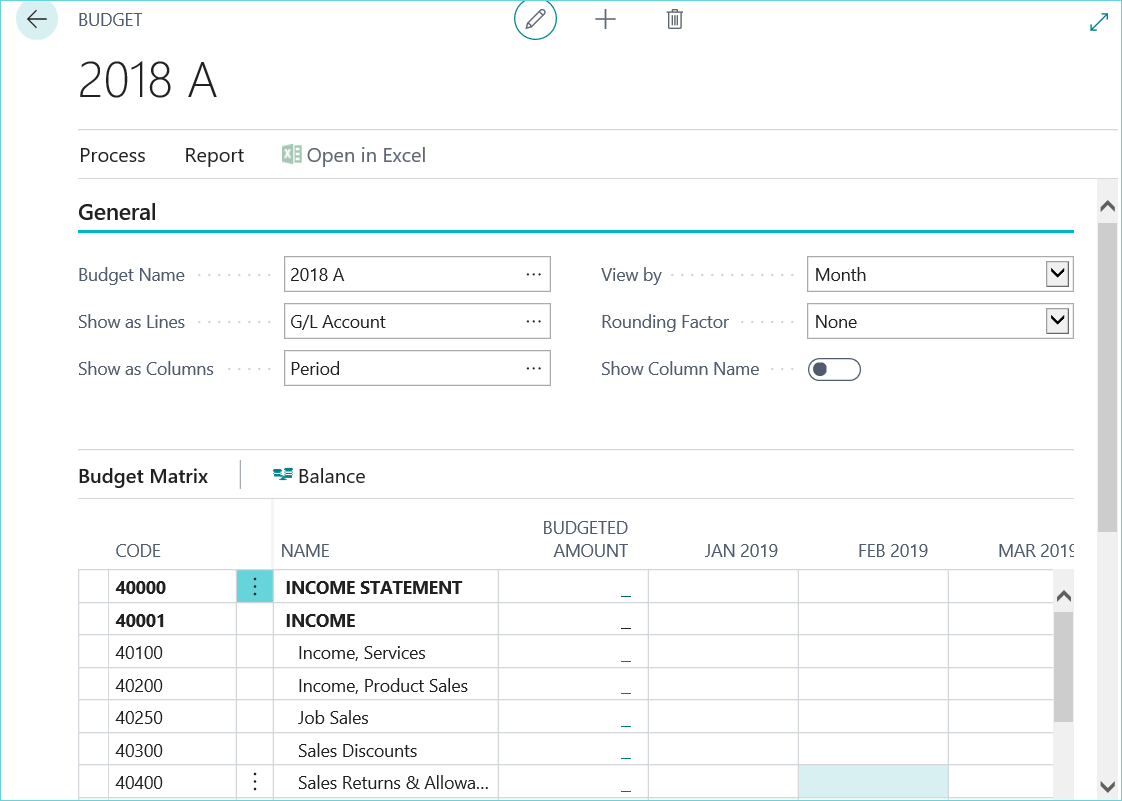
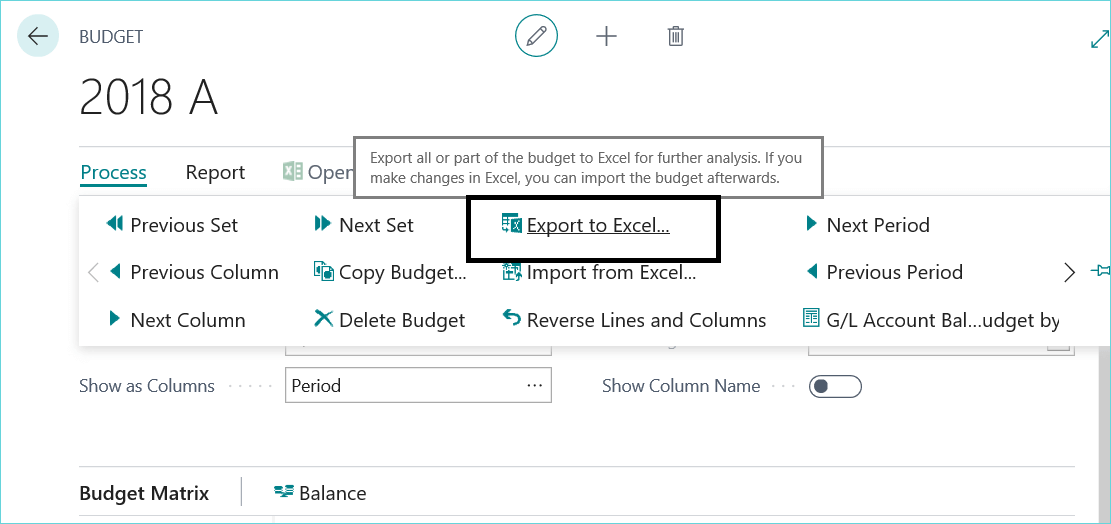
Next I will choose Process-Export to excel
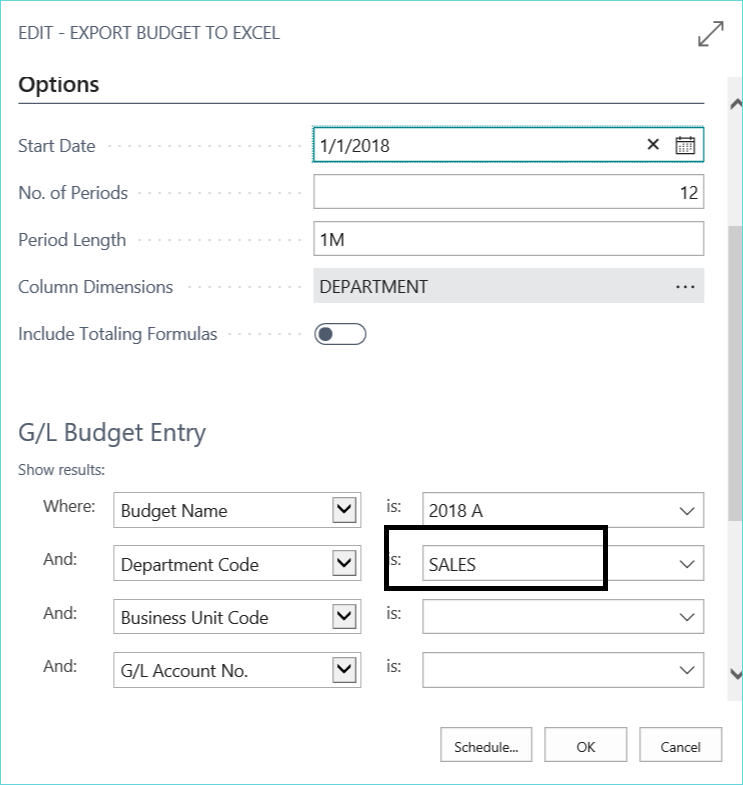
I’ve made the selections to start my budget on 1/1/2018 for 12 periods. I will also include the DEPARTMENT as the column dimensions.
Note – the department code is restricted to SALES
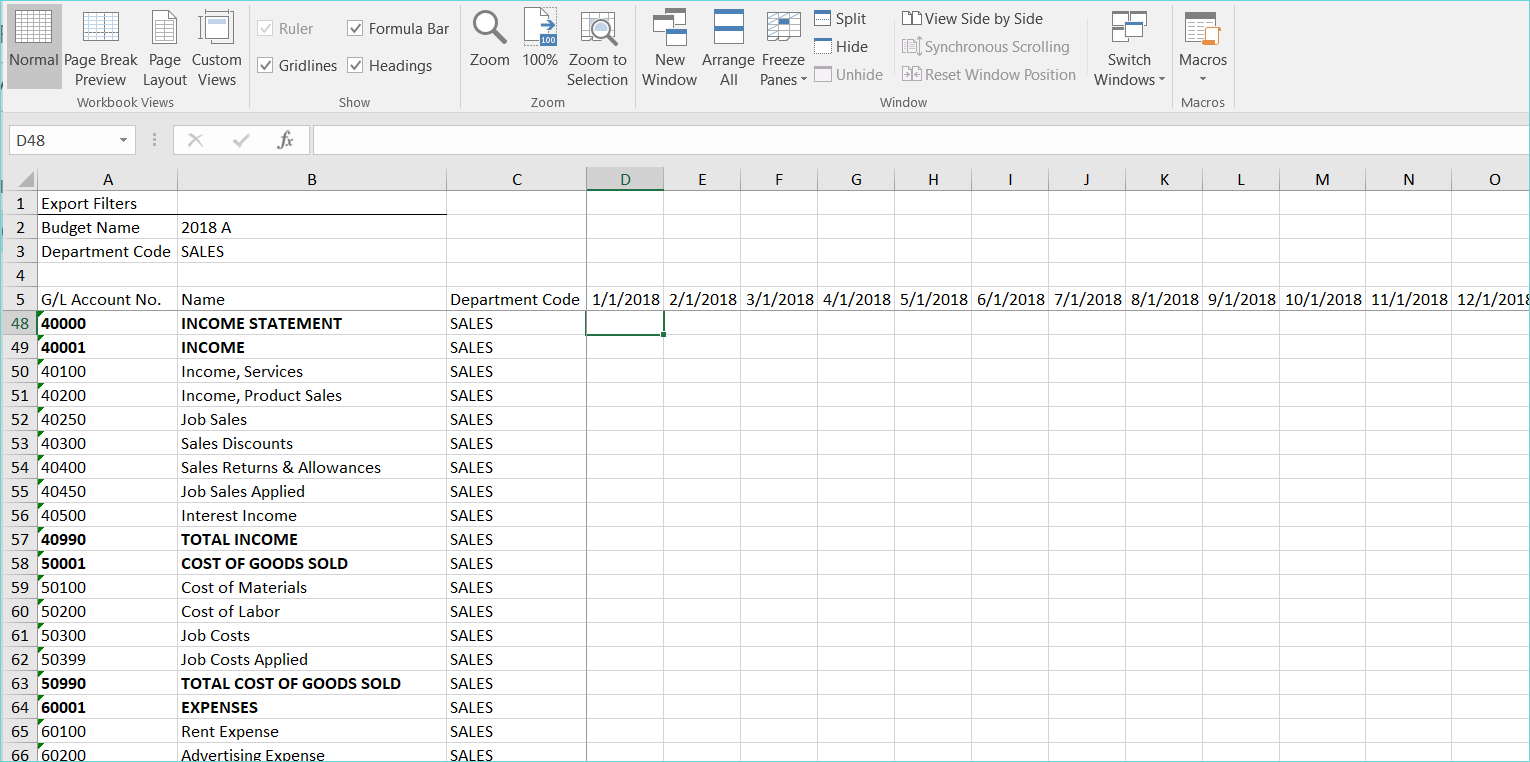
My excel template has now been created for me. I just need to populate the budget amounts for each account per period for the SALES department:
After I’ve populated the excel sheet I’ll go to Process-Import from Excel (I’ve chosen to replace all entries)
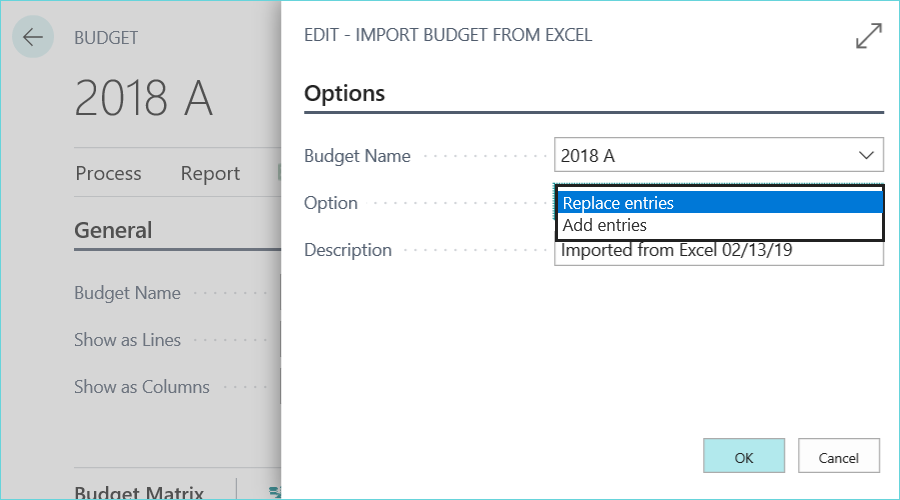
Upon selecting the excel file it will confirm the budget replacement and then provide a message with the number of successful entries that were uploaded.

I can then complete the same process for the next department.
After I’ve loaded the budget data for all departments, it will display in the budget window. I can click the link to see the details:
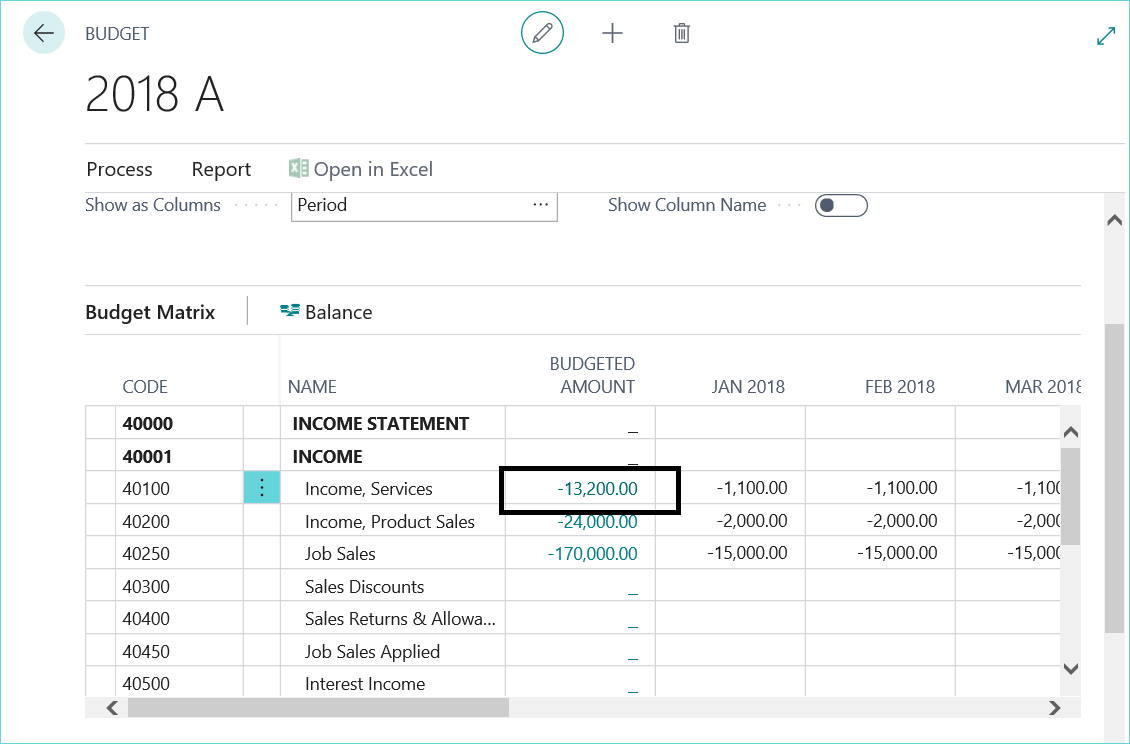
This will show the breakout between the different departments for that total budget amount:
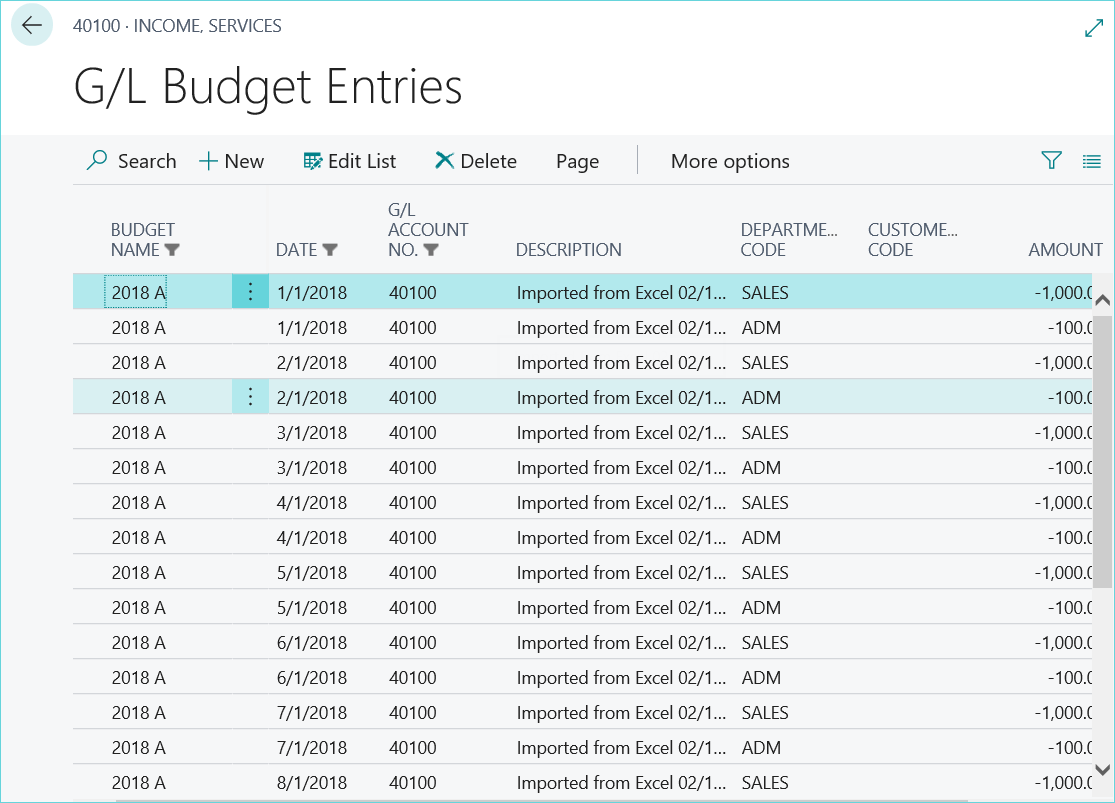
The budgeted amounts can now display on reports, including the account schedules.
For more tips, tricks, and shortcuts using Microsoft Dynamics 365 Business Central, check out our other great blog posts and subscribe!
