Have you ever needed to move a field from one Acumatica tab to another? You might want to organize your fields on the tabs to match your process. It will make your day go faster and easier. I’m going to show you how, without needing an Acumatica developer to help.
However, keep in mind that you can’t always move fields to entire new entities in Acumatica. There are many instances when the field you want to move will just not work because it goes against business logic. The data will lose its context and won’t connect to the correct field in the database anymore. If this is the case, you will want to get an Acumatica developer involved to help.
Gathering Information
Let’s move Tax Registration ID, in the Vendor window, from the Purchase Settings tab to the General Info tab immediately following the 1099 Box. To move the field, open the page you wish to customize (Vendor (AP303000)). Next, find the location where you want to move it to (in this example, the General Info tab).
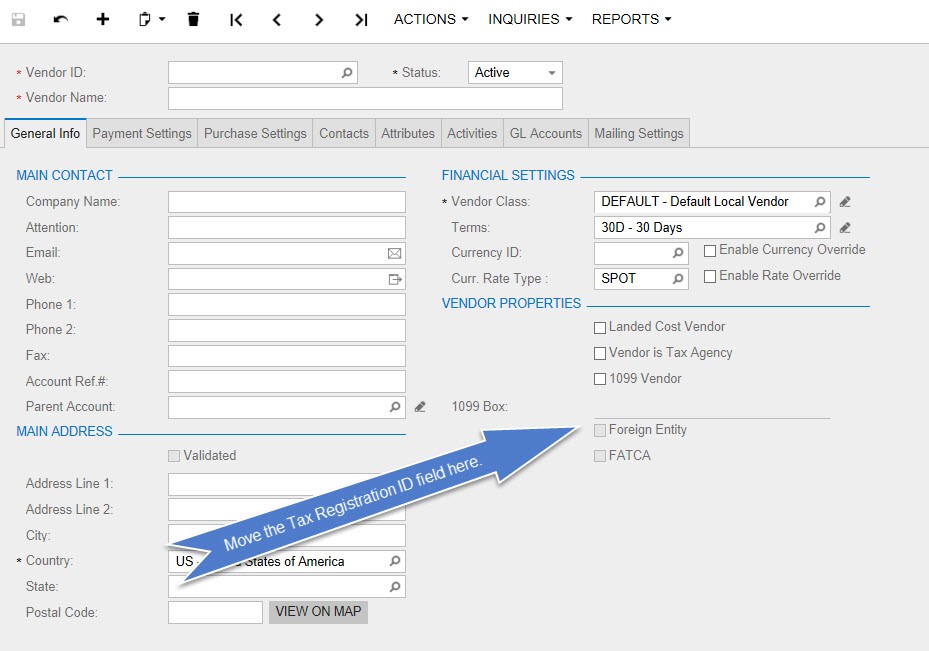
First, make note of the controls in the new location for positioning. Then use the Inspect Element option available from the Customization control in the top right of the screen and select the 1099 Box control. It will show us the Data Access Class (DAC) and the view used in this part of the page.
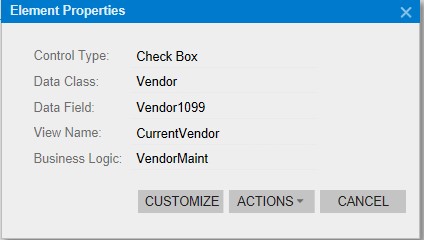
Note: In this example, the View = CurrentVendor and the DAC = Vendor.
Next, we find the field we are going to be moving. In this example, it’s Tax Registration ID from the Purchase Settings tab.
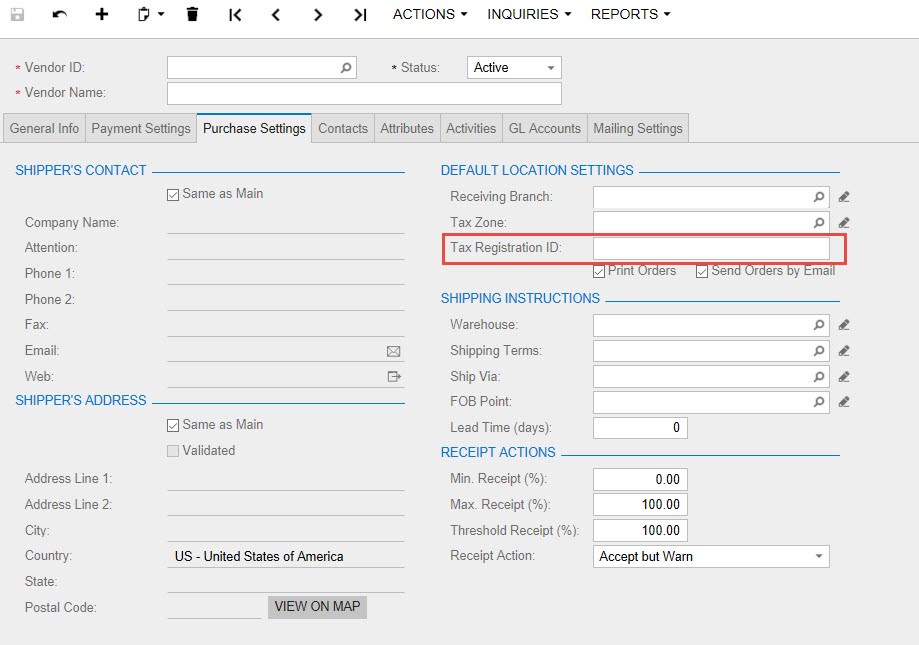
Using Inspect Element again, we see the following properties:
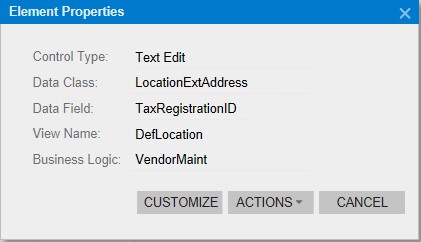
Again, we want to look at the View and Data Class. For this example, the View = DefLocation and the DAC = LocationExtAddress.
Moving the Field
To successfully move the field to a location where its DAC and View are not in use, we need to place it in a wrapper. With the information we’ve gathered, we have everything we need to move the field and successfully display and edit information in its new location.
Go back to the General Info tab and look at Inspect Element again on the 1099 Box control and then choose Customize. If this is a new customization, you’ll need to give it a name, otherwise you’ll need to select a customization package that this update will be a part of. Once you do that you’ll be taken to the Layout Editor showing the data fields on the tab you’re currently looking at:
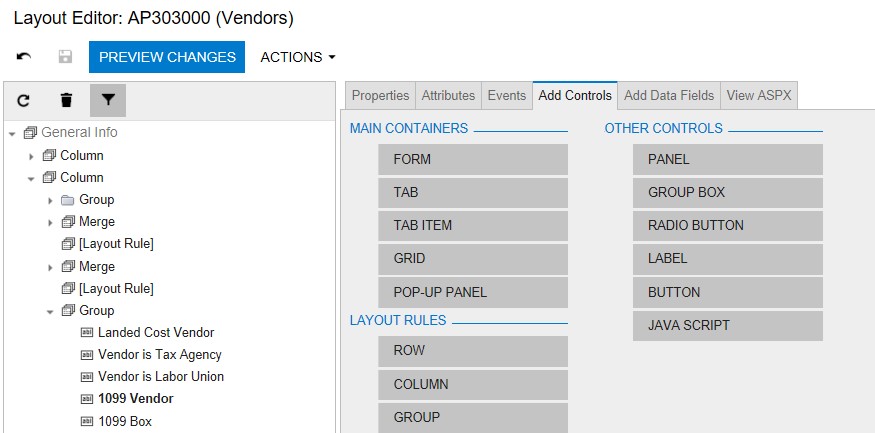
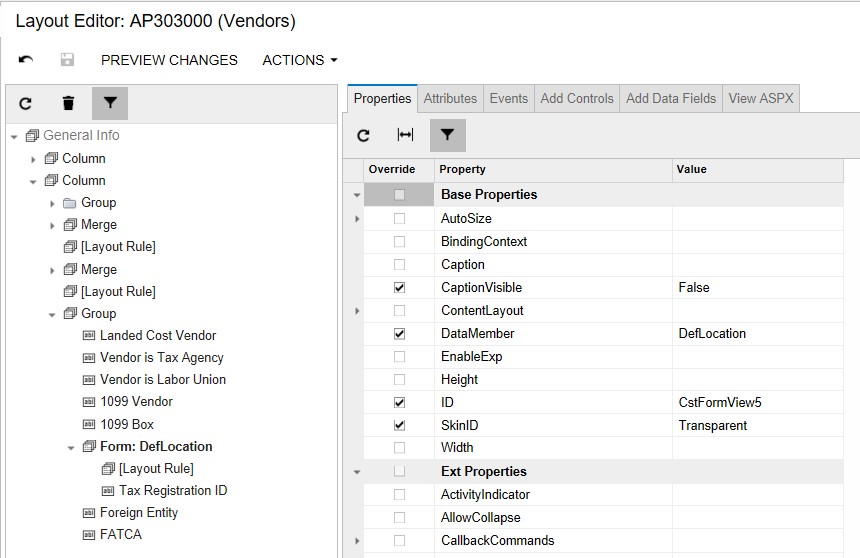
We then select the field we want to place our new control after and choose the Add Controls tab. We will need to add a Form. Editing the form, we set Caption Visible to False and Skin ID to transparent so there will not be visual evidence that this field was somehow distinct from the other fields on the tab. The important setting, however, is Datamember. By setting that to the view our data field needs (in this case DefLocation), we put the view in context so it can successfully bind to the data and allow editing, even though it would normally not be in context here. You can see the settings below:
Now, let’s place our field inside the form. With the new form selected in the panel on the left, we choose the Add Data Fields tab on the right.
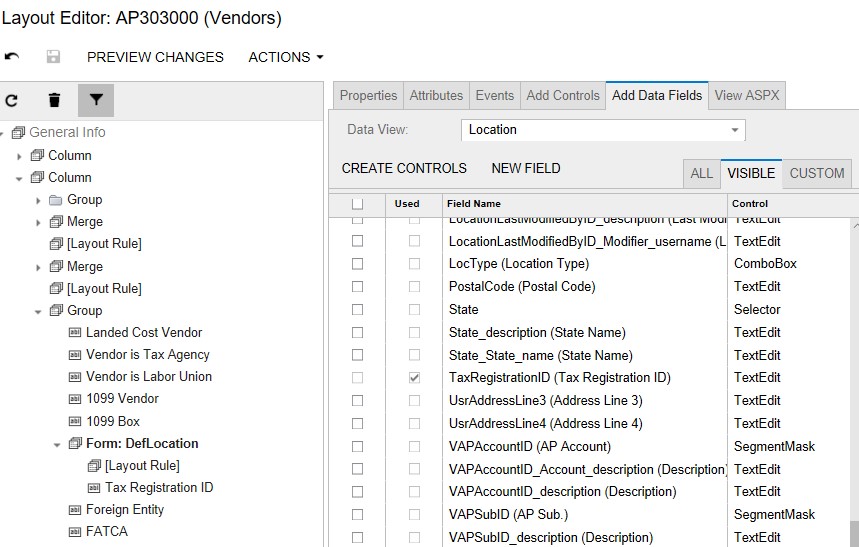
We need to make sure our correct Data View is selected in the drop-down on the top (Location in our case) and then scroll through the list of fields until you find what you’re looking for (Tax Registration IDfor us). Select the checkbox to the left of the name and press the Create Controls button located under the Data View drop-down box.
Layout Rule
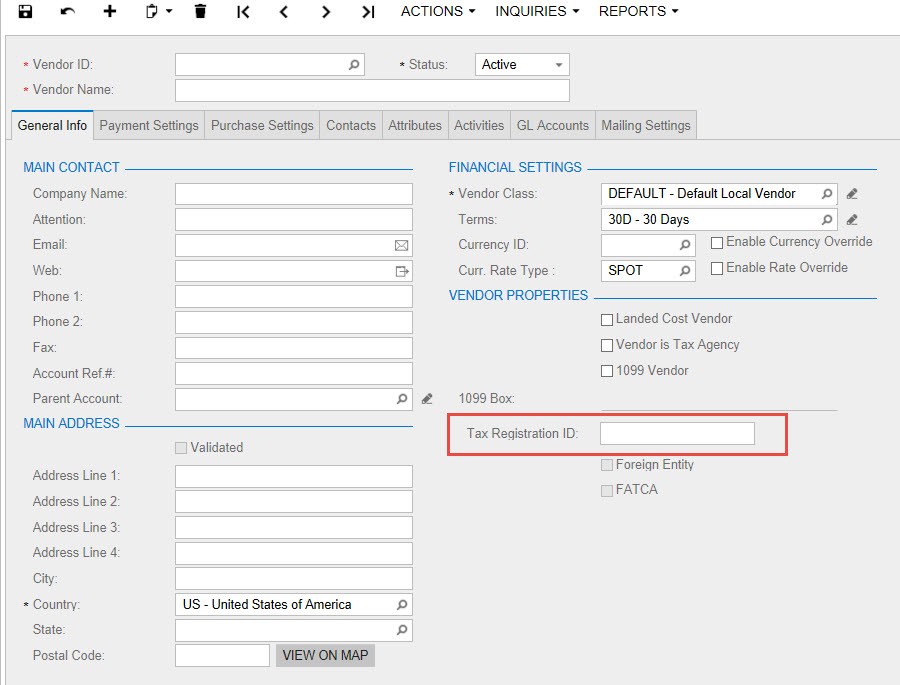
Once the control is created, you’ve done everything you need for the field to be editable there. You may notice that we placed a layout rule inside the container. Since the field exists inside a form, even though the form is invisible, it will line up differently than the controls around it. The layout rule was used to set the label width for the control such that it lines up with everything else on the screen and looks more natural, as shown below:
Once the new control is in place, best practice is to then remove it from its original location. This way you avoid having the field editable in two different locations. Simply navigate to the control in the Layout Editor and delete it.
Now the field is moved and will be displaying and updating correctly in the database. At this point you can save your customization or add any related business logic. Remember, when in doubt, ask your Acumatica developer about moving a field.
Want to add a new field to your Acumatica screen? Here’s a post on how to do that too.
If you have questions or need some assistance, visit our support page for more help.
