Our Marketing department here at Crestwood decided to try out Microsoft Teams. I was leery at first, but I have to say, overall, it’s AWESOME! The more I use Teams, the less time I spend searching for emails, files, or switching between screens. Microsoft Teams has brought almost everything into one window. It truly is the hub for collaboration with my marketing co-workers. We hold online meetings, chat, add notes, have running conversations, and add files. You can even add in additional views from your apps; such as, Trello, MindMeister, Evernote, Adobe, pretty much all the other online tools you might use. But, the best part – everything is searchable, you just enter a key word in the search bar and it finds everything! Let me show you some of the great things I do in Microsoft Teams.
The Basics
The navigation menu down the left side, gives you access to your Teams, Activity, Chat, Meetings, Files and Apps.
- Activity gives you a history of your conversations or things you are tagged in.
- Chat is replacing Skype. It’s the instant messaging tool.
- Teams are collaboration groups you belong to, or you can set up private areas. We have Teams for our Webinars, Sales Pieces, and Product Development. Read more on Teams later in this “how to.”
- Meetings coincide with your Outlook calendar. You can schedule and join online meetings right within Teams. One difference from Skype, is screen sharing. In Teams, you can only share one screen at a time when presenting. That might be good or bad for you – I’m still undecided.
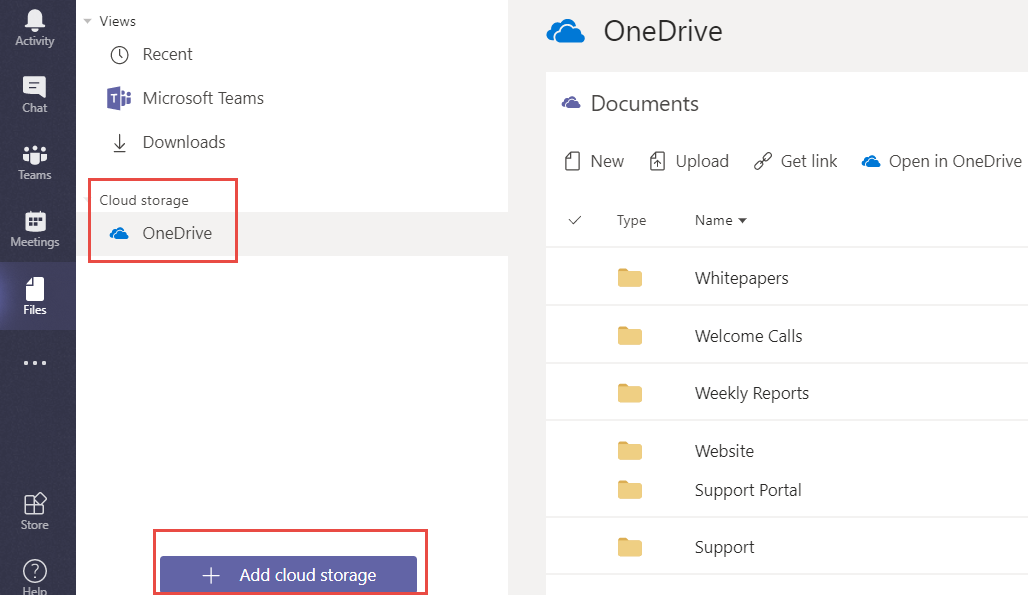
- Files allows you to do many things.
- Look at recent files that you have been working on that are saved to the Cloud.
- Review files that you have uploaded to Teams under each Channel.
- View files that you have downloaded from others.
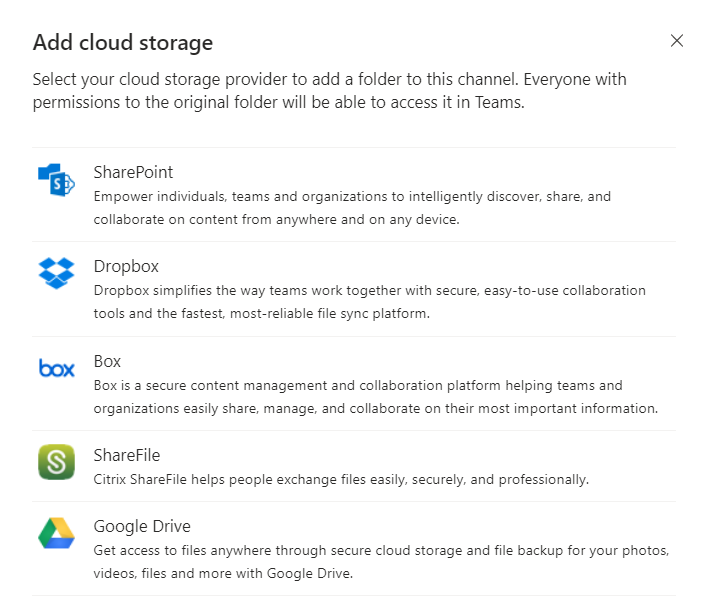
- Your OneDrive is automatically synced with Teams, but you can also add other cloud storage to your Teams, such as Google Drive, Dropbox, Box etc.
- Get App – Add your mobile telephone number to get Teams to go on your phone.
- Store – select from hundreds of apps to connect your Teams to extensions that will help you work more efficiently.
- Help – Allows you to browse topics, see what’s new in Teams or provide feedback
Working with Teams
To begin with, you will either make a Team or be added to Teams at your business. For example, I have multiple Teams I belong to.
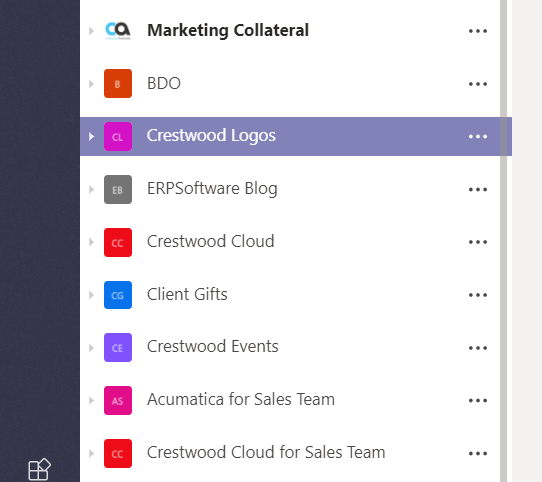
Then, within each Team are channels. Channels are a way of organizing the projects within your Team.
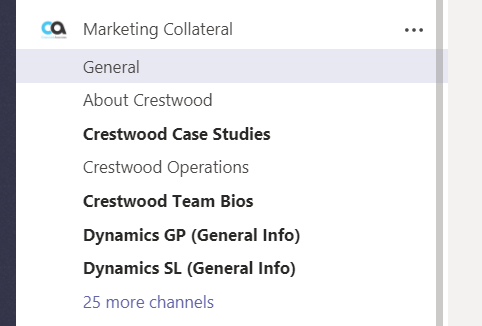
When determining whether to set up a Team or a Channel within a Team, think of the people you need involved. You designate members at a Team level. So they will see all the information in all the Channels associated with the Team.
We learned this through trial and error. We had set up a general Marketing Team, but then anyone we added as a member could see all the information in any of the channels. It was overwhelming.
Here are the general components for a Team:

In the Members section, you can add additional members and assign members to be owners or general members. Owners are allowed to make setting changes where as Members are not.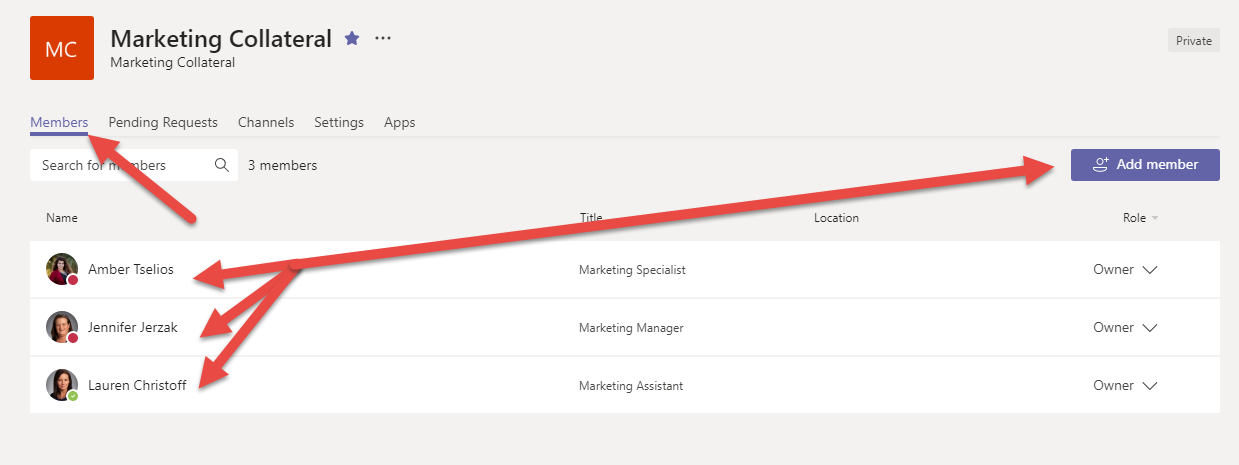
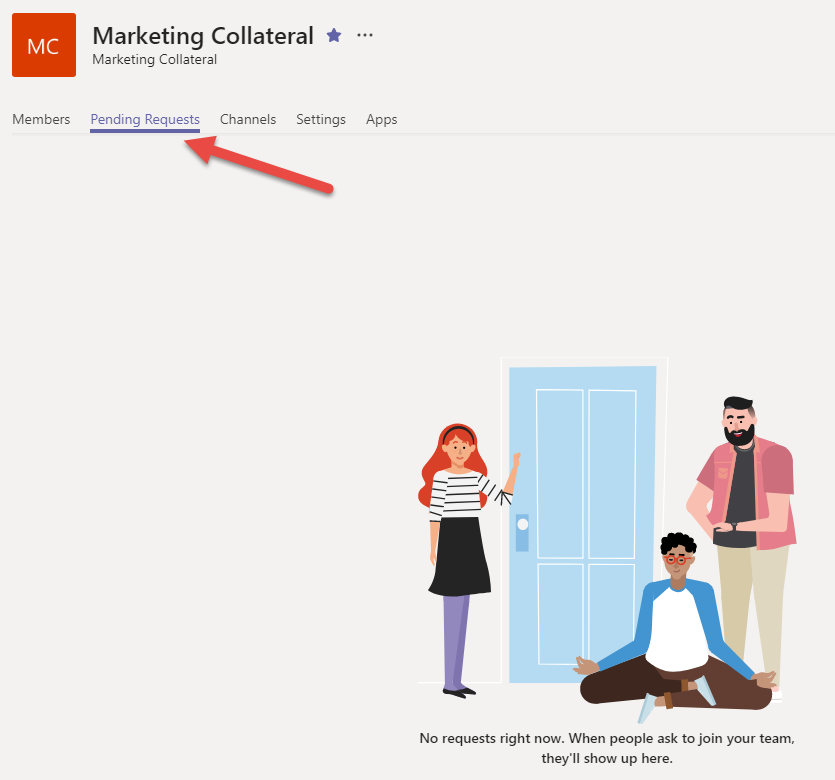
The Pending Requests Section will show members who requested to join your team.
The Channels section allows you to view all of the Channels within that Team, it also allows you to add additional Channels and mark individual Channels as Favorites.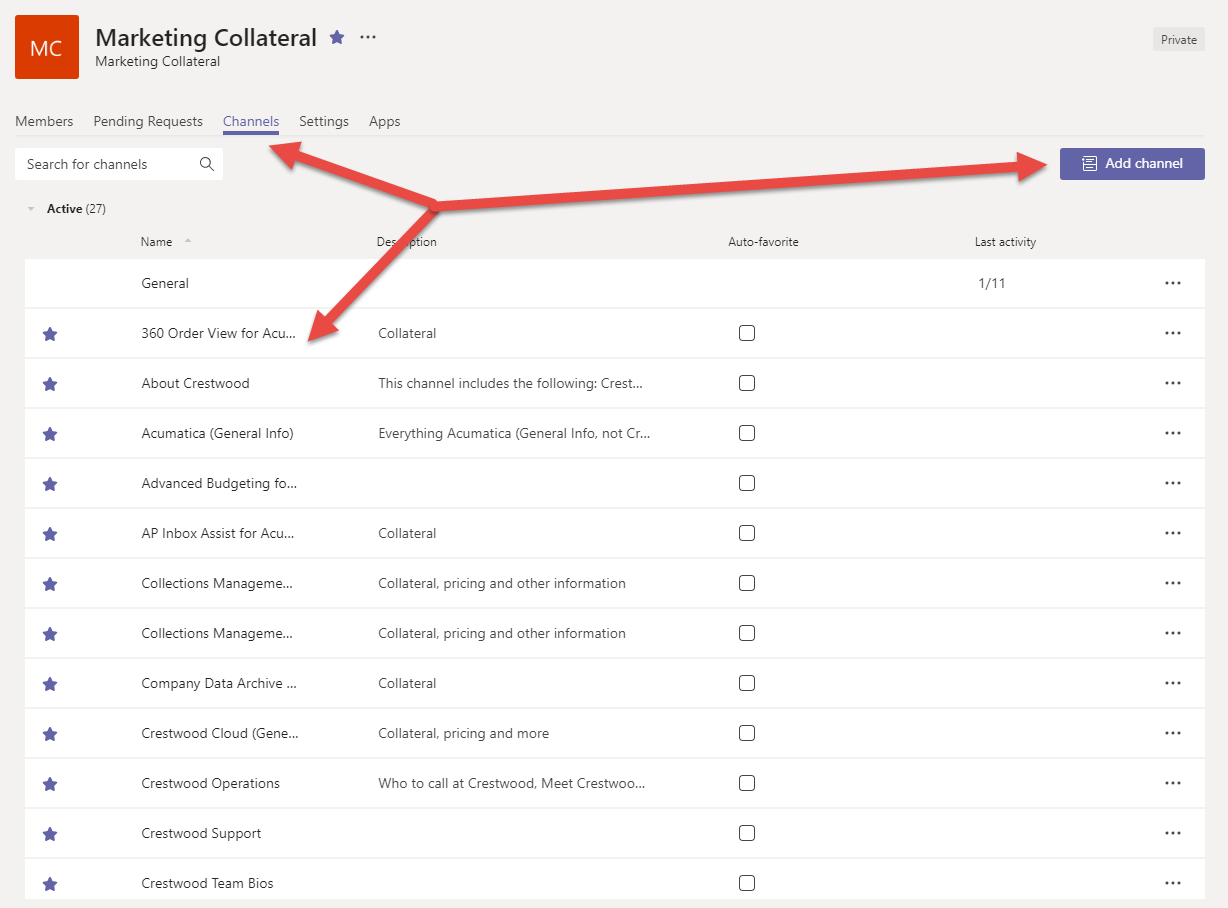
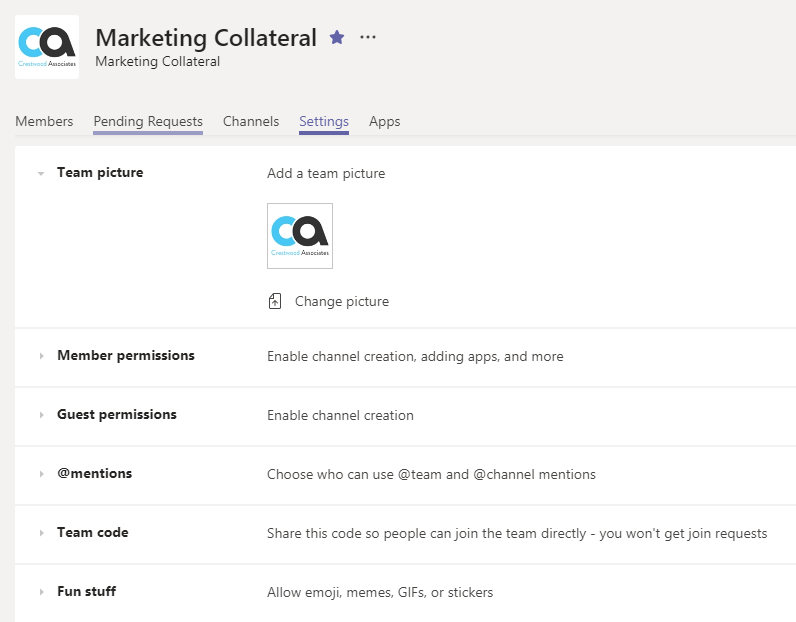
The Setting menu is where the owner of the Channel can set specific rights for each individual member. I have broken down each section here:
- Team Picture: Add a team photo or logo
- Member Permissions: Enables channel creation and updates, delete and restore channels, add apps, and more
- Guest Permission: Allow creating and updating channels, allow guests to delete channels
- @Mentions: Choose who can use @Team and @Channel mentions
- Team Code: Obtain codes to share with people to join the team directly – you won’t get join requests
- Fun stuff: Allows you to add emoji, memes, GIFs, or stickers
This is how you change the plain colored box for the Team to your logo or any image you desire.
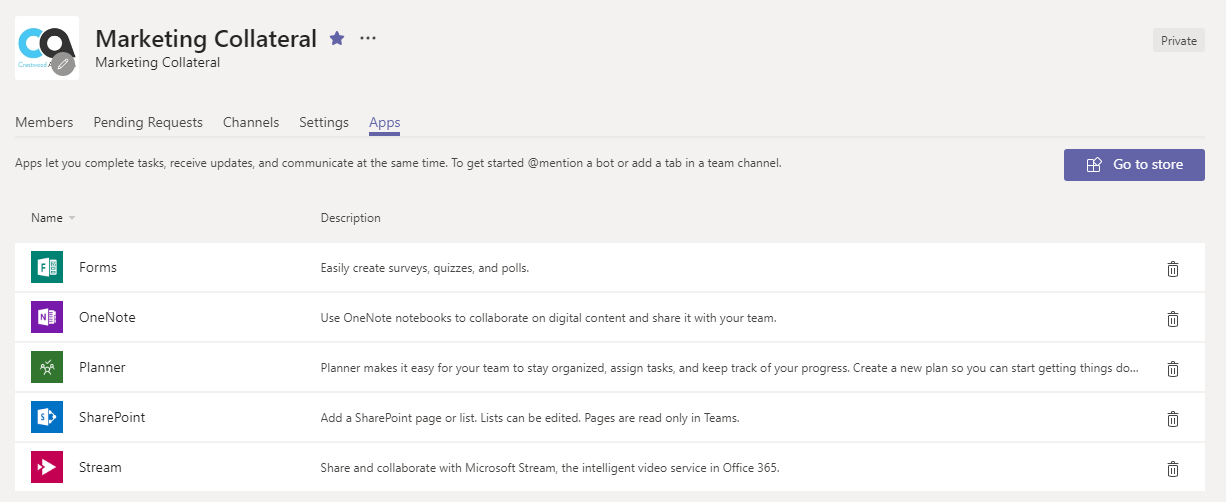
The Apps setting allows you to add apps to help you with your team collaboration.
You can also access general Team information with the ellipses to the right of the Team name.
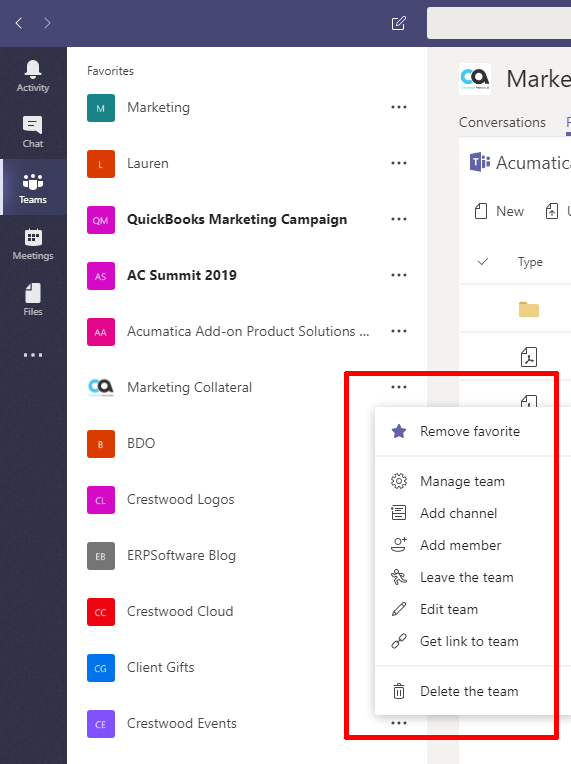
The pop-up menu will allow you to add and edit your team. You can do things such as:
- Add/Remove the Team as a Favorite: add the most important channels as favorites
- Manage Team: Assign members as owners or just plain members to the team
- Add Channel: Create a new Channel within the Team
- Add Members
- Leave the Team: Exit the team
- Edit the Team: Change the title of the team and /description
- Get Link to Team: Copy Team link to invite others to join
- Delete Team
Working with Channels
Each Team can be broken down into individual pages or sections where you can collaborate conversations, files and produce Wiki pages. These are called Channels. In the example below. The Marketing Collateral Team is broken down in sections or subcategories such as “About Crestwood,” “Crestwood Support,” etc. Each Channel under the Marketing Collateral Team will hold everything and anything pertaining to that section.
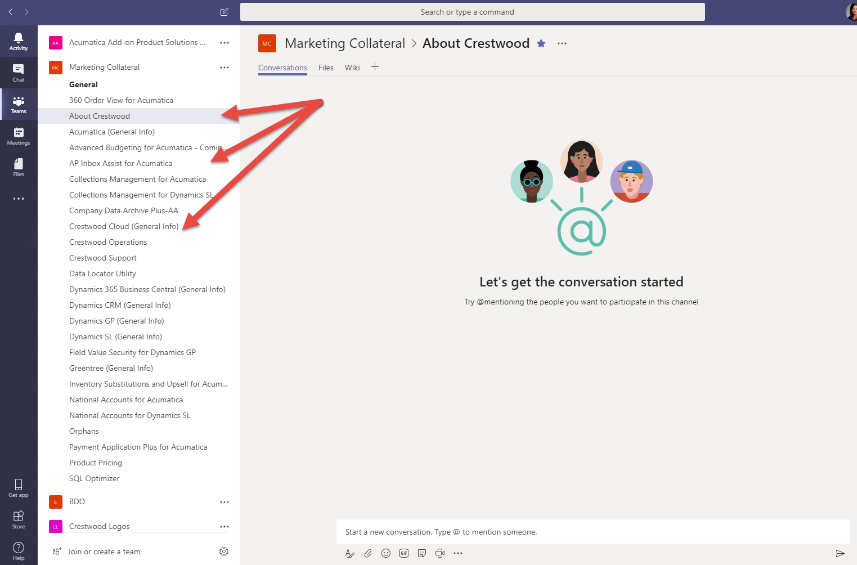
Conversations – Talk with Team Members
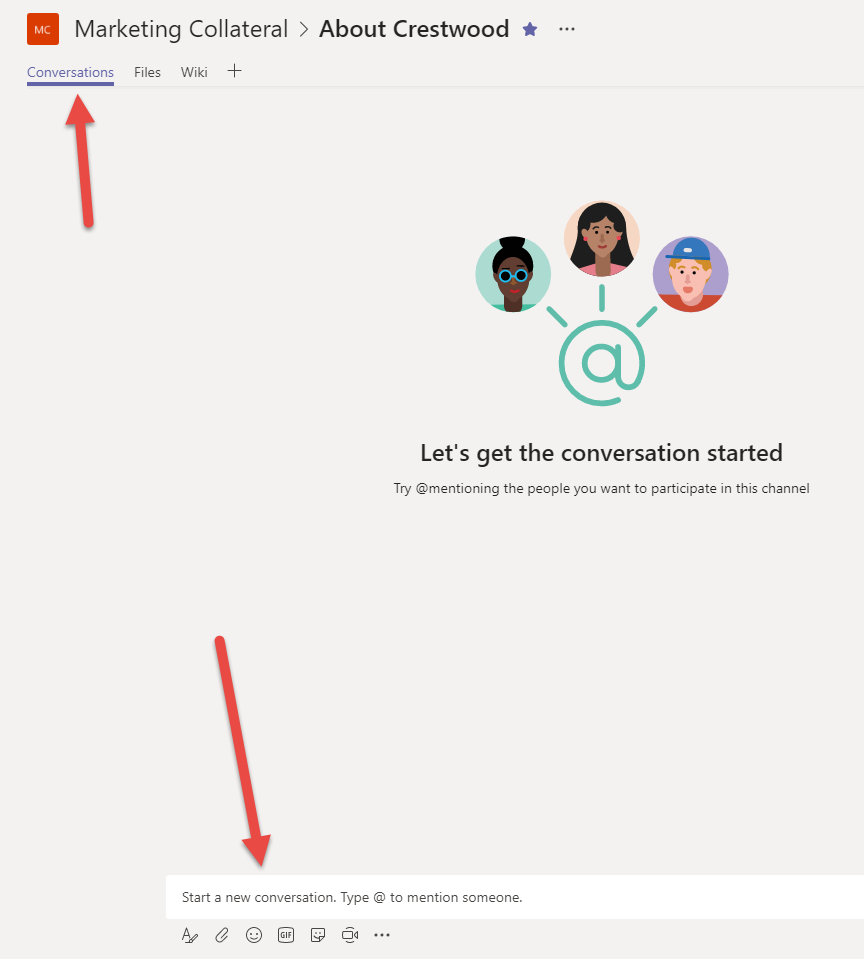
In a Channel, under the Conversations menu item, you can start a message at the bottom of the page to the entire group, or you can tag a certain individual within the group by typing the “@” symbol and typing in the name. By tagging a person, they will get a notification pop up on their screen and in the activity area, indicating they have a message. Others not tagged may see the conversation if they happen to be on the conversation screen, but will not receive a notification.
A Walk Through Files
Under the File Menu item, you can store or share any file with the members of that team/channel. Files can be separated into individual folders or left as individual files. All these files are also accessible through SharePoint online.
By clicking on “New” at the top, you can create a new file folder or select whether you want to create a Word, Excel, or PowerPoint Presentation within Teams.
You also can upload files from your computer, and like Sharepoint, copy the link to share the files with others.
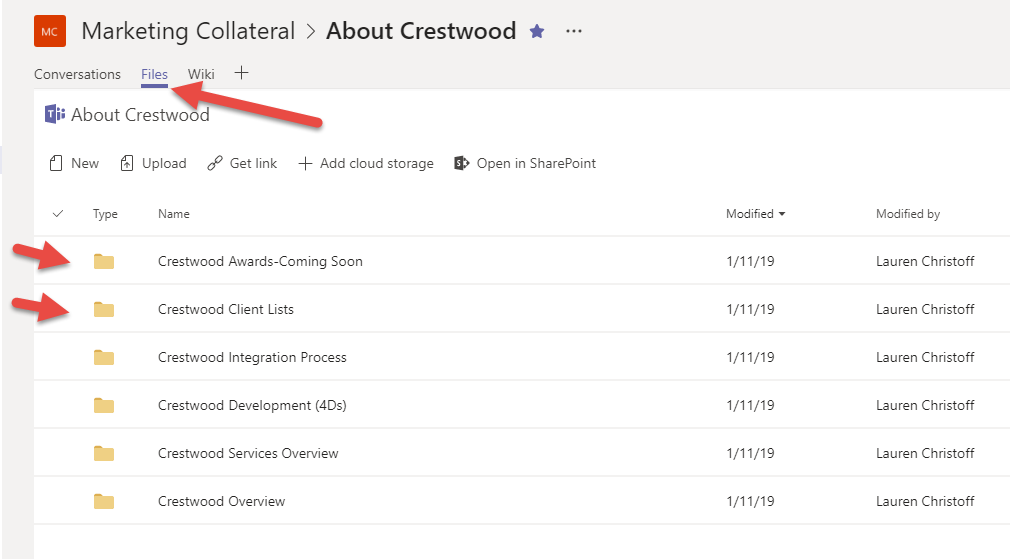
Additionally, accessing cloud storage is easy. “Add cloud storage” at the top allows you to connect to Sharepoint, Dropbox, and more.
Whatever is a Wiki?
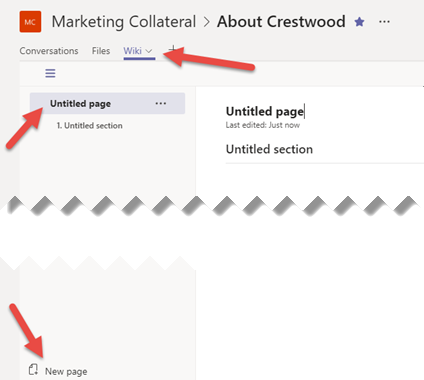
Wiki is the area where you can collaborate ideas, make lists, and take notes. Within your Wiki you can create separate pages for different topics, tag individual team members, add graphics, and more.
I hope this helps to get you started on Microsoft Teams. Like any new system, play around, spend a little time with it. I assure you, you’ll love it too. To learn more about Teams, check out the Microsoft Teams Training Videos.
