From the Acumatica S130 course, Data Retrieval and Analysis, you learn that “a tabular report is a report that displays information from the database in a format consisting of multiple columns and rows.” You can use a tabular report, for example, to see a breakdown of your sales by Customer and Inventory Item Class. In this case, the rows would be Customer ID, the columns would be Inventory Item Classes, and the cell at the intersection of each row and column would be the total sales amount of the Class by Customer.
The advantage of using a Tabular report approach versus the traditional format in Report Designer is that the Tabular report will dynamically add the necessary columns for the Item Class included in the report, so you don’t have to hard code every Item Class possible value.
Here’s how:
A quick summary:
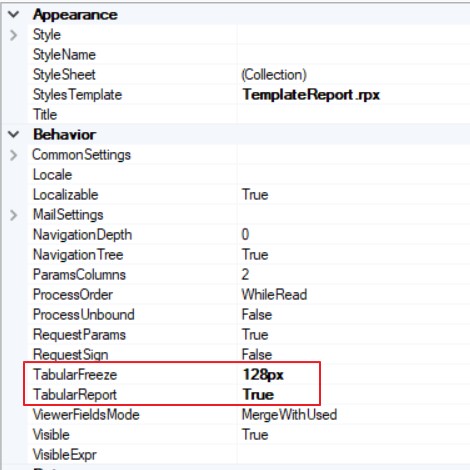
- The key settings are TabularFreeze (in pixels) and TabularReport (True)
- Tabular reports render dynamic columns for the data field defined as a top-level Report Group
- The additional Report Groups are used as Rows in the report.
- A select field (e.g. Sales Amount) is used in the Group with a SUM formula.
Let’s get technical
Compare the results when run the report for two different date ranges.
A short range includes seven Item Classes:

A longer date range includes sixteen Item Classes:

Selecting the Data
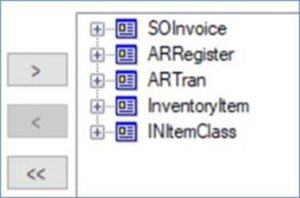
In the Report Designer’s Schema Builder, select these five Data Access Classes (DACs):
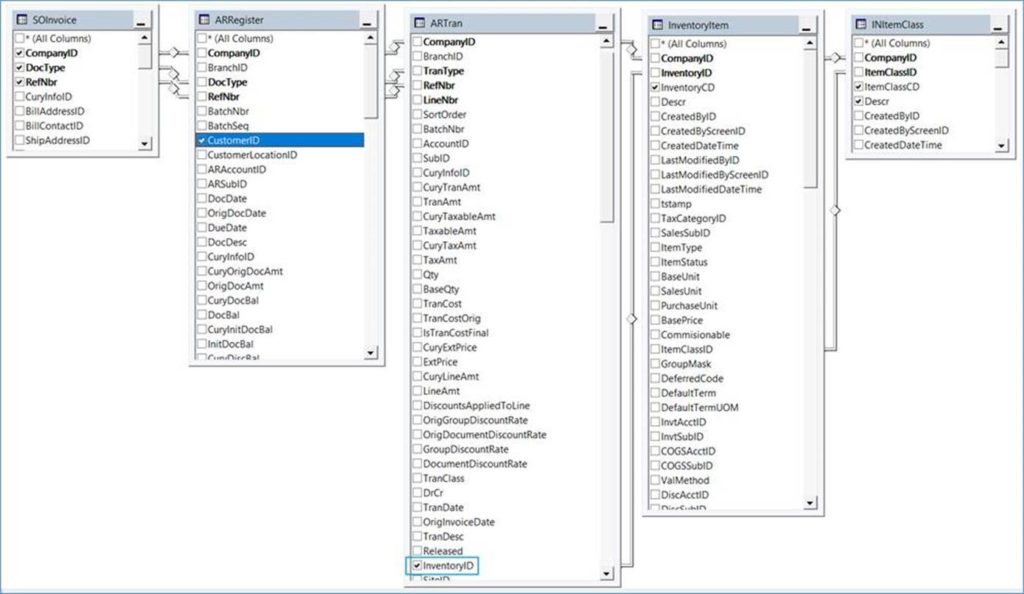
The relationships between these DACs is demonstrated in this SQL Query Designer schema:
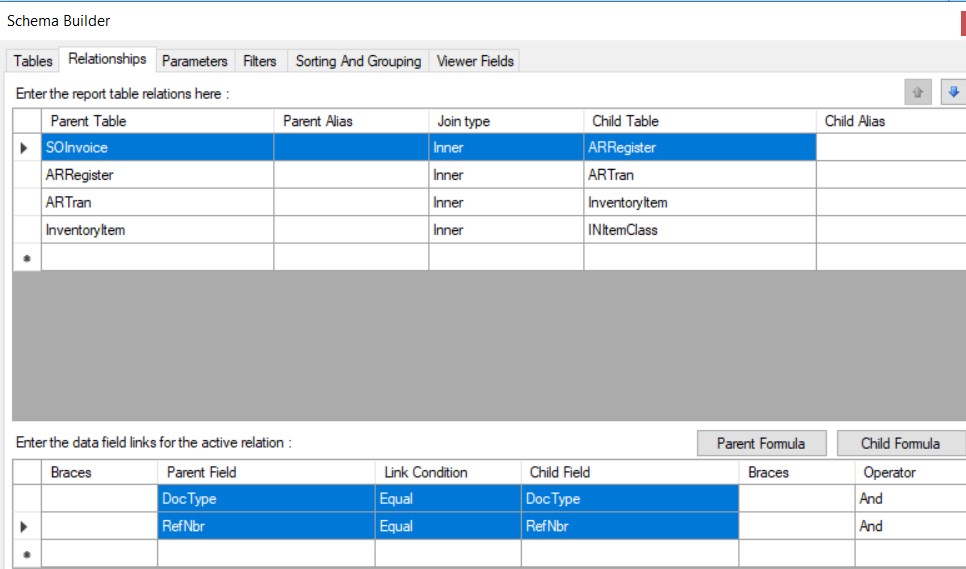
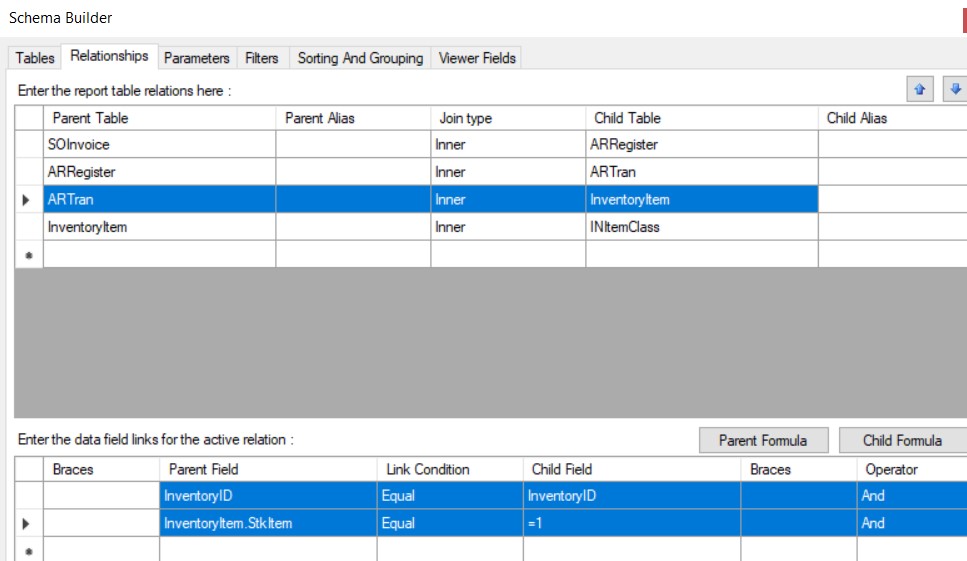
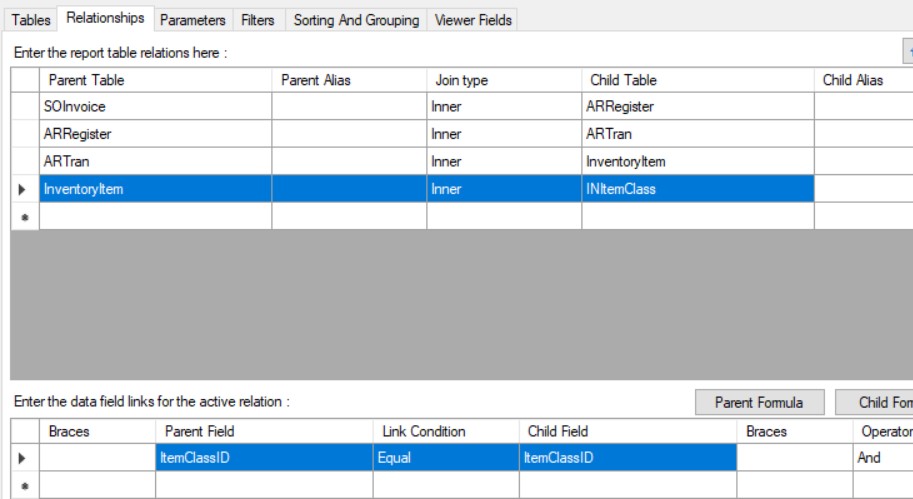
The relationships in Report Designer are:
SOInvoice > ARRegister:
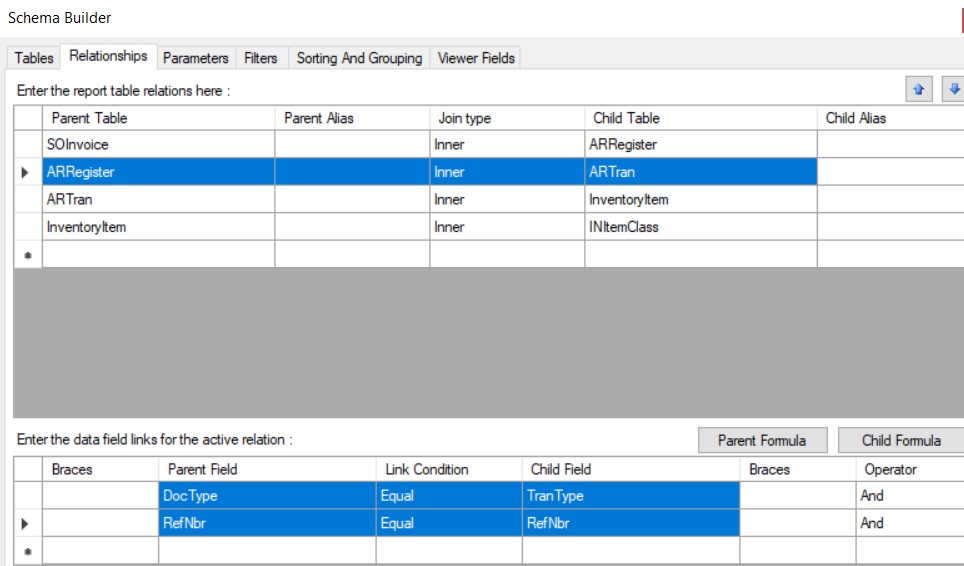
ARRegister to ARTran:
ARTran to InventoryItem:
InventoryItem to INItemClass:
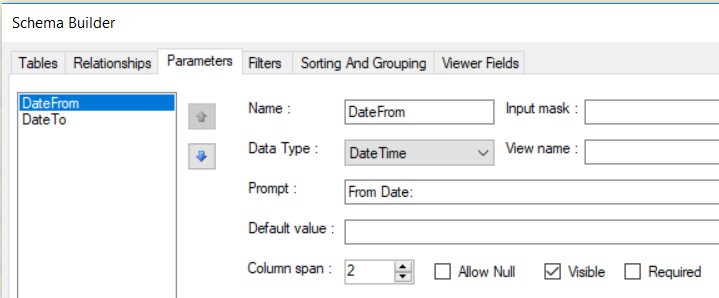
Parameters
We will add two date parameters to filter the results by date range:
Next, the filter is set to use the ARRegister document date.

Report Groups
The top-level group is always used for the report-level dynamic columns, and the second (and subsequent) groups are used as rows in the report.
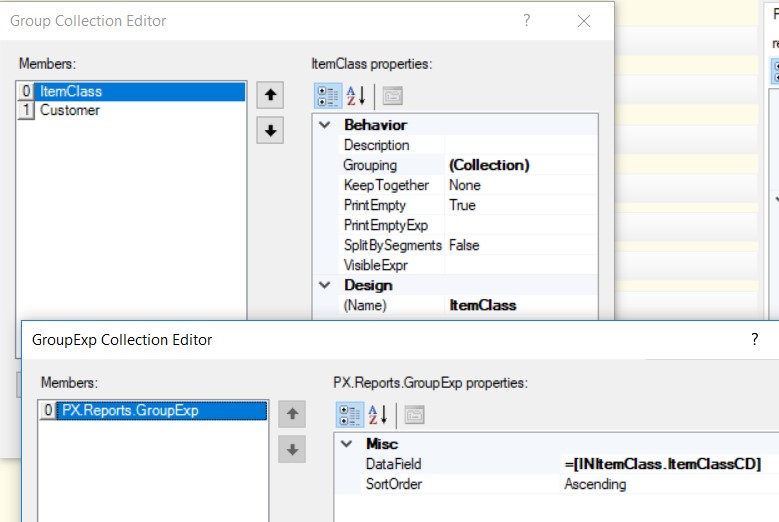
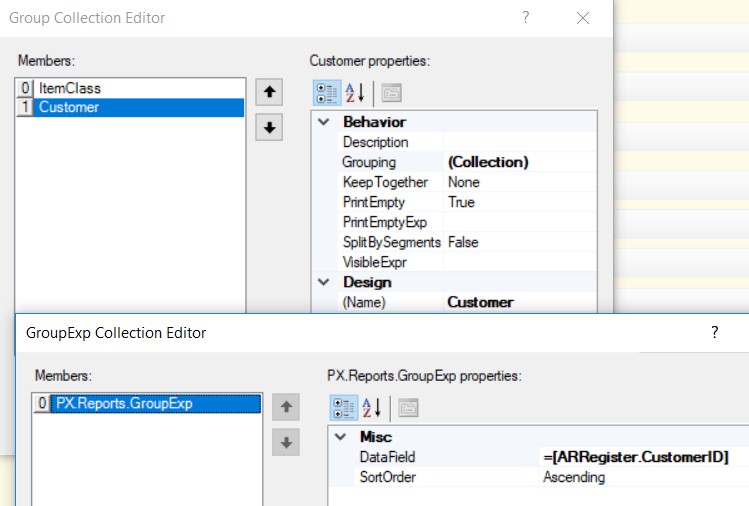
To calculate the total sum of sales of each Item Class per Customer, we will group the report by Item Class and Customer.
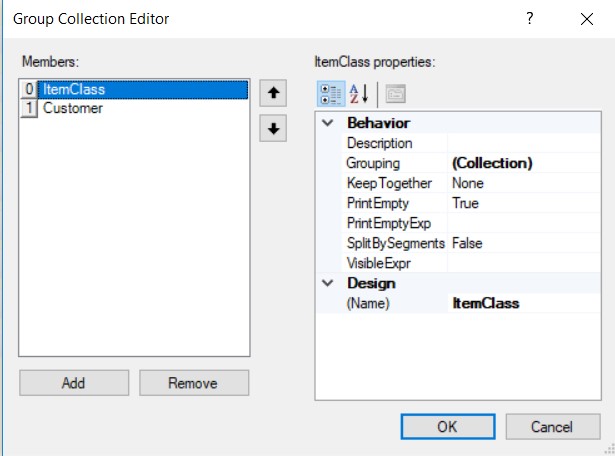
For the Item Class:
For the Customer Class:
Tabular report property settings:
On the Properties tab, select the report1 Report object from the drop-down list to select the report form, and specify the following settings:
- TabularReport: True
- TabularFreeze: 128px
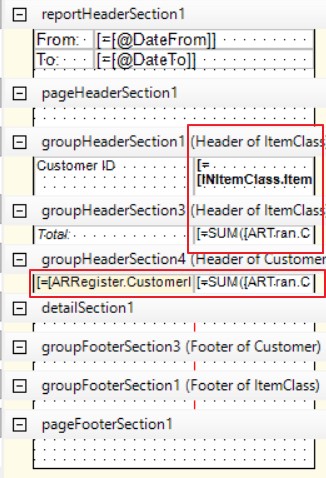
Based on the value of TabularFreeze, a red line appears on the report layout. The line passes through all the group headers, the group footers, and the detail sections of the tabular report. Anything that is beyond this red line will appear as new columns instead of new rows.
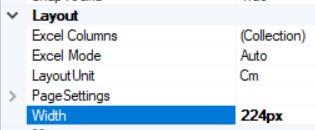
We will also set the page width:
Once the report layout is updated based on the TabularFreeze settings, we proceed to add TextBox controls for the Item Class header and the sum of sales, using this expression:
=SUM(IIF([ARTran.DrCr]=’C’,1,-1)* [ARTran.CuryTranAmt])
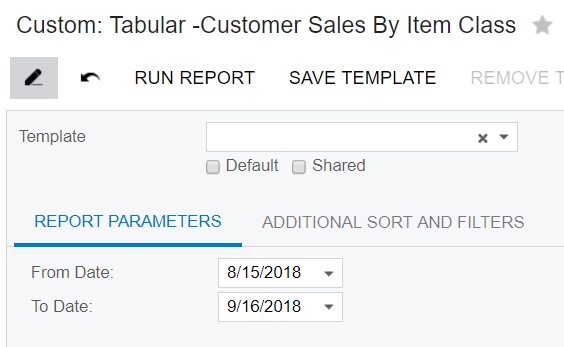
Save the report, set it in the Site Map and a Workspace, and you can select a date range and run it:
Give these tabular reports a try in Acumatica. You will save yourself quite a bit of time. By using parameters, grouping, and report properties, the resulting report is sleek and easy-to-read, and will be available in the Report Designer for future use. If you have questions or need some assistance, visit our support page for more help.
