
Adding a new data field to various forms in Acumatica is usually simple and quick. The system gives you countless options to choose from, with the ability to arrange them in whatever order is most intuitive for your company. But what if there is a specific field you need on a form that isn’t already listed in the SQL tables? Still simple: just create your own using the Customization Projects function.
Before you start, though, be aware: adding fields to Acumatica through the use of the customization button only allows you to add a static data field. Which means you’re missing out on things such as:
- Workflow
- Business Logic
- Making the new field required
- Adding a default value
So, if those things are important, you need to get a developer involved to help.
Is it an Attribute?
Tip: Check the Attributes tab first. Are there any Attributes that might work rather than adding a field to a screen? Many times people forget to check there.
If there isn’t an attribute and you want to add a new static field to a screen, you need to go into customization and create a new project.
Don’t forget that all users must be signed off before publishing a new customization project.
After you check these two things, you’re ready to add your field. Here’s how.
Step 1: Opening the Layout Editor for the Form
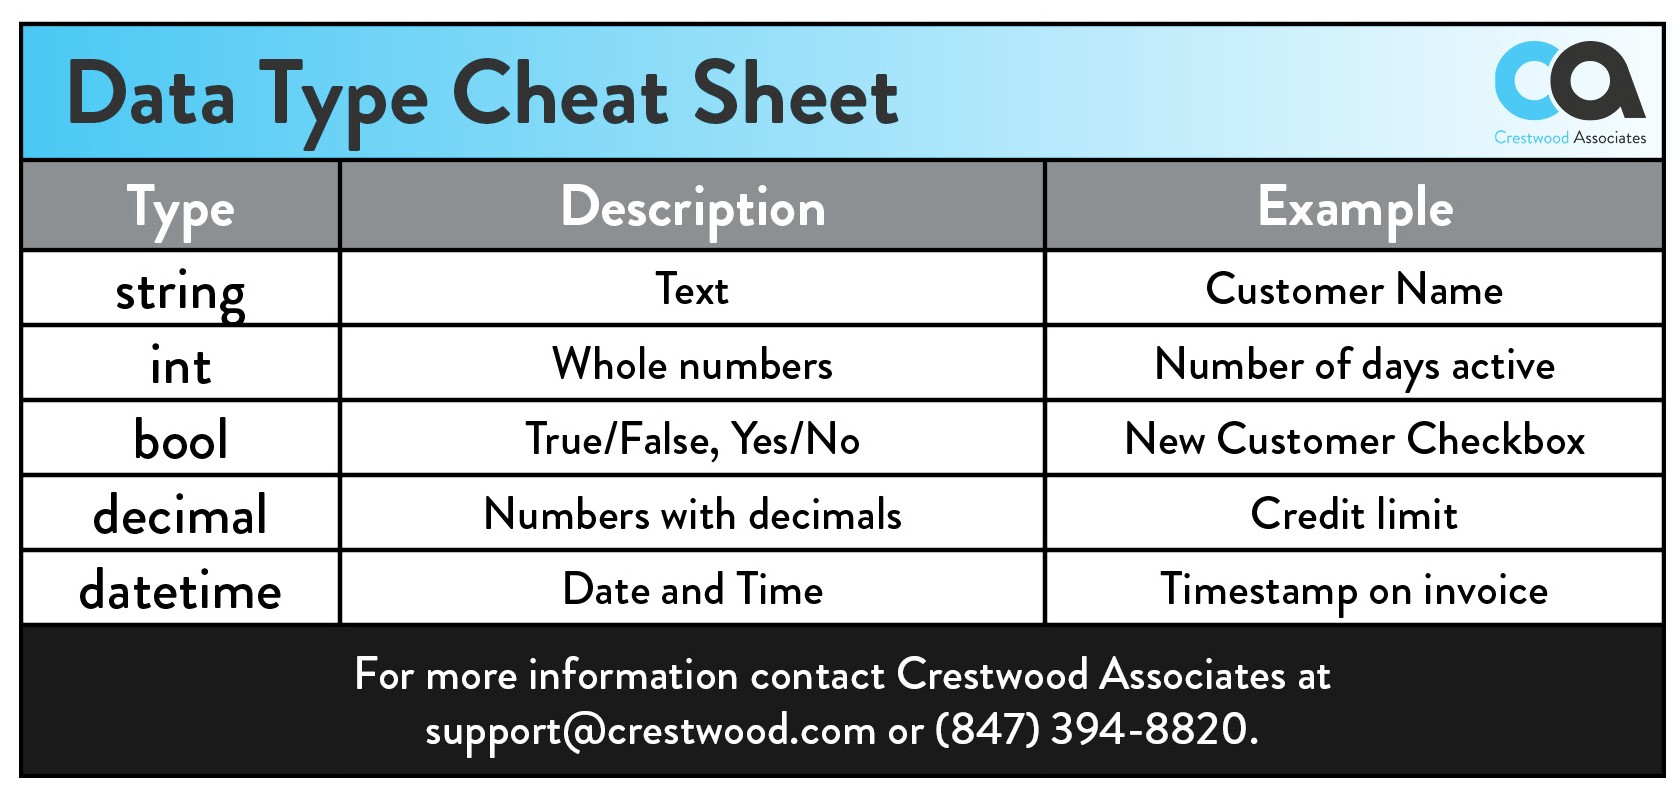
This particular example will demonstrate how to add a check box to the Vendor Screen, but you have the ability to add any string data field for text, decimal or integer field for numbers, Booleans, or others (see below Step 2 for a cheat sheet). You can even add a drop-down list.
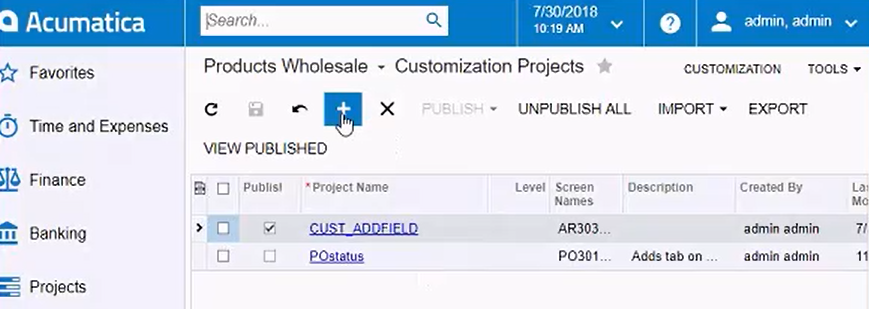
Start by opening a new Customization project. Open up your “Customization Projects” window, and click the plus sign to Create New Project.
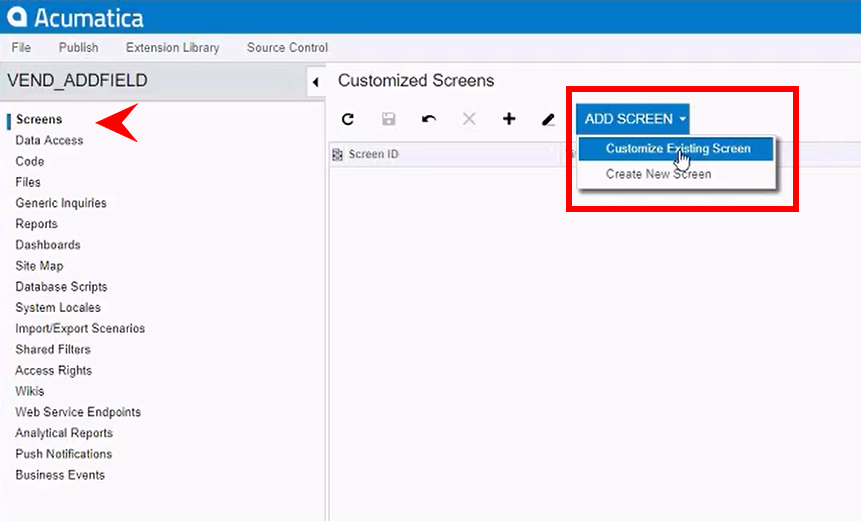
Type a name for your project, and then click to open the “Customized Screens” window.
On the toolbar on the left, click on “Screens,” if it’s not already selected. In the “Add Screen” dropdown, select “Customize Existing Screen” (“Create New Screen” requires a developer.)
Use the Magnifying Glass tooltip to open up the site map. Click through to find the screen you’re looking to customize (in our example, the “Vendor” screen).
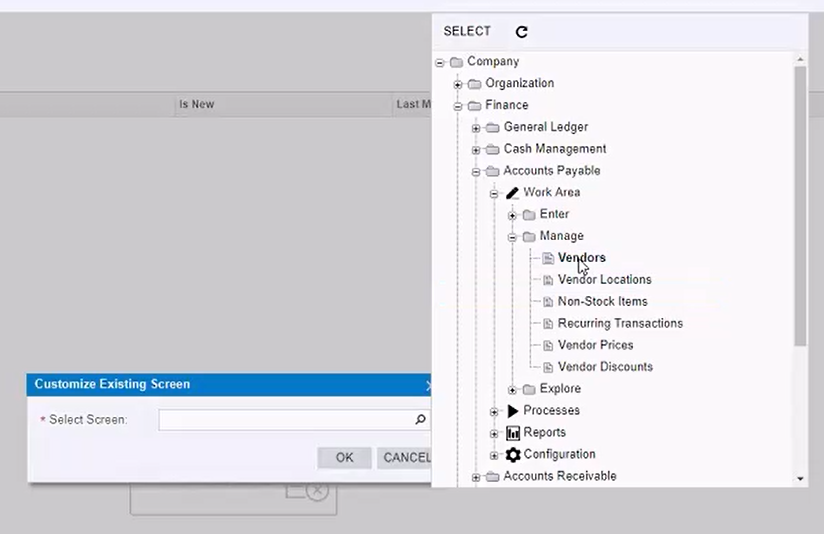
Click OK, and the Layout Editor will display.
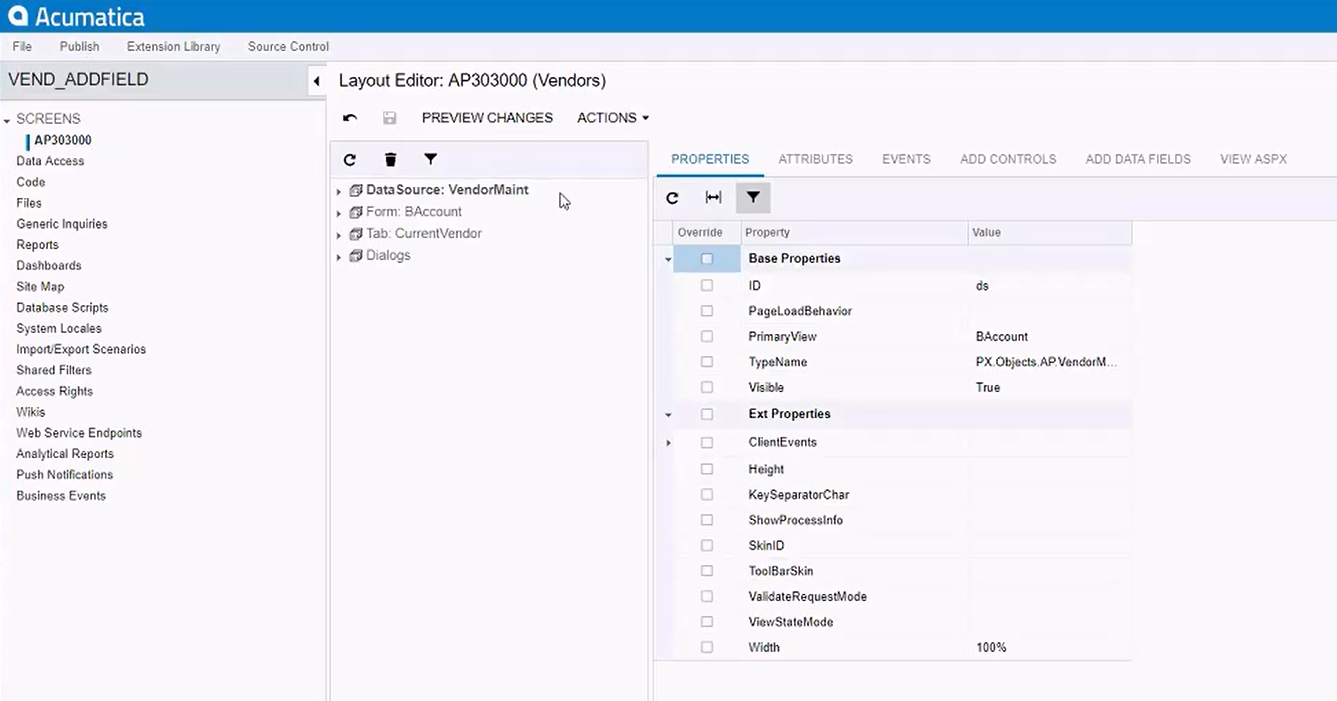
Tip: It is helpful at this point to view the screen that you’re looking to customize next to the Layout Editor for that screen. It will allow you to see what fields are already being displayed and the order they’re displayed in.
Step 2: Adding the Data Field to the Tables
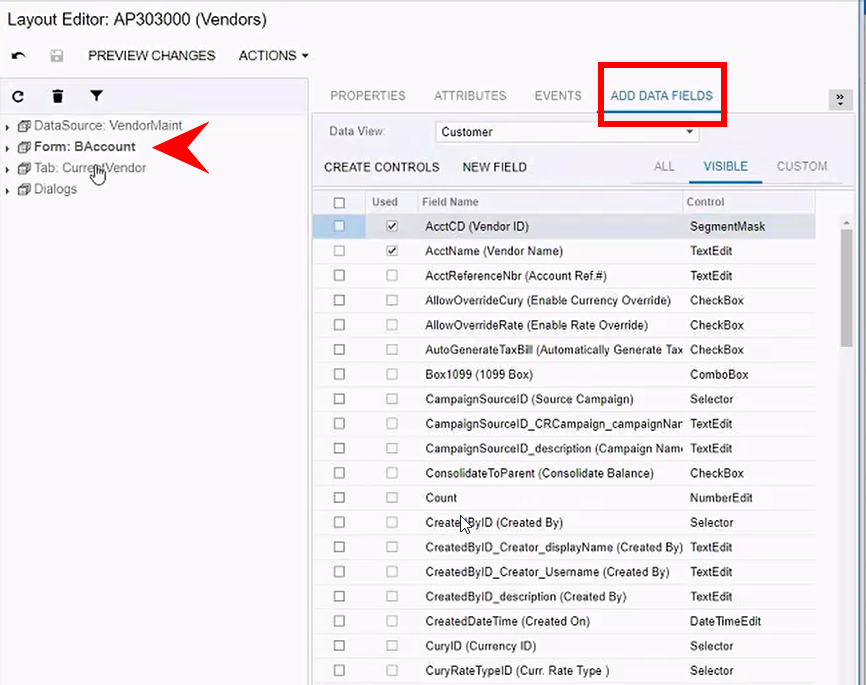
To ensure that you are customizing the correct form, be sure that the “Form: BAccount” table is selected at the left. Every entity in Acumatica is located in the Table called “Form: BAccount” and this is where you will need to add fields. Once you select that table, click on “Add Data Fields” in the tabs to the right. Acumatica will pre-populate the correct Data View.
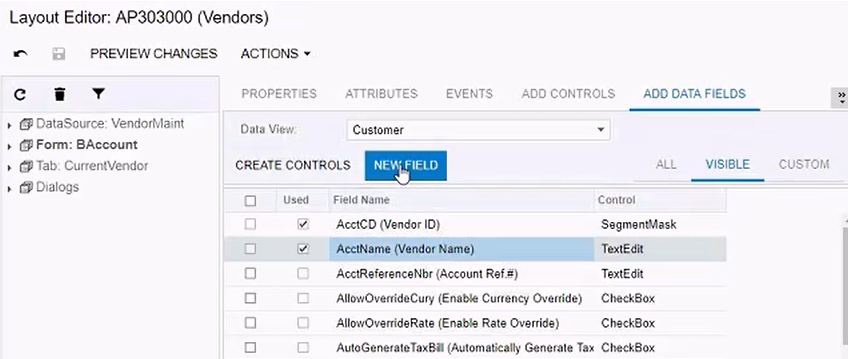
Click on “Add New Field.” And type the field name.
The system will automatically update the “Display Name,” but you should change it. This will be the label that displays on the form itself, so be sure to capitalize and spellcheck! You don’t want to have to go back and fix this later. The Storage Type will automatically populate, as well – do not change it.
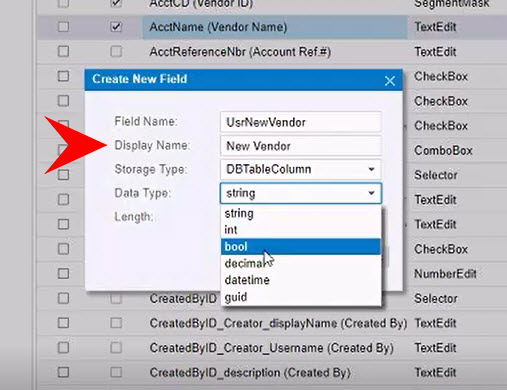
Now, select the Data Type for the field you’d like to add.
This example will use Boolean (true or false) to make a check box. Once you select OK, and scroll down to your new data field in the table, you will notice an error message. It warns that you must publish the customization project before you can use the field.
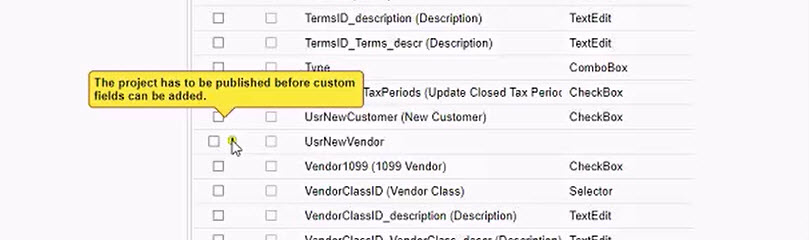
Be sure that all users are logged out before publishing.
Step 3: Adding the Field to the Form
Now you will see that your tables are updated, and your new field is ready to use. The final step is adding your new field to the form itself. First locate the exact form and location on the form that you would like to place your field into.
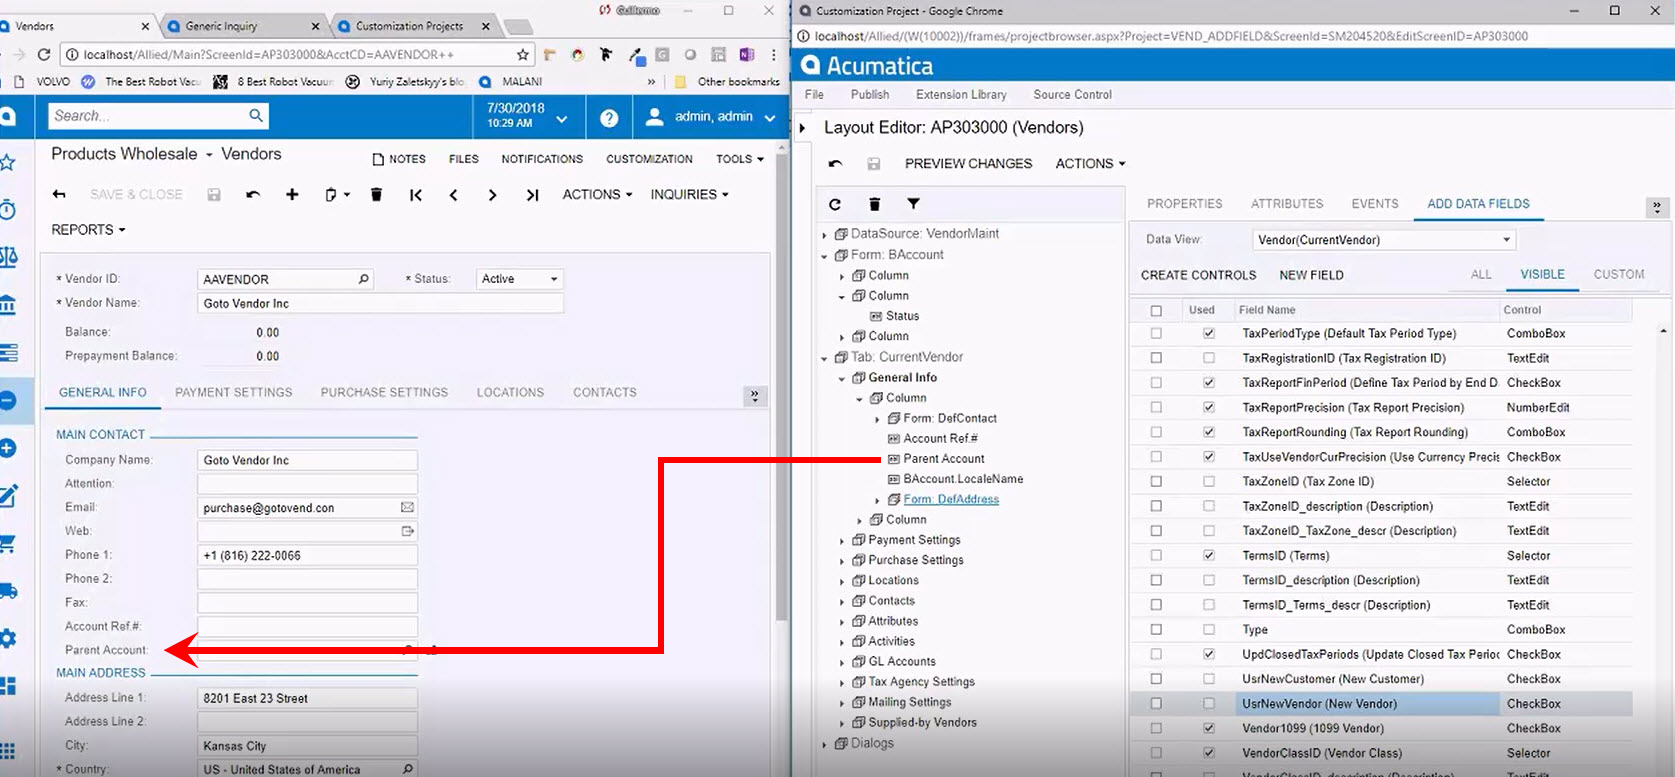
Once you decide where to place the field, locate the existing field that is directly above it. In this case, we are adding our checkbox right under the “Parent Account” field. So, you first select “Parent Account” on the left, then our new field to add on the right. Then click “Create Controls.”

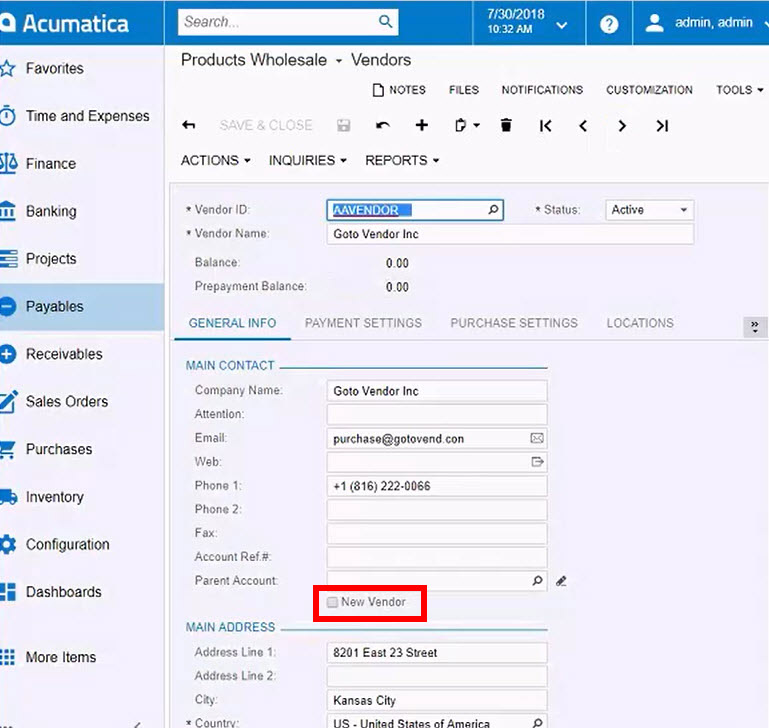
Now, save your progress and preview your changes to ensure that the field is placed in the correct spot. If it looks good, then hit Publish.
Your form is now be ready to use with your new data field.
If you have questions or need some assistance, visit our support page for more help.