This week we’re going to talk about Microsoft Office 365 PowerPoint, what it’s used for, and how to set up a new presentation.
First things first, you may ask yourself, what will I use PowerPoint for? PowerPoint is software used to create professional looking slideshow presentations. They can be displayed on projectors, big screen TVs, or your personal office computer when presenting one-on-one with clients.
Just to name a few, PowerPoint can be used to showcase a product, service, training, demo, and business plans; basically used to educate your audience. Just about anyone, in any field can use PowerPoint for any purpose. I’ve used PowerPoint on many occasions to create video photo albums. I’ve also use it on job interviews to display my skills and abilities. Have you watched Crestwood’s holiday greetings in the last two years? PowerPoint is just one of the great tools I have used to produce those videos for your entertainment. It’s a fun tool to get to know.
How to Set-up a New PowerPoint Presentation
If you know how to use Microsoft Word, you know how to use PowerPoint. It’s the same concept, same tools, but different layout and with PowerPoint you can add slide transitions and animation effects to images, text, etc.
Let’s get started!
Open PowerPoint from your taskbar, select New.
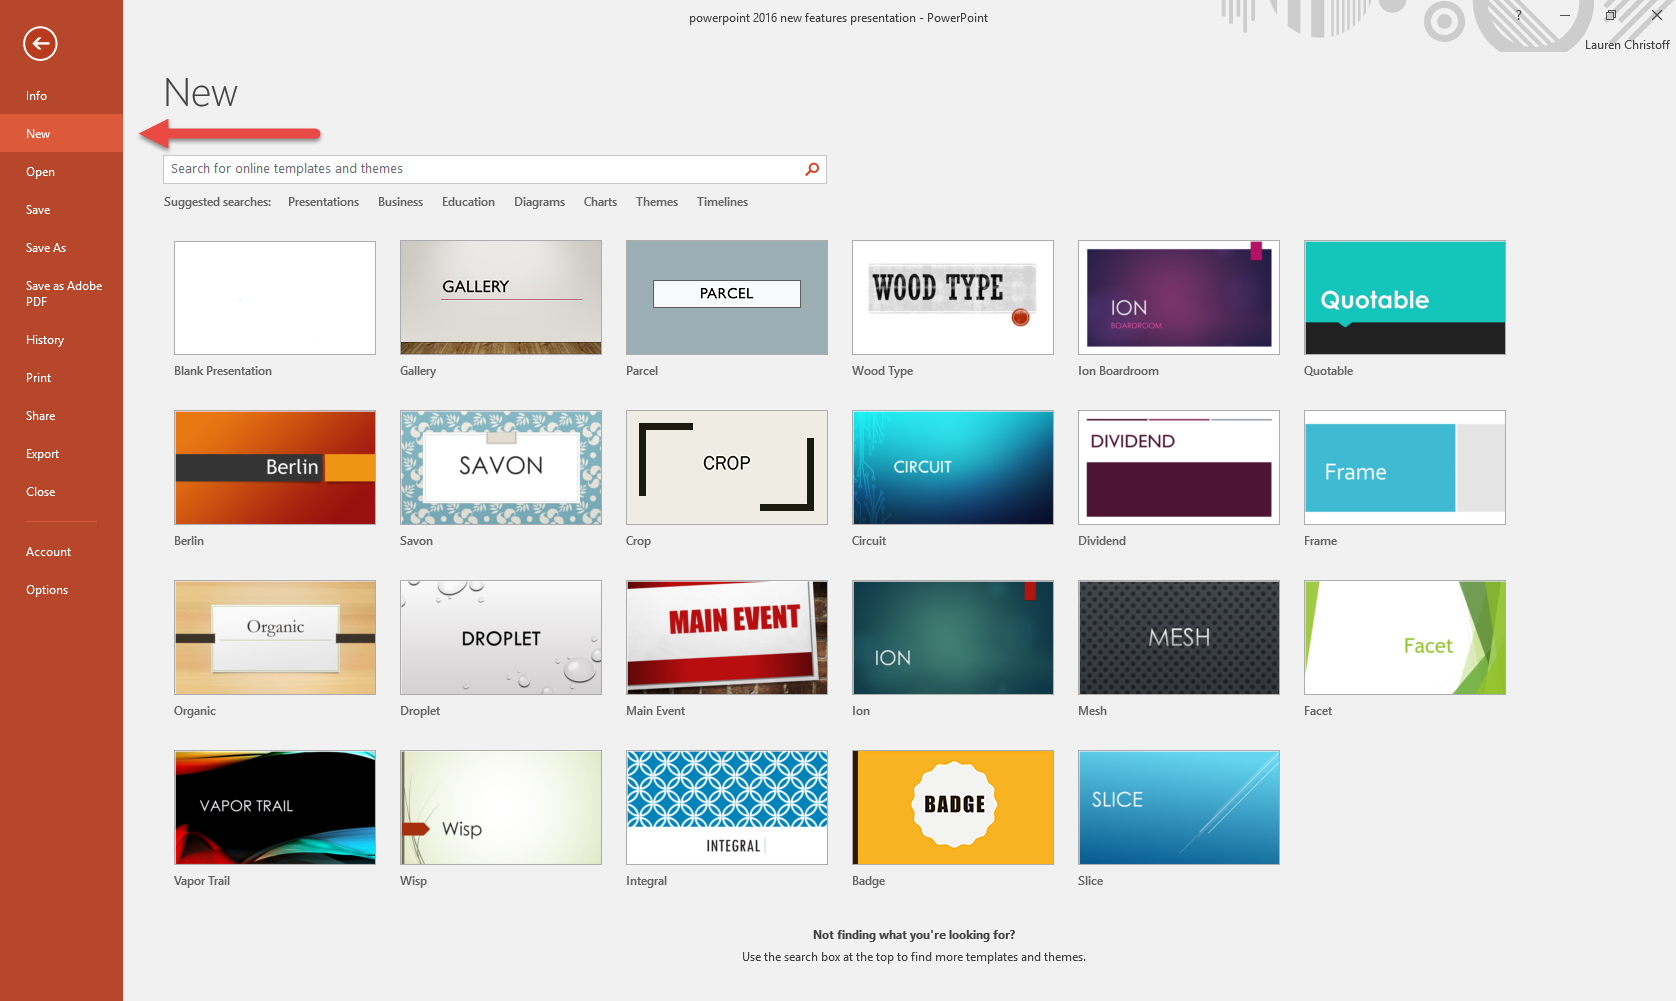
You can select a Blank Presentation and build it from the ground up, or you can select from any of the templates provided by Microsoft. If you’re very new to PowerPoint, I suggest selecting a template at first. Creating your own template can get a little tricky. So we will skip that and focus on the basics.
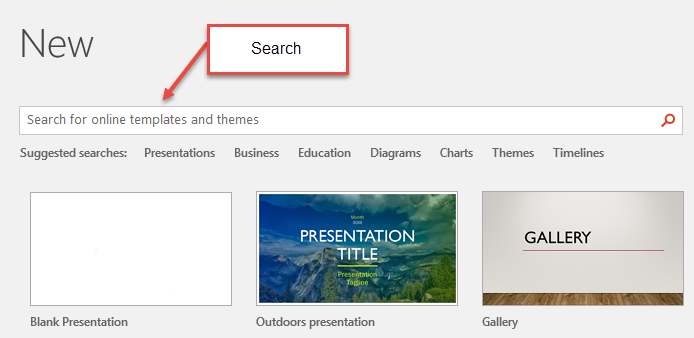
If you have worked in PowerPoint before, the start screen will provide you with previously created presentations from local or cloud storage. Otherwise, you will have access to various premade PowerPoint templates. If you can’t find what you are looking for in design and features, you can search online for other templates that can help you get started quickly. New templates are added frequently.
Once you have selected your type of presentation and prior to adding your content, save your presentation immediately to avoid losing your work in the long run. See my blog Microsoft Word Productivity Tip #2 – Whoa! What Just Happened?, on AutoSave & AutoRecovery. The same rules apply with PowerPoint. Remember, once you save your work, PowerPoint saves your changes to the new file, not the template, so you can use that template for unlimited presentations in the future.
Note: Most companies have an in-house Graphic Designer or PowerPoint Specialist who have designed templates to match company color schemes and layouts with added logos, etc. So, if you are presenting on behalf of your company, you might want to utilize what is already available.
What Next!
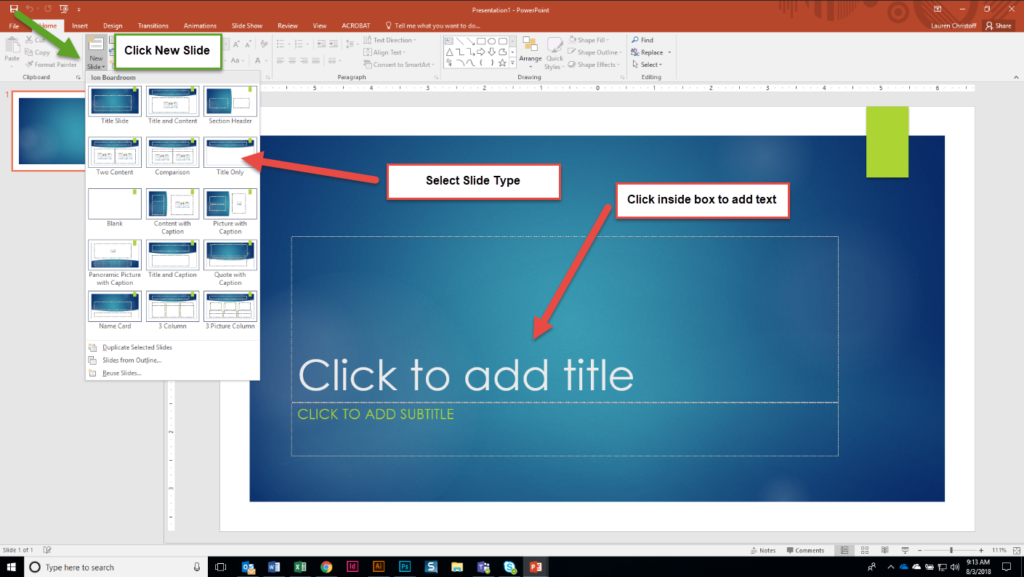
After you have selected your template, you can begin by building your presentation. On the Home Ribbon, click on NEW SLIDE. Any template you select has various predesigned slides that you can add to your presentation. For example, there are Title Slides, Section Headers, Two Content, Comparison Slides and more. Go ahead and select the types of slides you want to use in your presentation.
When you have completed selecting the types of slides you want displayed we can go ahead and start adding text. Click in the text box to start adding content. Once you finished with the first slide you can move to the next to add content and so forth.
Recap
So you have selected your template, added your slides and content, what we need now is to spice it up a bit. This next screen shot will guide you through to adding elements to your presentation.
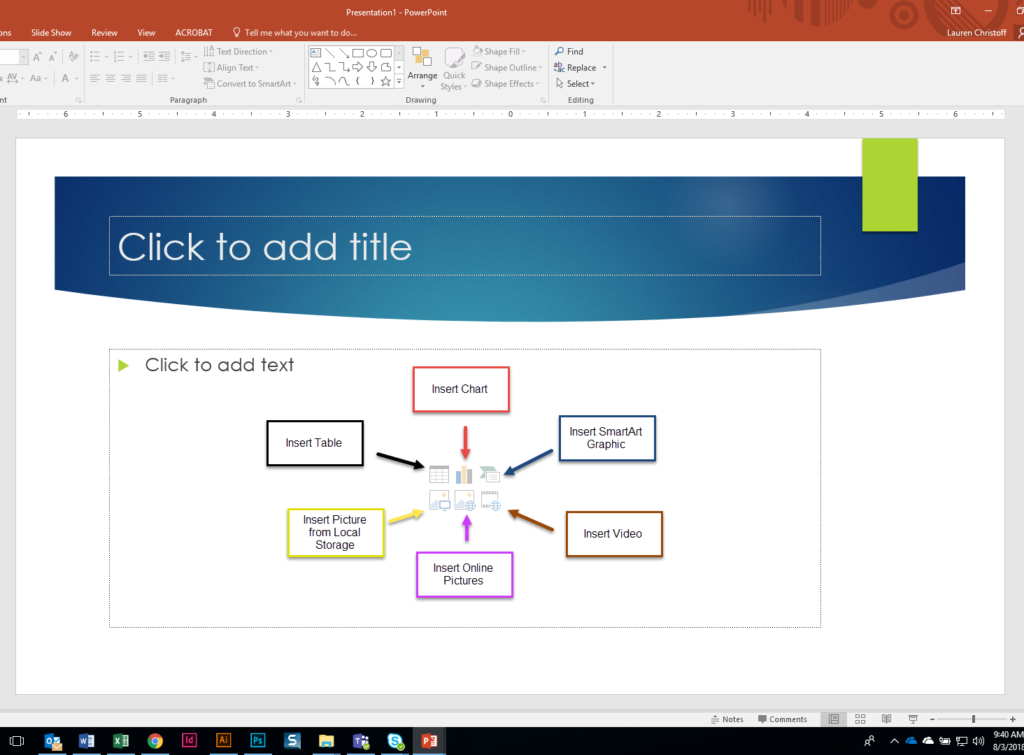
Speedy tip: If you already have charts, tables or pictures in other documents you can simply copy and paste them into your presentation, otherwise click on the icons shown in screen shot above and follow the steps to adding elements to your presentation.
Follow the directions when inserting a:
- Table: You can create a table by entering the number of columns and rows, click ok then start entering your text
- Chart: Select from a variety of charting options, enter your data, click ok
- SmartArt Graphic: Select from a variety of SmartArt Graphics, enter your data, click ok
- Video: From a file, YouTube or other area
- Online Pictures: Locate images online to insert into your presentation
- Picture from Local Storage: Located your images on your OneDrive, C: Drive etc
Once you have entered all your content on all slides you can click the Slide Show menu, and view your presentation in presentation mode from the beginning of your presentation or from the current slide. Your presentation will be viewable in full screen mode without displaying editing menus. To go back to editing press the ESC key.

Well, this covers our first portion of getting to know PowerPoint, how to select templates, add slides, add text, and add elements. Stay tuned for more productivity tips involving adding animations to graphics, slide transitions, and much more.
