Microsoft Dynamics GP Letter Writing Assistant has been around for a long time but I find a lot of people don’t know about it. Microsoft has provided sample Word documents to be used for letters that you need to send to customers, vendors, and employees. You can send the letters to all, or select from a list, or you can create a SmartList and then use the SmartList to determine who the letters should be sent to. The steps basically involve doing a Word mail merge with your Dynamics GP SmartList. Here’s how:
Mail Merge with a SmartList and Letter Template
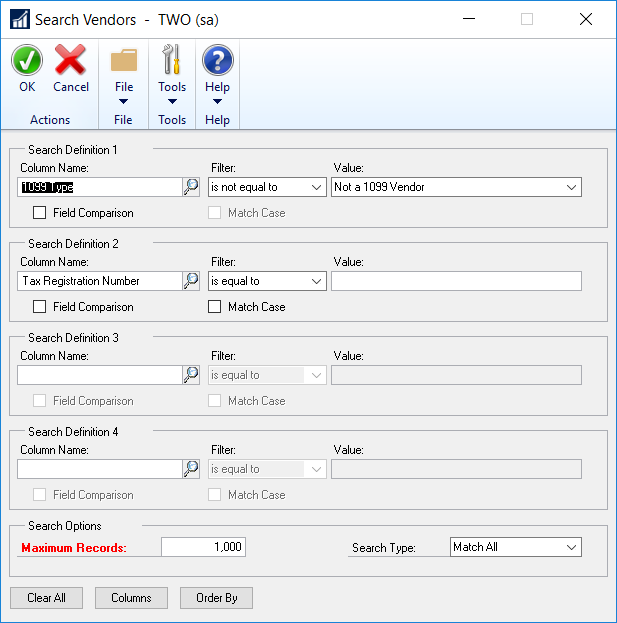
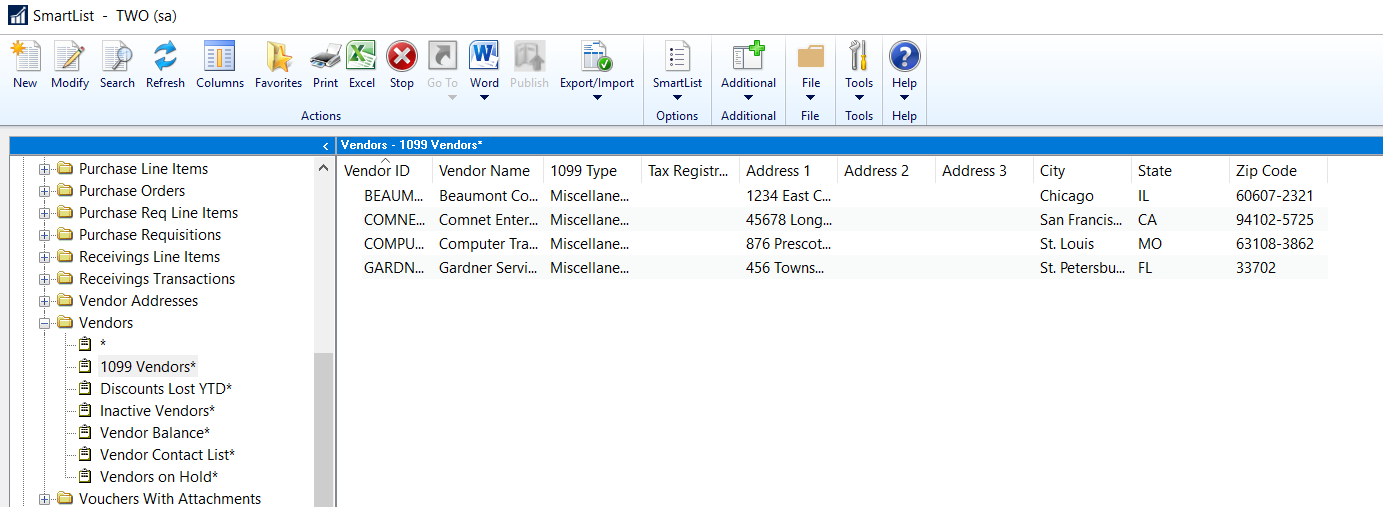
For example, let’s say that you want to create a letter to send to all vendors who are set up to receive a 1099 form but do not have a Tax ID. First, you can update a Microsoft-provided SmartList favorite to include the columns you will need to generate letters. You can start with the Microsoft-provided 1099 Vendors* list that is found under SmartList > Purchasing folder > Vendors folder, then add the columns Tax Registration Number: Address 1, 2, and 3; City, State, and Zip Code. Next, update the search to only include vendors if the Tax Registration ID is blank. Click the Favorites button and choose Modify. Here are screenshots of the Search window and the resulting SmartLists.
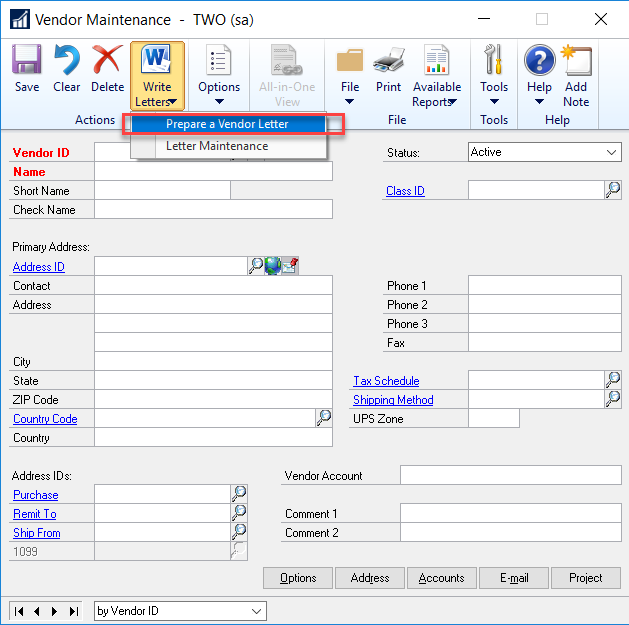
Now that we have our list, next we will go into the Vendor Maintenance window (Cards > Purchasing > Vendor). Do not select a vendor. Instead, click the Write Letters button and select Prepare a Vendor Letter.
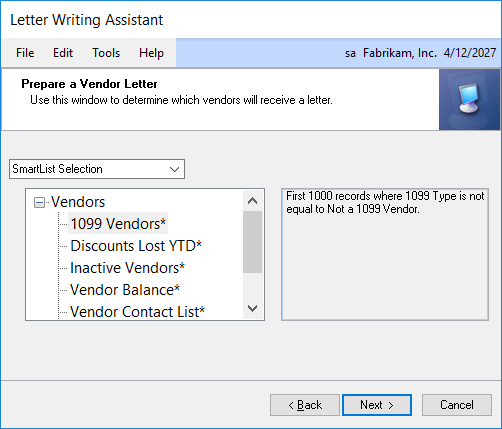
In the Letter Writing Assistant window, select SmartList Selection in the drop-down field, highlight the 1099 Vendors* SmartList, and click the Next button. (Note: you can also get to the Letter Writing Assistant by going to Reports > Letter Writing Assistant, which can be found in the Reports section of the Administration page.)
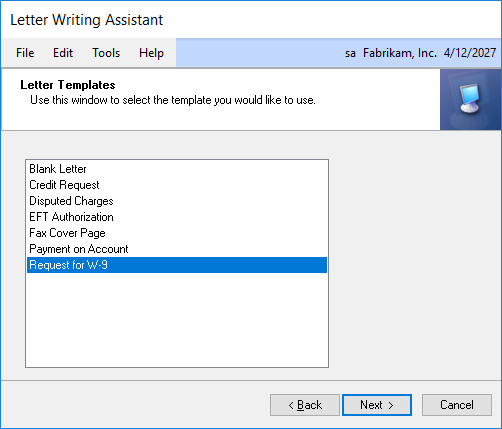
In the next window, highlight Request for W9 and then click the Next button.
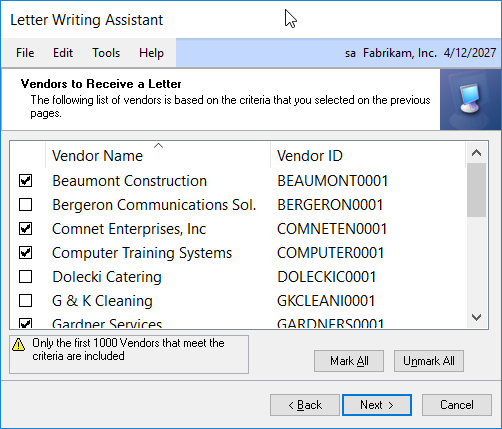
The next window will show a list of vendors. If there are vendors in the list that you do not want send the letter, uncheck the box next to the vendor name, and then click Next.
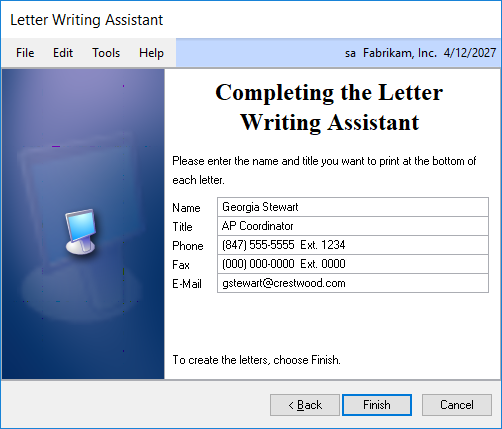
In the last window, enter your contact information (or the contact information that you want to print on the letter) and click the Finish button.
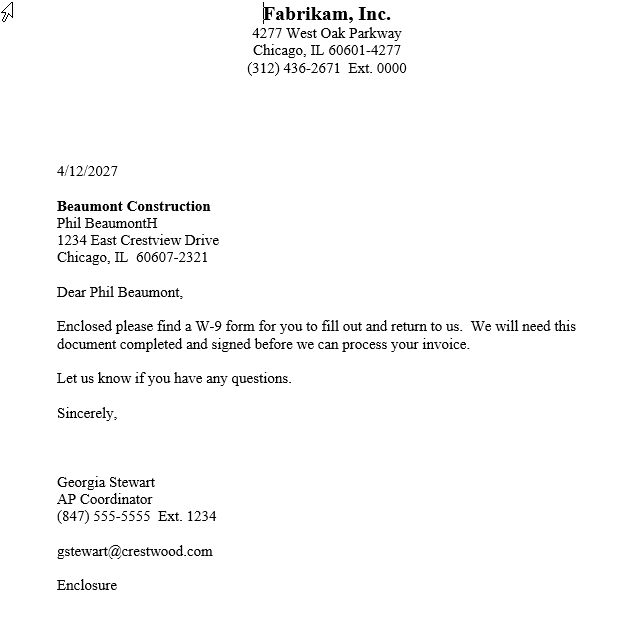
Dynamics GP will prepare the letters using a mail-merge and open them as one document in Word. You can then use Word to print the letters and mail to the vendors with a W9 form to be completed by the vendor.
Modifying Your Letter Template
If you want to make changes to the letter template, you can do this by opening the Vendor Maintenance window, then clicking Write Letters and selecting Letter Maintenance. On the Letter Writing Assistant window, select the button ‘Edit an Existing Letter,’ highlight the letter you want to edit, and then click the Next button.
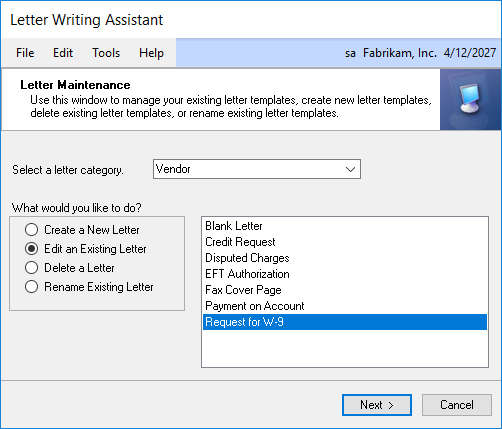
This will open the letter template in Word where you can edit the document and save it. Make sure that you save it in the same location so that it will be used the next time you use the Letter Writing Assistant and select that letter template. Notice in the Letter template that wording that is surrounded by << >> is an indication to pull in the data from Dynamics GP. If you want to add fields, click the Add-ins button at the top of Word. You will see that for Vendor Letters you can select fields from the Company and from the Vendor.

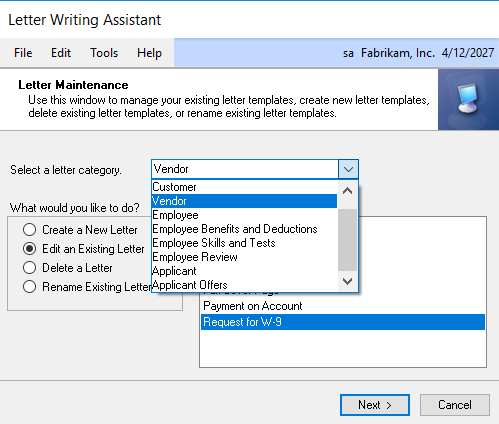
The Letter Writing Assistant allows you to Create a New Letter, Delete a Letter, or Rename an Existing Letter. Each template will show the appropriate Add-ins fields from Dynamics GP depending on what type of letter template you are updating. As you can see from the screenshot, you can select from Customer, Vendor, several types of Employee and Applicant letters, as well as Collection letter templates.
Help – I don’t have any templates available!
If you do not see any Microsoft-provided letter templates in the Letter Writing Assistant, it is likely because the default templates are not found in the folder location specified in your DEX.INI file for Dynamics GP on your computer.
The DEX.INI file is usually found in the Data folder in your GP folder location. The path to my local DEX.INI is found in C:\Program Files (x86)\Microsoft Dynamics\GP2018\Data\
Open the DEX.INI file in notepad and look for the line that begins:
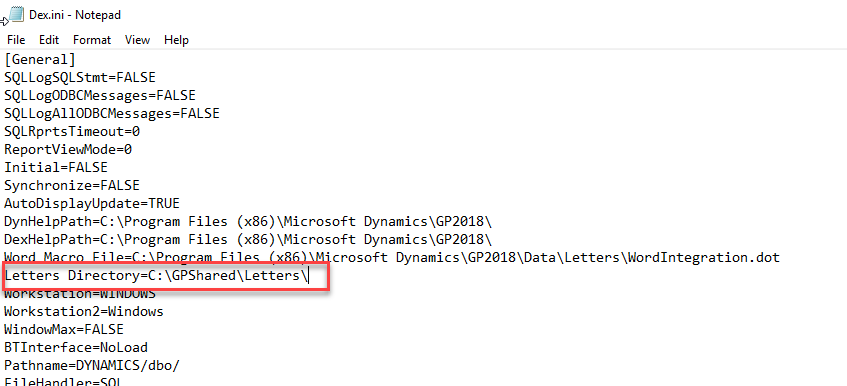
Letters Directory=
Make a note of that path. Here is an example from my local machine. For a lot of our clients we see that the letters are in a network shared folder so that all users can access the same letters.
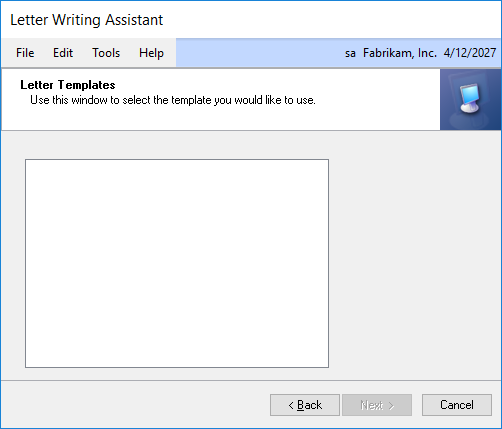
If you are in the Letter Writing Assistant in Dynamics GP and you do not see any Letter Templates (which will look like the screenshot below), it means that you need to copy the Letter Templates from a location where they exist into the Path in your DEX.INI file, or change the Path in your DEX.INI file to use the location where the letters already exist.
Sometimes when you update your version of Dynamics GP, the letters are installed in the default path and the shared path is not updated.
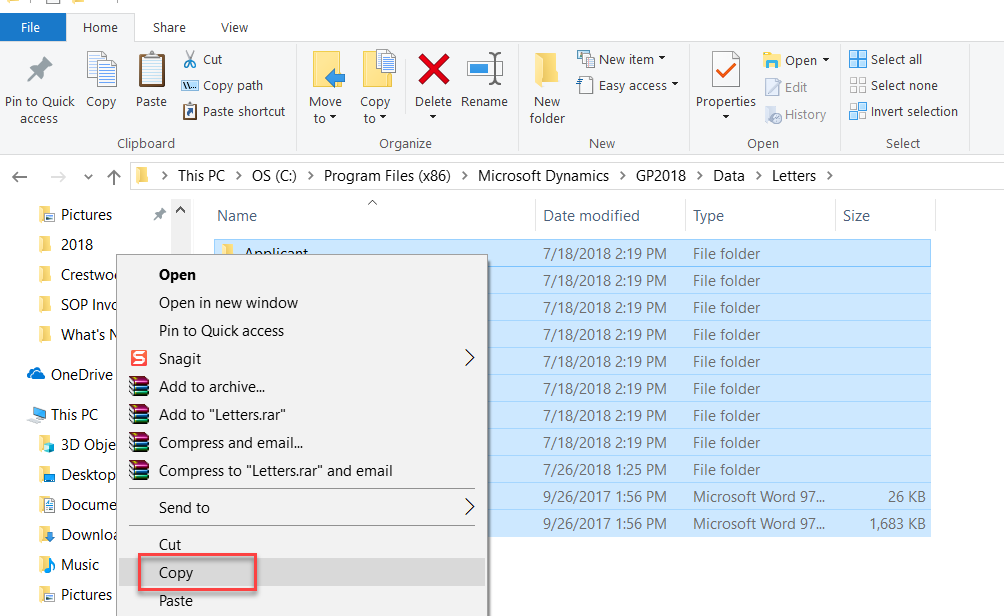
To correct this, go to the default path where Dynamics GP is installed and look in the Data folder and then the Letters folder (C:\Program Files (x86)\Microsoft Dynamics\GP2018\Data\Letters\)
If you see the Letters folder and there are folders and templates (.dot files), highlight all of the folders and documents in that folder, right click and choose Copy, then go to the folder location noted in your DEX.INI and right-click and choose Paste.
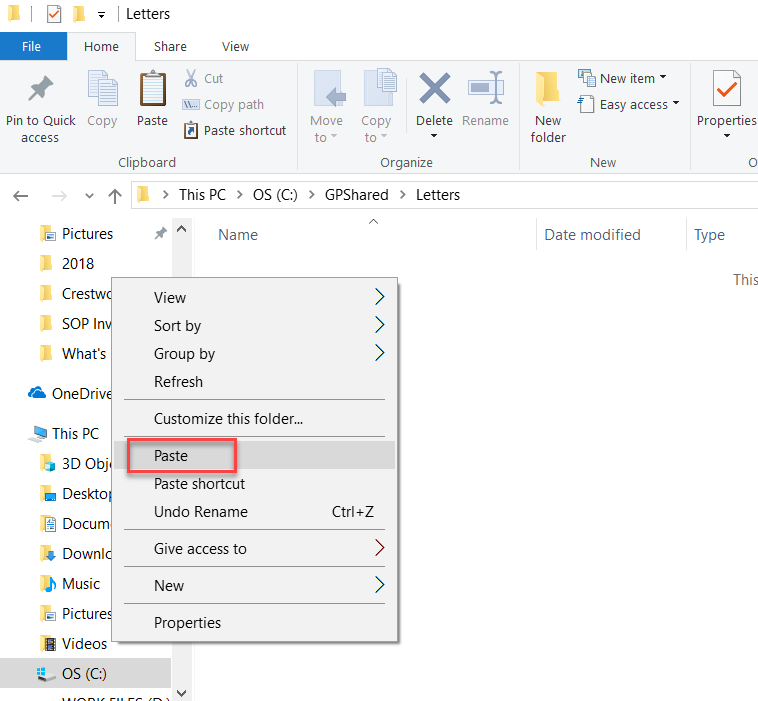
Then sign out of Dynamics GP and sign back in again. You should see that the default letters are now available.
I hope you give this a try. When I tell support customers about this, they always are telling me how much time this has saved! Let me know what you think. If you have questions or need some assistance, visit our support page for more help.
