If a picture is worth a thousand words, then what is a video worth? A lot, as it turns out!
I am an ERP developer, not a writer, yet I used to spend a lot of time writing instructions or explaining concepts in lengthy documents. I’ve moved away from writing and have found it’s easier for me and my clients to record instructional videos. I take these videos and embed them directly into their ERP help file system. And guess what? You can do it too. It’s crazy simple!
Getting started
This article will give you a brief walk through of how we can do this for the Acumatica platform but you can apply the notes below for other systems.
Tools needed
- Screen recording software. I’m going to use a popular inexpensive software product called SnagIt by TechSmith but use whatever best suits you. In many cases, Acumatica does not allow us to save the actual video file, so you’ll need to use a screen capture system that will let you create a hyperlink.
Steps:
- Write out a short list of what you want to show in the video. This will help keep you focused.
- Record the screen capture video.
- Save the rendering to a file and to a web service so that it can be accessible from the internet.
- Create a Wiki article in Acumatica to store the video link.
Tips when recording
- Know your audience: If viewers of the video are non-technical, then you’ll want to take your time moving from screen to screen and explain as much as you can about what it is that you are showing. Using the mouse to point out things of importance is helpful.
- Silence can be golden. If this relates to technical documentation then you may not even need to speak at all. And you should be able to jump from screen to screen as fast as you’d like since anyone can pause the screen as often as they’d like. I like to capture complex GIs for our clients in case they get changed at some point. I can jump from screen to screen in less than 20 seconds and individual screen shots would have taken much, much longer.
- Pause your recordings often as you transition from each screen or subject matter: These short breaks will help you collect your thoughts before moving forward. If done properly, the person watching probably won’t notice that you took a short break.
- Better to create several very short videos than one long video: That way someone can easily jump to areas that they are interested in without having to search for the nuggets of information that they need.
- Keep a local copy: If you are using a service to host your finished videos, always try and keep a copy locally in case that service becomes unavailable. The content might expire for some services like Screencast after a period of time.
At this point you are probably asking why isn’t this BLOG a video BLOG? Yep, I thought about that too, but it’s sort of like making a movie about making a movie. You can do it but it’s a little tricky. So, let’s get on to the recording steps!
Using Snagit to record
Set the mode to Video and outline a screen box of where you are going to do your presenting. It’s best to keep the box as small as you can so people don’t strain to see the video. Next, click on record.

After recording I normally do two things.
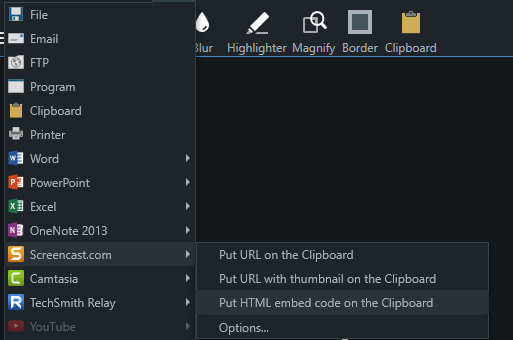
- Send the video to Screencast.com. You will need to setup an account which is free. When sending, select ‘Put HTML embed code on Clipboard.’ Then copy and paste the hyperlink to OneNote or somewhere for safe-keeping.
- Under File, save the MP4.

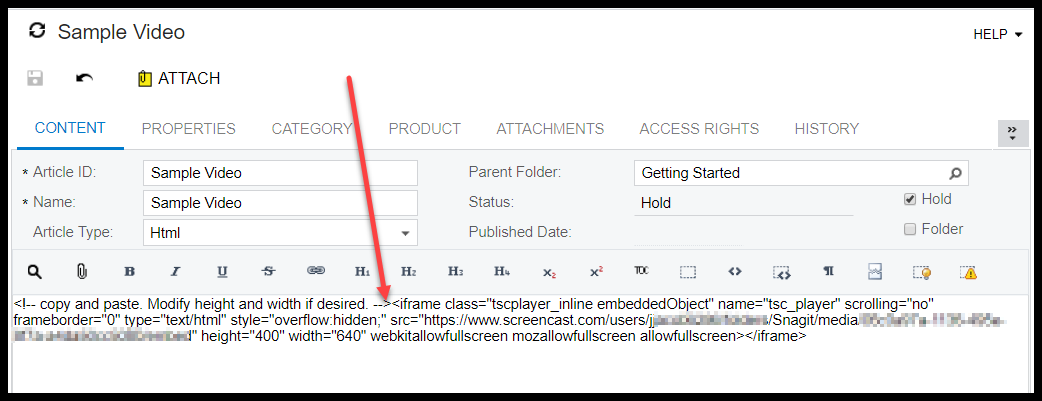
Notice that you can adjust the width and height of the frame.

This blog won’t go into detail about creating a Wiki page on your site since there are several articles on how to do that already. However, when you are ready to create the Wiki article, simply copy and paste the link into the body of the article and save.

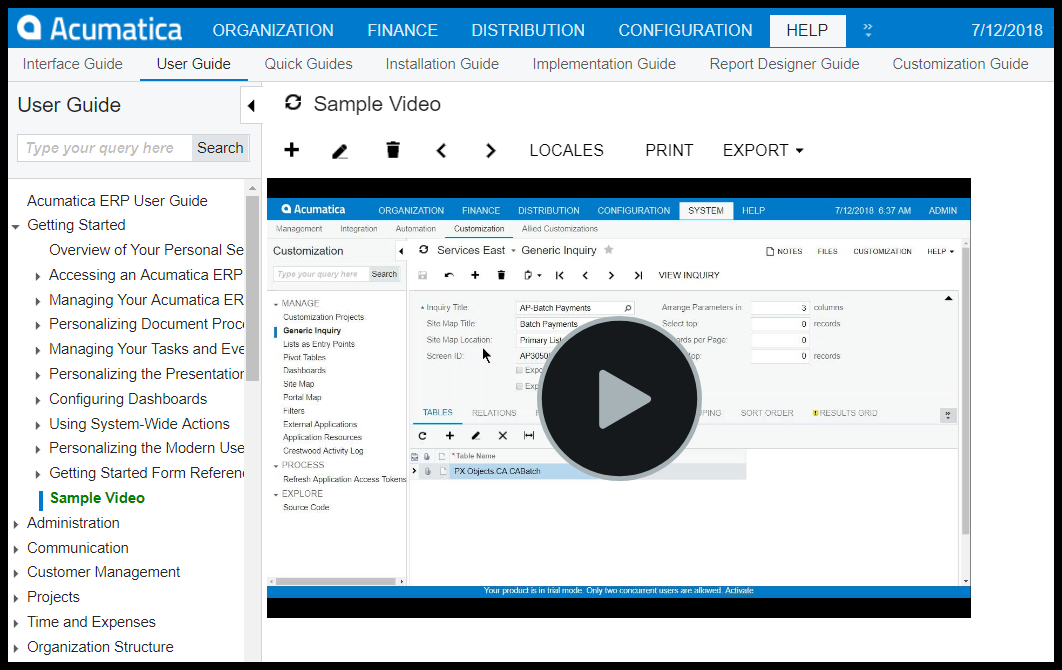
Once saved, your help file article will look like the image below and the video will play as you’d expect. The height and width of 400/640 was used in this example for illustration purposes, however the resolution might be a bit grainy for use. The video offered by Screencast does provide a fullscreen option when the video starts running.


Now you are ready to publish the help article WITH your video ready to play! If you have questions or need some assistance, visit our support page for more help.
