Do you have Field Level Security set up in your Microsoft Dynamics GP system? Did you know you can use it to do things such as:
- Lock a user date
- Hide a field
- Require a password to change a default warehouse
- And so much more
Dynamics GP Field Level Security allows you to control user access and edit abilities at a field level in Dynamics GP windows. General security in Dynamics GP is based per screen, but by implementing Dynamics GP Field Level Security, you can control individual fields with a simple click. You can set up Field Level security right within the Dynamics user interface.
Here are some examples and how to set up the Field Level Security:
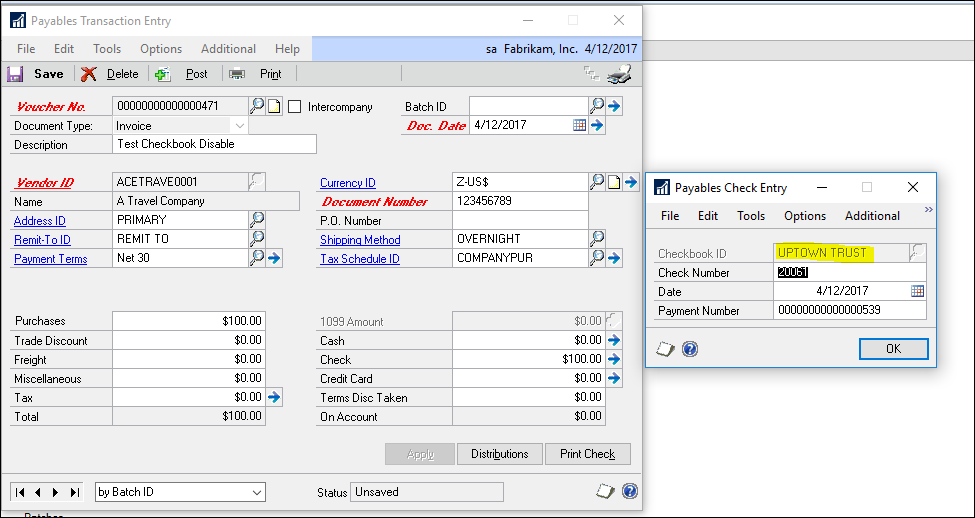
For example, let’s say that you want to make sure that users cannot change the default checkbook when paying a vendor invoice on the payables transaction entry screen.
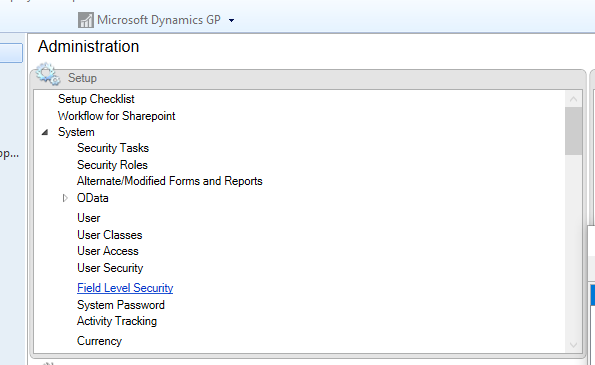
Go to the administration tab and select field level security under the setup section.

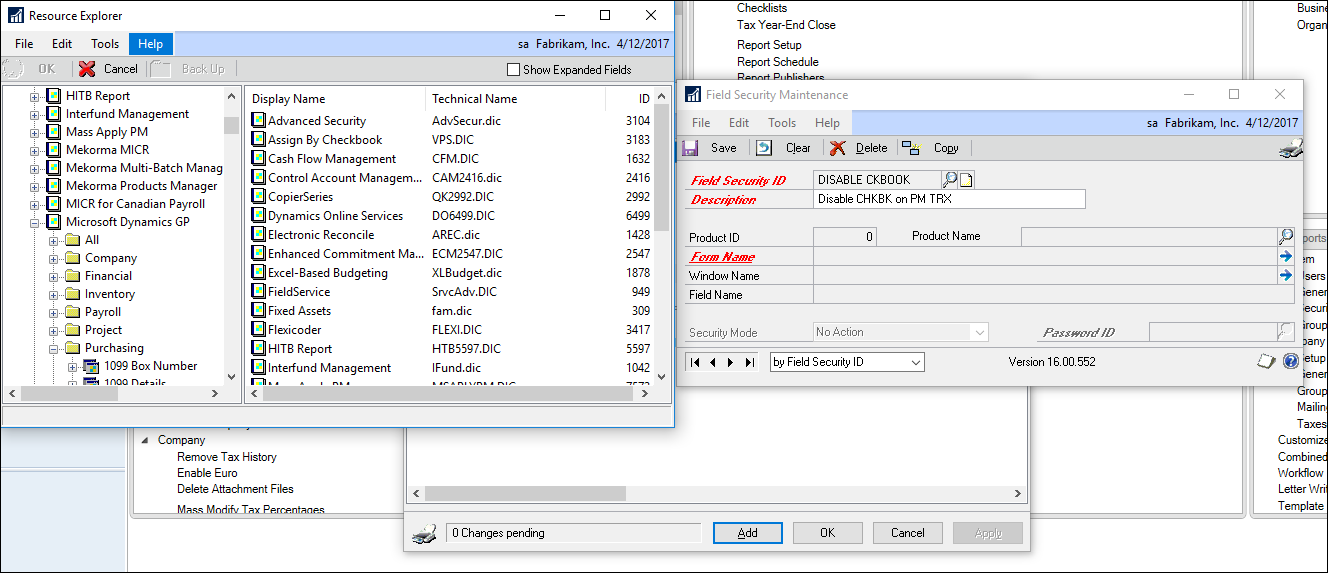
In this window, click “add” at the bottom of the screen. Next, add an ID (limited to 15 characters) and a description. Now, click on the magnifying glass next to product name. This will open the resource explorer.
**Note – be careful, sometimes a 3rd-party window is used with products. If you need confirmation, go to the alternate/modified forms and reports window. To do this, select all products, type of windows, and purchasing for series. Then expand the purchasing folder, scroll down to the payables transaction entry node and expand. There you will see which window you are using.

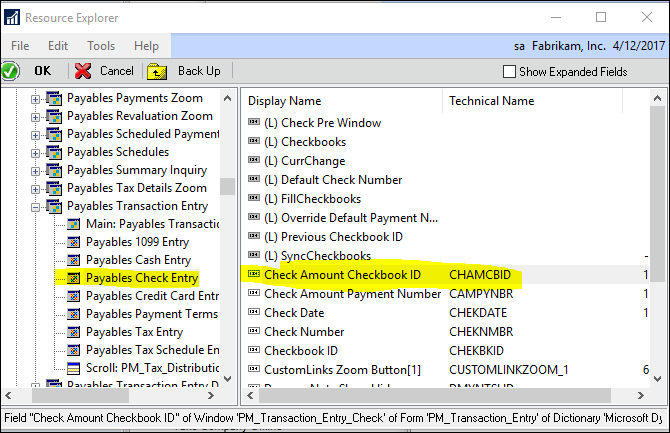
Back in resource explorer, on the left side of the screen, scroll down to Microsoft Dynamics GP and expand the node, then expand the node for purchasing. Scroll down to the payables transaction entry section and expand it. Here you will see a number of things that you can lock, disable, hide, etc. Select the payables check entry on the left, then select check amount checkbook ID on the right and press OK.

Back in the field security maintenance window, select the security mode that you want to apply. For our example, select disable field from the dropdown and save it. Now go back to the field level security window and select the new ID in the bottom of the screen and check which databases and users that this should be applied to. Press apply and OK and you are finished!

Notice that the checkbook ID is greyed out and cannot be changed by this user.
Have fun experimenting! I’d love to hear from you – leave US a comment as to how you use field level security in Microsoft Dynamics GP.
