The Recurring Transactions function in Acumatica is just one of the ways that this system helps automate your processes. For repetitive transactions that occur on a regular basis, you can create a schedule and add it to a batch (or multiple batches) or a journal entry. This eliminates the need to pull each transaction one at a time, every time you need it.
The Two Options
There are two options for Generating Recurring Transactions: “Stop on Execution Date” or “Stop After Number of Executions.”
Stop on Execution Date
The first option of Stop on Execution Date will generate batches until the next execution date is later than the specified stop date. This option allows you to set the date and then the transactions will be generated up to the date you have specified.
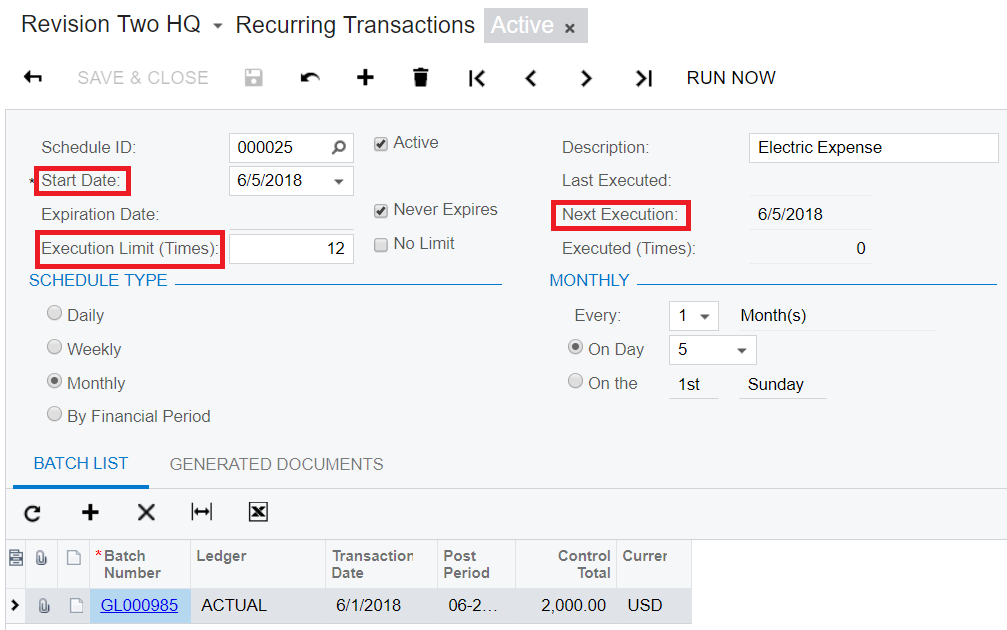
First, create a Schedule. Choose a Start Date (this example uses 6/5/2018), a number of times for the Execution Limit, and a Next Execution Date. The Next Execution Date should reflect the day you want the batch to generate. This example generates monthly on the 5th day of the month.
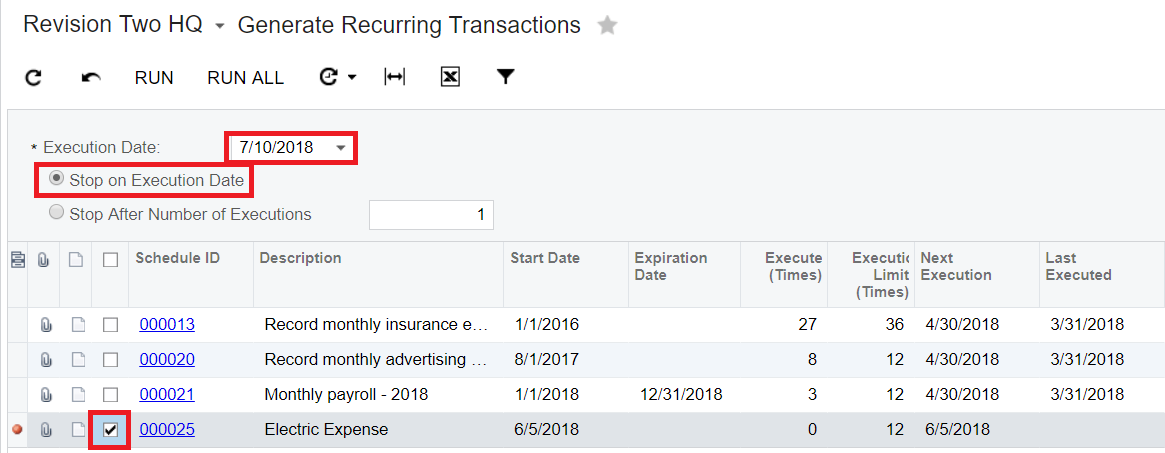
On the Generate Recurring Transactions screen, set the Execution Date and select Stop on Execution Date. Then place a check mark next to the schedule you want to run.
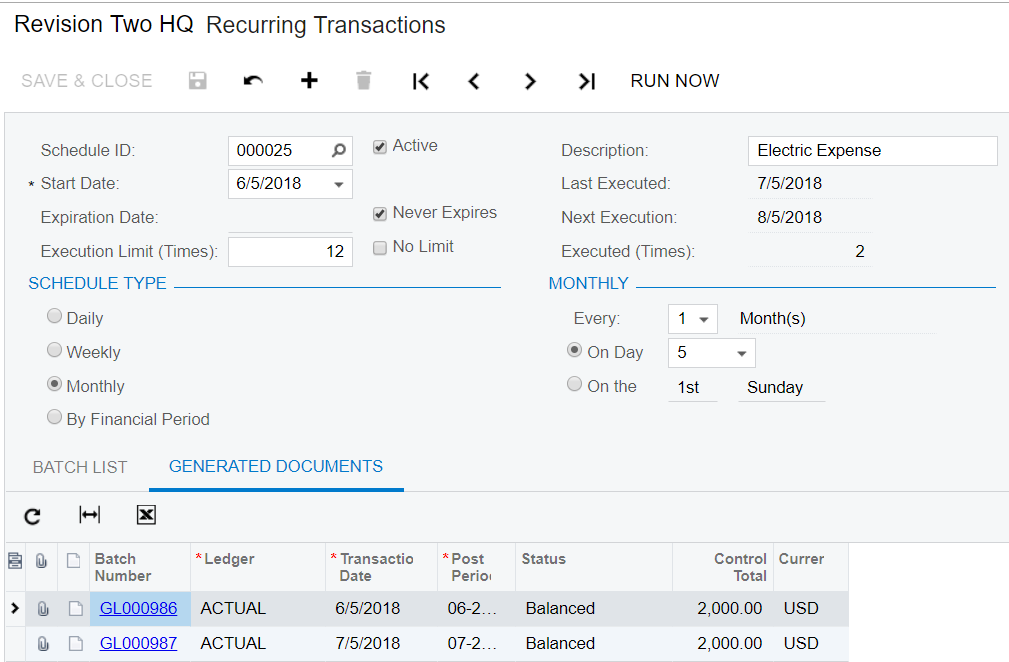
After the process is run, you can now see it was executed 2 times (for June and July). The Last Executed Date is 7/5/2018 and the Next Execution date is 8/5/2018.

If you go to the schedule, you can see the 2 documents that were generated. They have a Balanced status and are ready to be released from the Release Transactions screen.
Stop After a Number of Executions
The second option, Stop After Number of Executions, allows you to specify the number of times Acumatica should execute the schedule. With this option, if your schedule is set up to be executed 12 times, you can change the option to 12 and it will run them until it produces 12 executions.
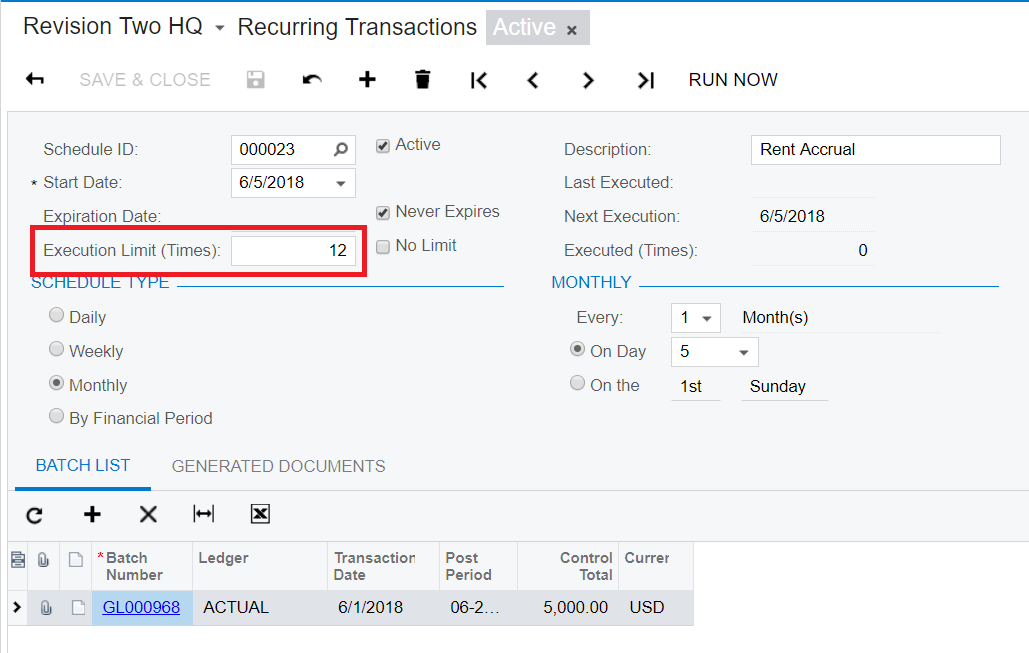
Select a start date and an Execution Limit.
On the Generate Recurring Transactions screen, select the second option and set the Number of Executions. Then select the schedule and click Run.
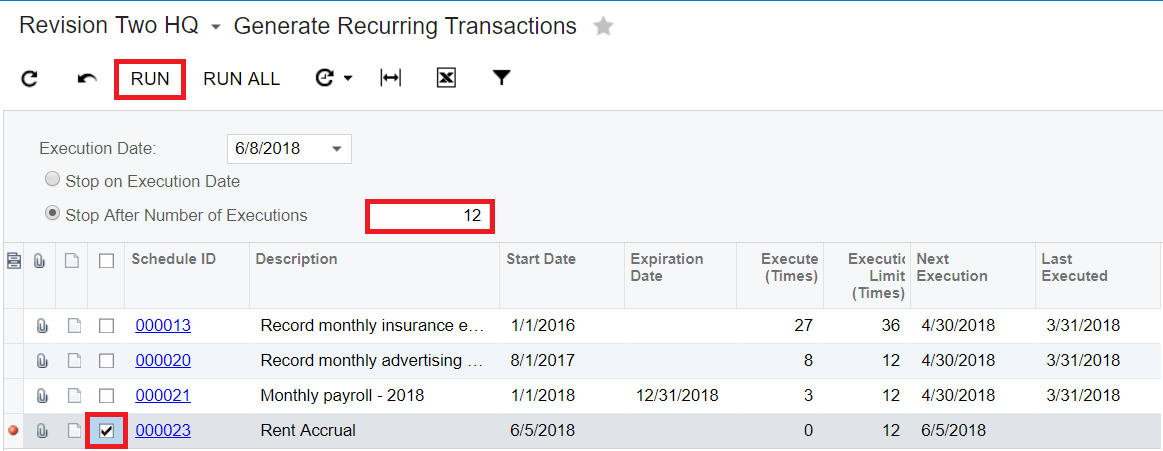
After the process is run, you will see it has been executed for the set number times (in this case, 12) and the last Execution Date is updated.

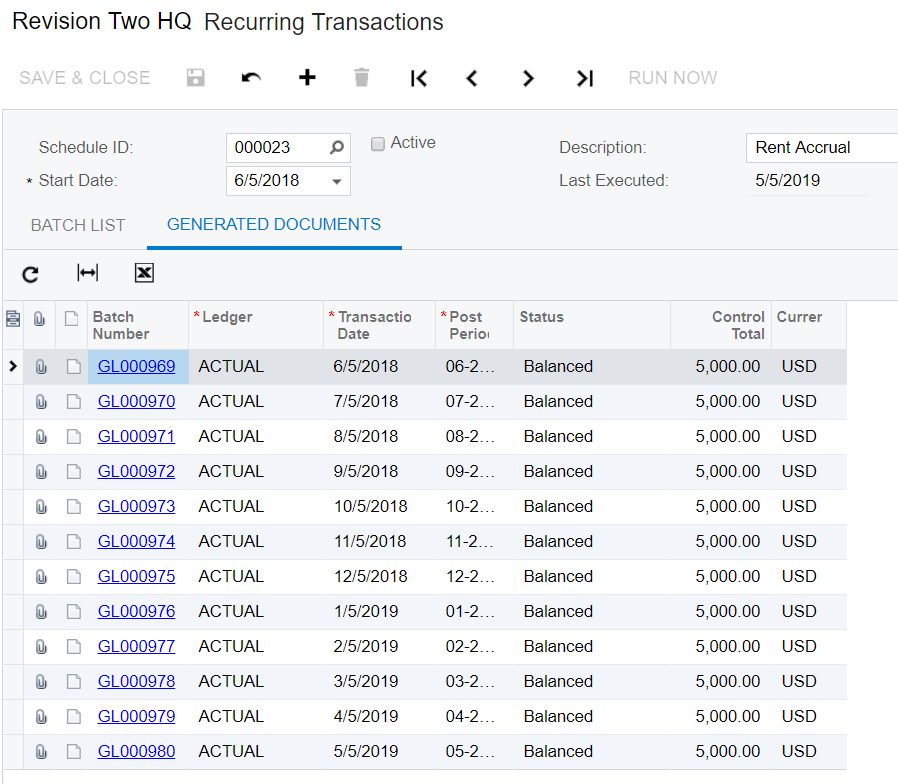
If you go to the Schedule, you can see the total number of documents that were generated. They have a Balanced status and are ready to be released from the Release Transactions screen.
Either of these options will allow you to generate all of your recurring transactions at one time instead of running each one individually. This option is also available in Accounts Payable and Accounts Receivable.
Craving more best practices for scheduling processes in Acumatica? Click here for Four Important Tips.
If you have questions or need some assistance, visit our support page for more help.
