Creating and Making a New Payment Method Available on a Cash Account
In Acumatica, there may be times when you need to create a new Payment Method to be used with your Cash Accounts. For example, you may have a new payment method if you started using credit cards or accepting credit cards for payment, either which was not already set up. In order to use your new Payment Method, you will need to add it to your Cash Account.
Here’s How:
Create a new Payment Method:
Finance / Cash Management / Configuration / Setup / Payment Methods (Screen ID CA204000) and click the “+” sign to create a new Payment Method.

Once you have clicked the “+” sign, you will then do the following:
- Create a unique ID for the Payment Method.
- Select a Means of Payment from the drop down list.
- Enter a Description
- Check or uncheck the check box to indicate if it will be used for AP.
- Check or uncheck the check box to indicate if it will be used for AR.
- Check or uncheck the check box to indicate if it will Require Remittance Information for the Cash Account.
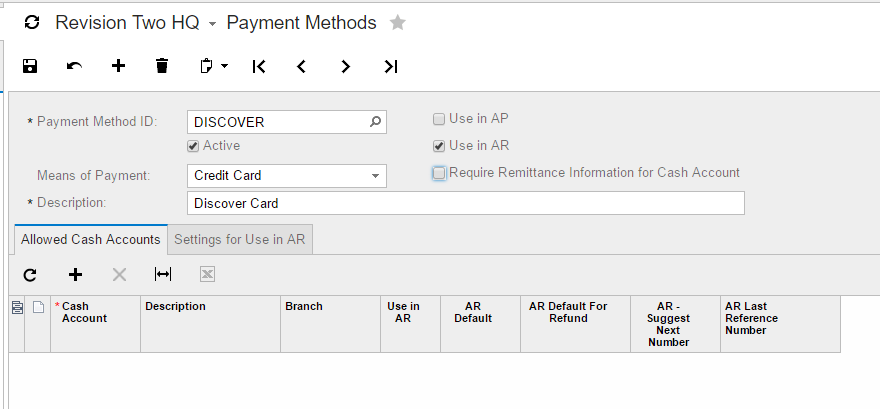
In this example, I’ve created a new Payment Method Discover credit cards that will only be used for AR.

Notice, the Settings for Use in AP and Remittance Settings tabs are gone. This is because I unchecked those boxes. You can always go back and change those and update the settings if later you need to use this same Payment Method in AP.
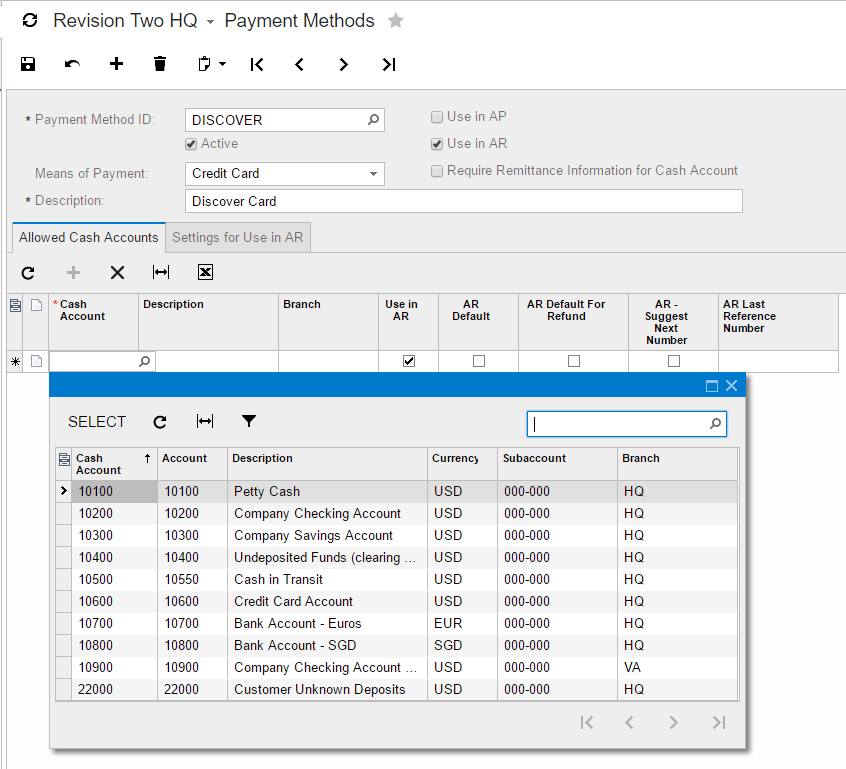
Once you have defined the information in your Summary area, you can add the Cash Account or multiple Cash Accounts that will use this Payment Method. You do this by clicking the “+” sign on the Allowed Cash Accounts tab. You will click on the magnifying glass and a window will pop up for you to select which Cash Account you would like to add to this Payment Method.
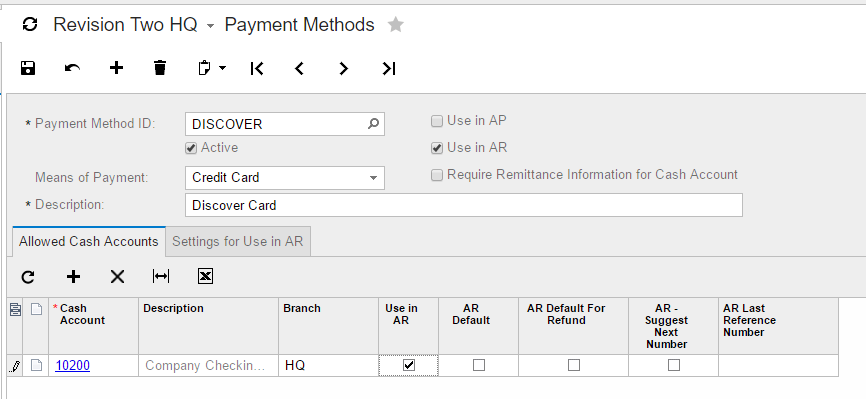
If you want to add more than one Cash Account, you will add another line and click the magnifying glass to select the next Cash Account.

Now that you have selected your Cash Account, you will choose some defaults for this Payment Method.
If you check the AR Default check box, it will cause this Cash Account to Default in the screen when you select this Payment Method. If you leave this check box unchecked, then you will need to select which Cash Account to use when selecting this Payment Method.
If you check the AR Default for Refund check box, it will cause this Cash Account to Default in the screen when you select this Payment Method. If you leave this check box unchecked, then you will need to select which Cash Account to use when selecting this Payment Method.
Note: You can only have one Cash Account as a Default for AR or AP for each Payment Method.

The Settings for Use in AR/AP tab is for determining the processing for the Means of Payment. In this example, I used a Credit Card, which then allows me to define the required information I need for the Credit Card payment, etc.

If I selected Cash/Check for my Means of Payment, then the Credit Card information is blank and not needed as shown below.

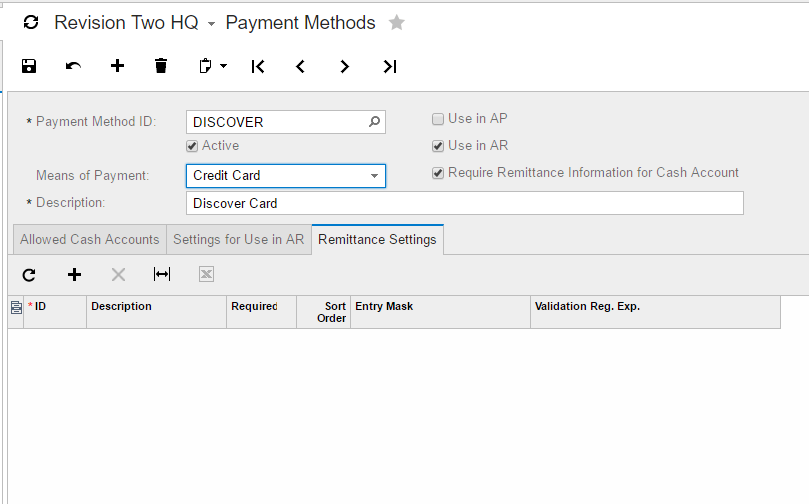
If I had selected the Require Remittance Information for Cash Account, then the additional tab would be there to define the information that you would need for remittance of this Payment Method.

I have now completed creating a Payment Method and adding a Cash Account so it can be used with the Cash Accounts I have selected. Next we will need to add that Payment Method to any Customer that will be using this new Payment Method.
Here’s How to Add a Payment Method to a Customer:
First, go to: Finance / Accounts Receivable / Work Area / Manage / Customers (Screen ID AR303000).
Then, select the Customer you want to add the Payment Method to by clicking on the magnifying glass for the Customer ID and selecting the Customer.
You will then go to the Payment Methods tab and click on Add Payment Method and add the Payment Method to the Customer. Now this Payment Method is available to be used with this Customer.

Set up the new payment method as a default for a vendor:
If you want a Vendor to Default to the new Payment Method you created and you have selected to use the Payment Method in AP, then you can go to the Vendors screen (AP303000) and set the Default Payment Method to the new one you created.
Here’s How:
Finance / Accounts Payable / Work Area / Manage / Vendors (Screen ID AP303000)
Using the magnifying glass on Vendor ID, select the Vendor you wish to make this change to and then go to the Payment Settings tab. You will click on the magnifying glass for Payment Method and select the new one you created. If you selected the check box to default the Cash Account, the Cash Account will automatically fill in, otherwise, you will need to select the Cash Account manually.

You now have completed the setup for a Payment Method and making it available on the Cash Account along with the Customers and Vendors when applicable.
If you have questions or need some assistance, visit our support page for more help.