Creating an Entry Type and Making the Entry Type Available on a Cash Account
In Acumatica, there may be times when you need to create a new Entry Type to be used with your Cash Accounts.
For example:
- Credit Card Fees
- Interest Expense
- Interest Income
- Misc. Receipt
- Band Service Charges
In order to use your new Entry Type, you will need to add it to your Cash Account.
Here’s How:
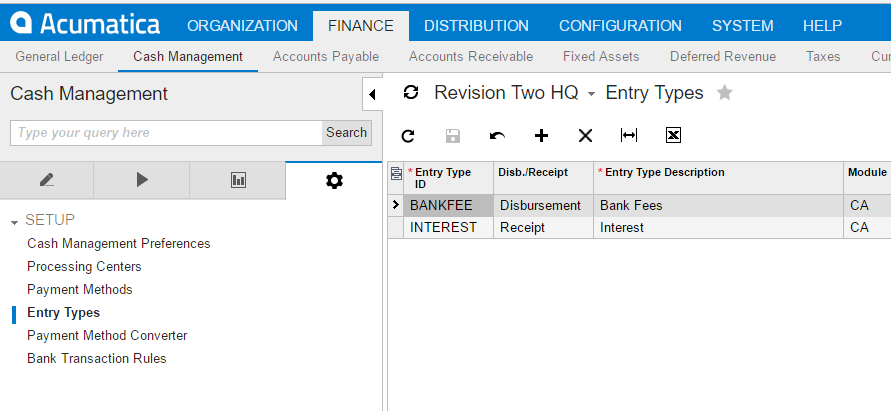
- To create a new Entry Type, go to: Finance / Cash Management / Configuration / Setup / Entry Types (Screen ID CA203000) and click the “+” sign to create a new Entry Type.

- Next, create a unique ID for the Entry Type, define it as a Disbursement or a Receipt, set a Default Offset Account and a Default Offset Subaccount, if applicable. You are not required to assign a Default Offset Account; it will just make things easier for entry. Also the Default Offset Account is just a default and can be changed when doing the actual entry.
 Below is an example of an Entry Type created for Interest Expense.

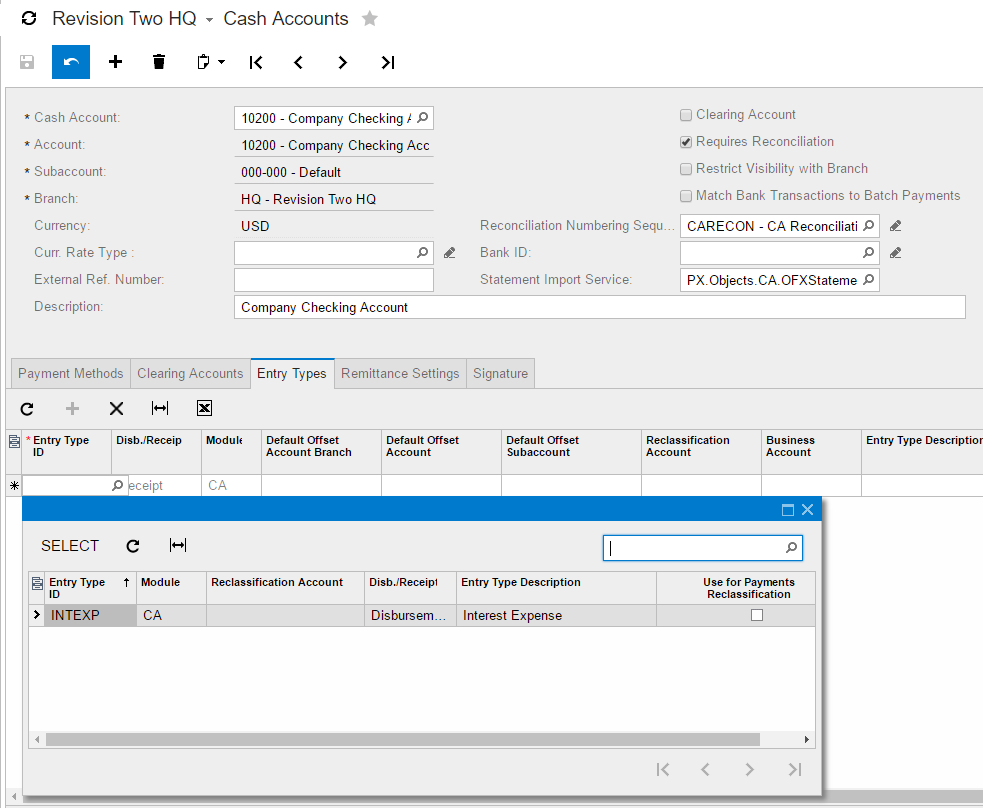
- Now you will need to add the new Entry Type to the Cash Account. Go to: Finance / Cash Management / Work Area / Manage / Cash Accounts (Screen ID CA202000).
- Using the magnifying glass for Cash Account, you will select the Cash Account you want to add the new Entry Type to.

- Next, go to the Entry Types tab and click on the “+” sign to add the new Entry Type.

- Now, click on the magnifying glass for Entry Type ID and a window will pop up for you to select the Entry Type you want to add to the Cash Account.

- The last step is to save the record at the top of the Cash Account screen. Now your Entry Type is available for use with this particular Cash Account.
Note: If you need to add your new Entry Type to other Cash Accounts, select the next Cash Account and follow the same steps to add it to the Cash Account as you did for this Cash Account.

If you have questions or need some assistance, our team of Acumatica experts are here to help. Visit our support page for more help.